Project Proposal
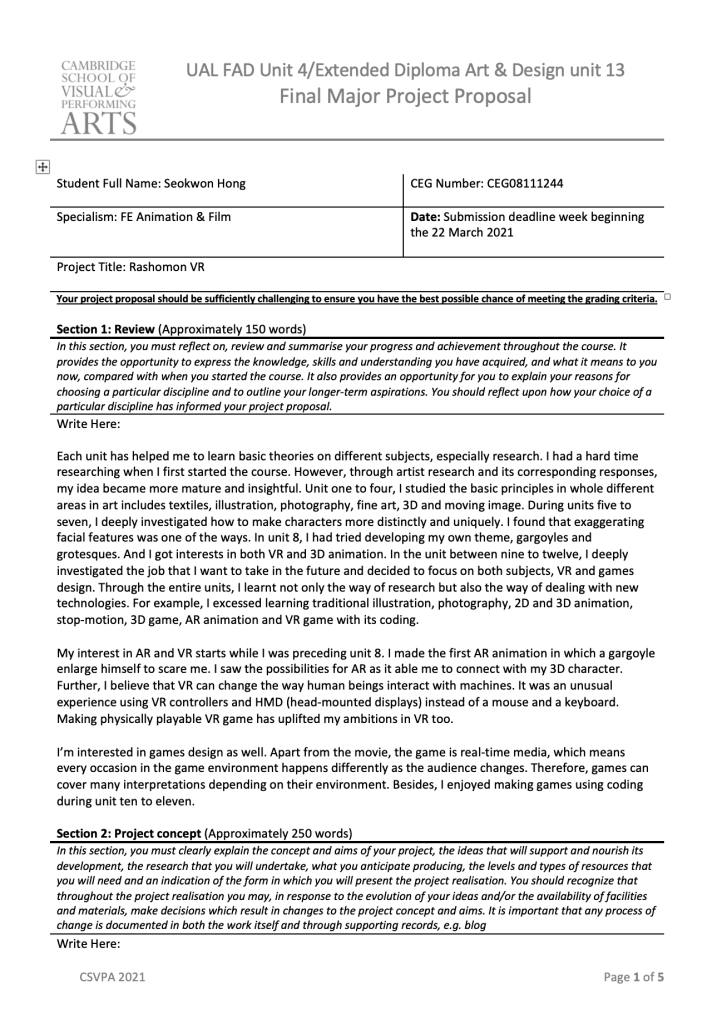

Project Brief – Fixed
Idea starts

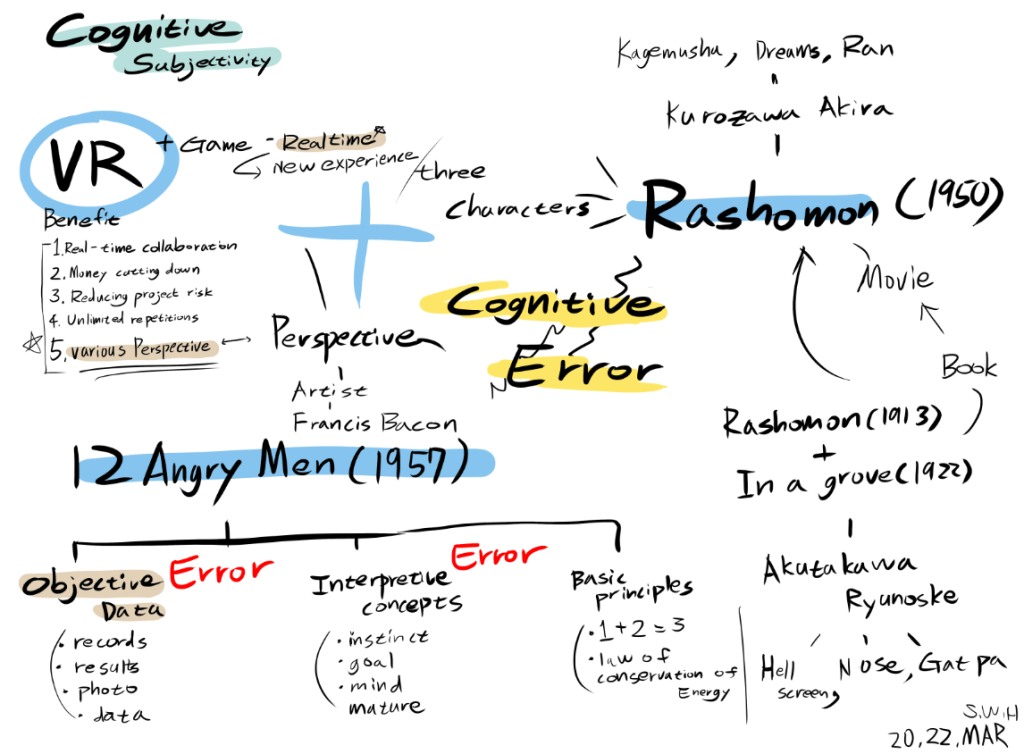
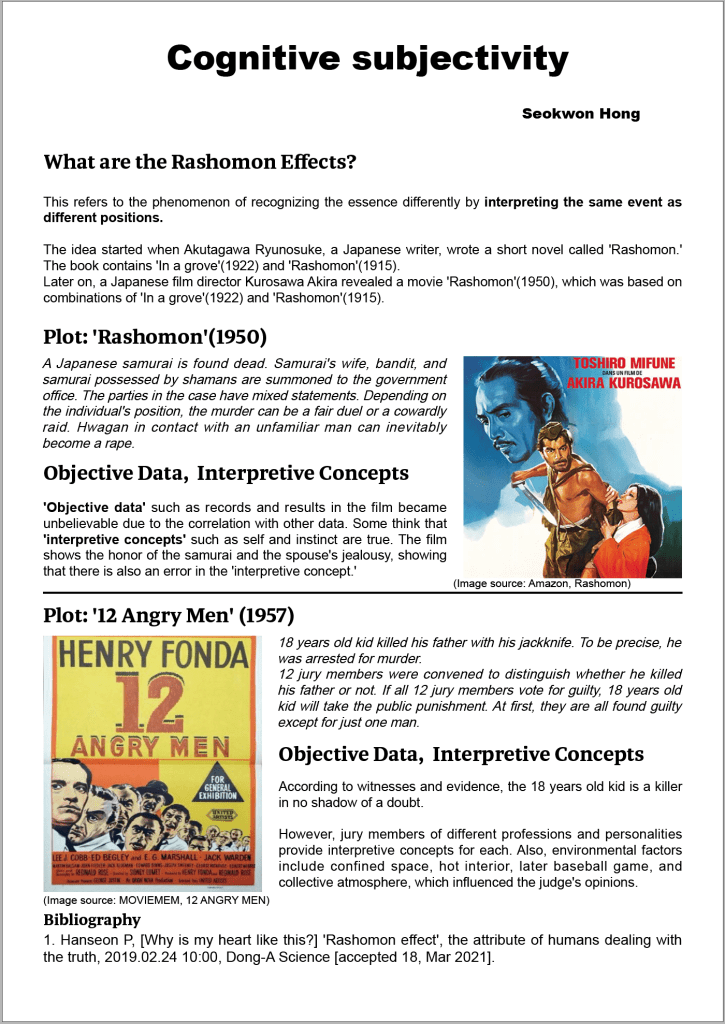
One remarkable artist who did just that was Akira Kurosawa, the celebrated filmmaker who adapted Akutagawa’s Rashomon and In a Grove into the iconic film Rashomon. What intrigued me about the film was its portrayal of a single event from multiple, conflicting perspectives—raising profound questions about truth and perception. I aim to reinterpret this concept through virtual reality.
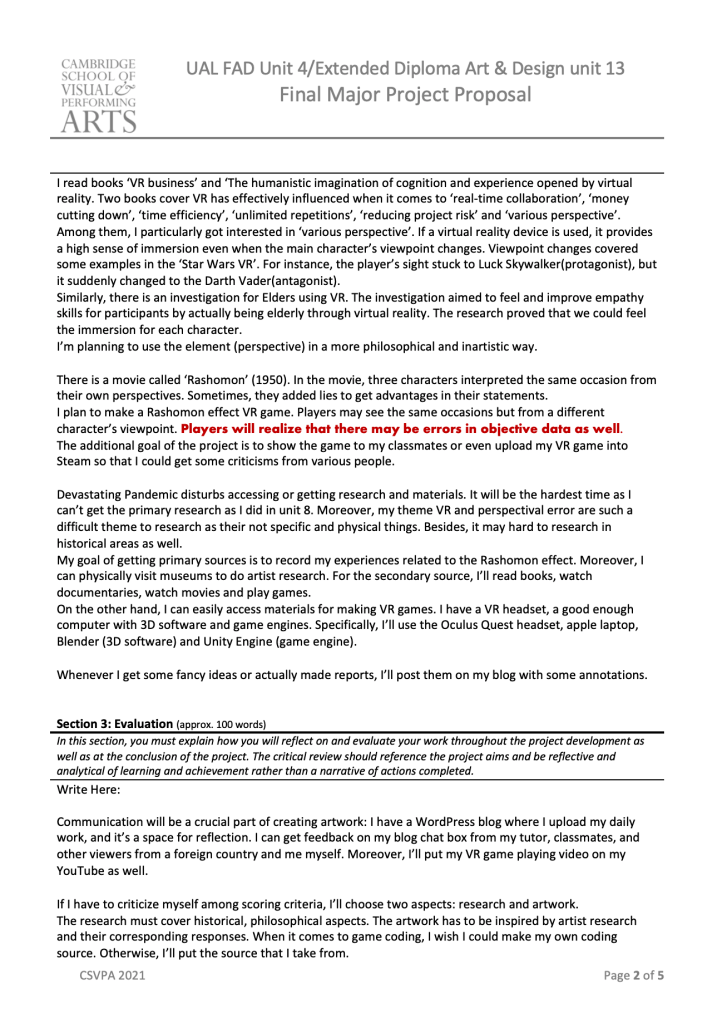
Books like VR Business and The Humanistic Imagination of Cognition and Experience Opened Up by a Scary but Attractive Virtual Reality (VR) highlight how virtual reality is especially suited to creating immersive experiences. Here, “experience” means an embodied one—engaging not only the eyes but also the body through haptic feedback and a fully immersive 360-degree visual environment. Unlike traditional screens that simply display images, VR lets users feel as if they are truly present inside the scene.
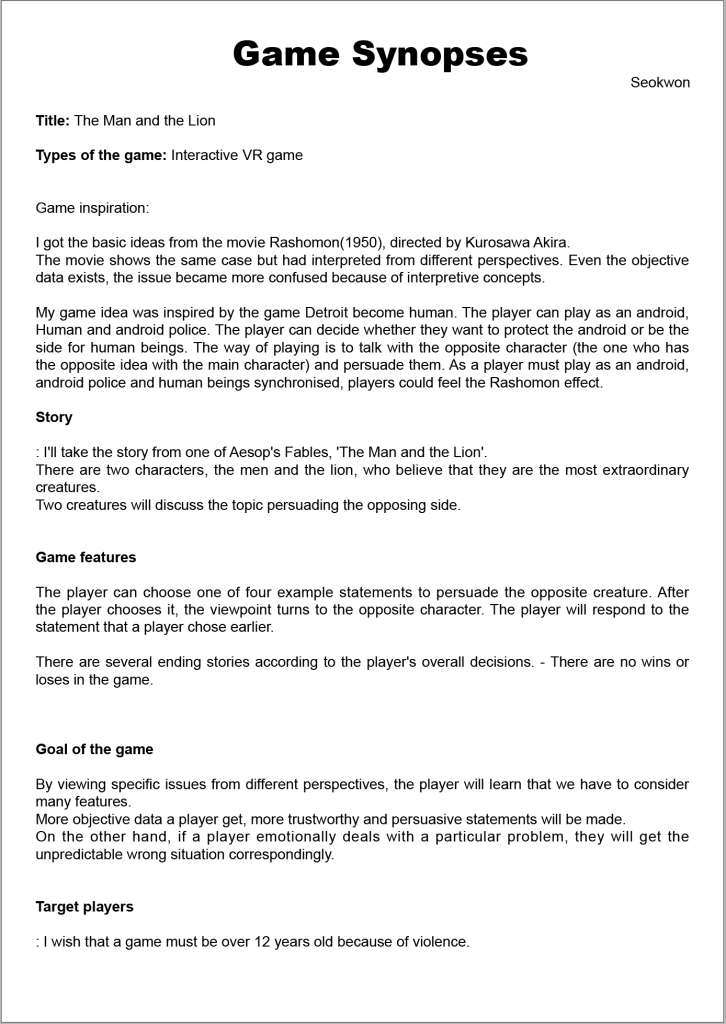
I plan to develop a virtual reality game that presents a single event from multiple perspectives. Through this, I hope to show how “objective” data can be interpreted differently depending on one’s viewpoint—and ultimately challenge the notion that truth is singular or absolute.
Mind map & Inspiration Board
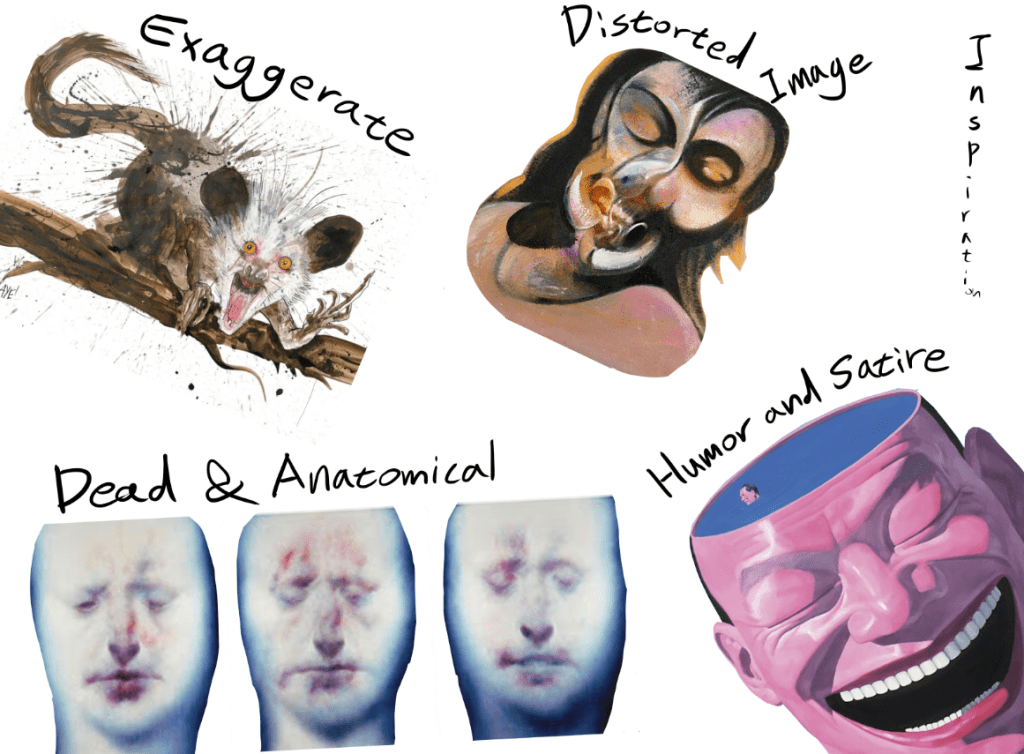
On the inspiration board, I approached the project from a more fine-art perspective. The overall aesthetic of the game is influenced by Ralph Steadman, the American illustrator known for his expressive ink splashes and vibrant use of color, reminiscent of Quentin Blake’s style. I believe that strategic exaggeration can amplify surrealism while saving time in design.
The character design draws from the anatomical deconstruction seen in the work of Scottish painter Ken Currie. I found it intriguing to incorporate elements of death and the grotesque—such as corpses—into the characters to evoke unease and tension. The narrative will be loosely based on one of Aesop’s Fables, which cleverly critiques human behavior through the lens of animal allegory. The satirical and humorous tone of these fables inspired me, particularly in relation to the biting social commentary found in the works of Chinese artist Yue Minjun, who often ridicules political systems and human absurdity through laughter and caricature.
Lastly, I was inspired by the “distorted imagery” of British painter Francis Bacon. I envision applying this concept within the game so that each character unconsciously distorts their memories, intentionally or not, to protect their own interests. This visual and psychological distortion would highlight the unreliability of memory and the subjectivity of perceived truth, reinforcing the core theme.
Contact sheet – Primary research – Humor and Satire
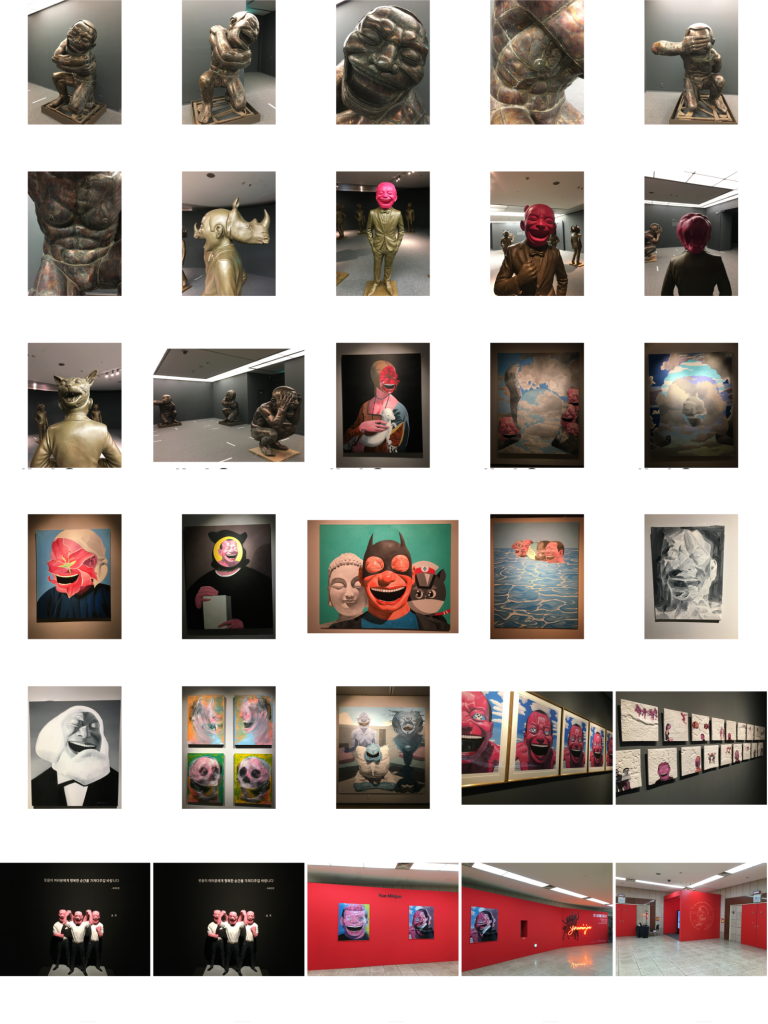
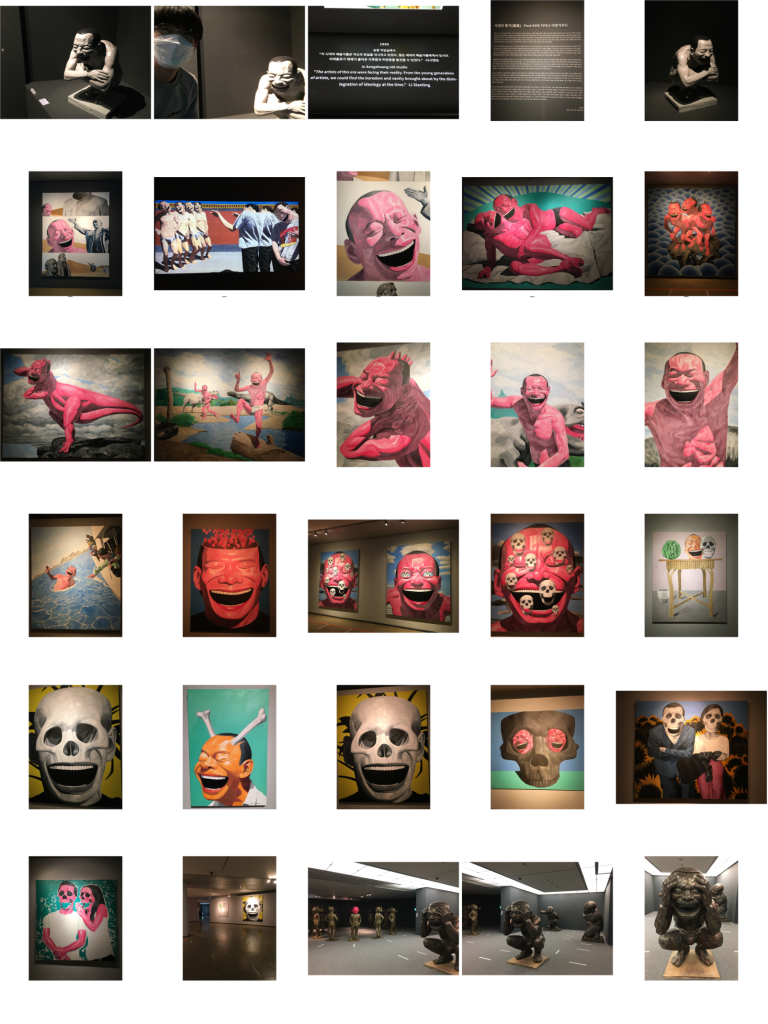

The most striking aspect of Minjun’s work is his use of paradoxical laughter—a blend of cynicism and despair—to critique the experiences of a new generation living in a turbulent society. His exaggerated characters and darkly comedic tone serve as a powerful vehicle for social commentary, creating a kind of intensified black comedy that forces the viewer to confront uncomfortable truths through humor.
One of my favorite pieces from the exhibition was “Human Beast”, a sculpture that features a laughing human face on the front and an animal face hidden on the back. I found this duality particularly compelling, as it closely aligns with the concept of the Rashomon Effect—where individuals present conflicting interpretations of the same event, often hiding their true nature or motives. The sculpture’s two-faced symbolism—literally and metaphorically—echoes the theme of subjective truth and internal contradiction, which are central to my project.
Memory – Manipulation – Secondary research

One particularly powerful example she shared was the case of Steve Titus. Titus was wrongfully imprisoned after a rape victim misidentified him as the perpetrator. Initially, when shown Titus’s photo, the victim said, “That one’s the closest.” However, by the time of the trial, her statement had shifted to, “I’m absolutely positive that’s the man.” This chilling transformation reveals how memories are not fixed—they evolve, and sometimes in dangerously inaccurate ways.
One quote from the talk stood out to me:
“Many people believe that memory works like a recording device. But decades of psychological research have shown that this isn’t true. Memory is reconstructive. It works more like a Wikipedia page—you can go in and change it, and so can other people.”
This idea links directly to the Rashomon Effect, which revolves around cognitive subjectivity and unintentional distortion of truth. However, I believe it’s not just about conflicting perspectives—it’s also deeply tied to the distortion of memory. This distortion becomes especially pronounced in high-stress or traumatic situations. For example, victims of severe torture often struggle to recall the face of their torturer accurately. The overwhelming emotional and physical stress interferes with memory formation, further proving that memory is not a reliable record of events.
Artist research week
Rashomon Report
Deformation Reports
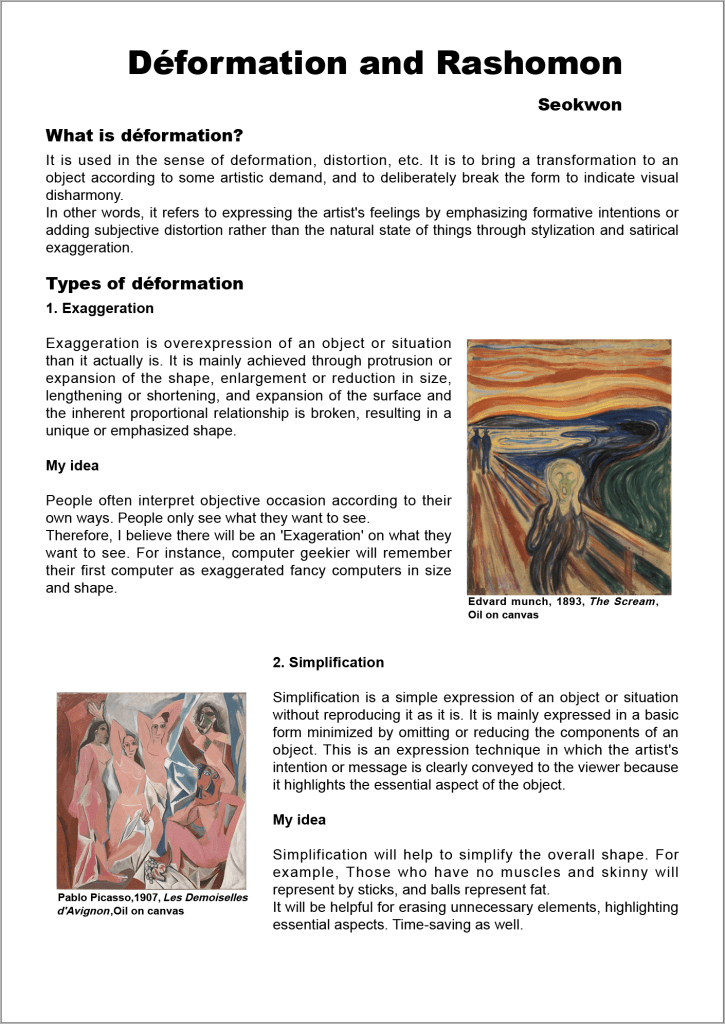
If there is a limitation to Akira Kurosawa’s film Rashomon or Ryunosuke Akutagawa’s original short story, it is that the audience remains passive. The central theme of Rashomon—the subjectivity of truth—does not directly involve the viewer. In contrast, I believe that player immersion is essential when dealing with this theme. By allowing the player to assume the perspective of different characters, the interactive format can create a more physical and emotional experience of subjective perception and its inherent errors.
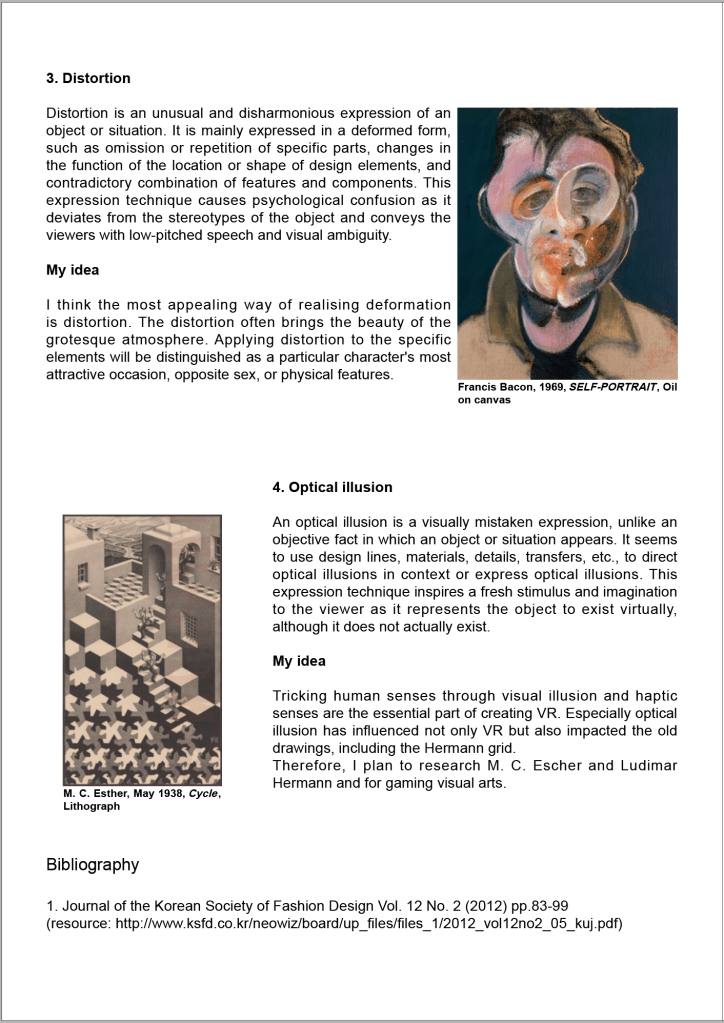
In Detroit: Become Human, the player doesn’t just observe the characters—they become them. Whether playing as an android fighting for freedom or as an android detective upholding the law, the player directly experiences conflicting viewpoints and moral dilemmas. This approach allows players to explore multiple truths firsthand, surpassing the limitations of traditional media like books and films.
Despite requiring less direct interaction compared to many games, Detroit: Become Human succeeds in offering hundreds of different narrative paths, demonstrating the strength of the interactive movie format.
Advantages of Applying the Interactive Movie Format to Virtual Reality:
Enhanced Immersion Compared to Traditional VR Games
Most existing VR games require intense physical interaction through VR controllers. While this can be engaging, it often leads to fatigue and motion sickness, which can break the sense of immersion (e.g., Superhot, Beat Saber). An interactive movie format allows players to focus more on narrative and emotional engagement, rather than physical exertion.
More Efficient VR Game Development
Interactive movie games are generally more straightforward to produce. They rely on pre-rendered or pre-animated sequences triggered by player choices. After creating long-form animations using 3D software, the only development needed in the game engine is assigning input keys to trigger those animations—greatly reducing production complexity and time.
Detroit: Become Human and the type of game that I want to develop
Story Choosing
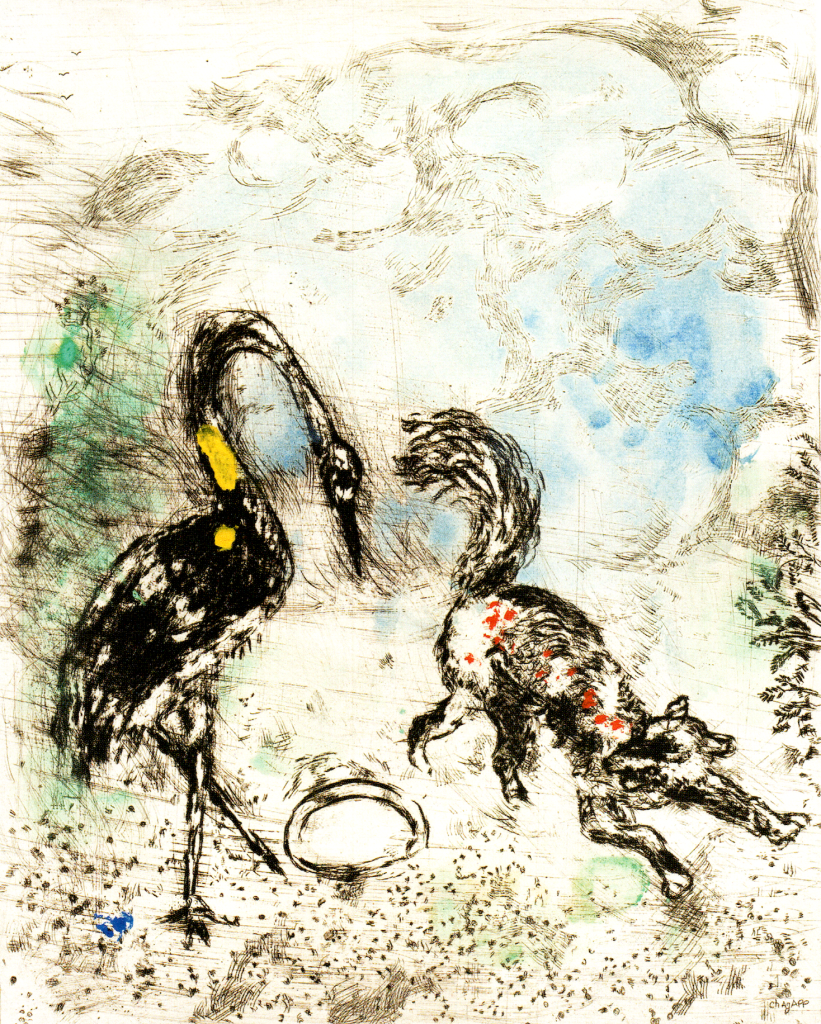

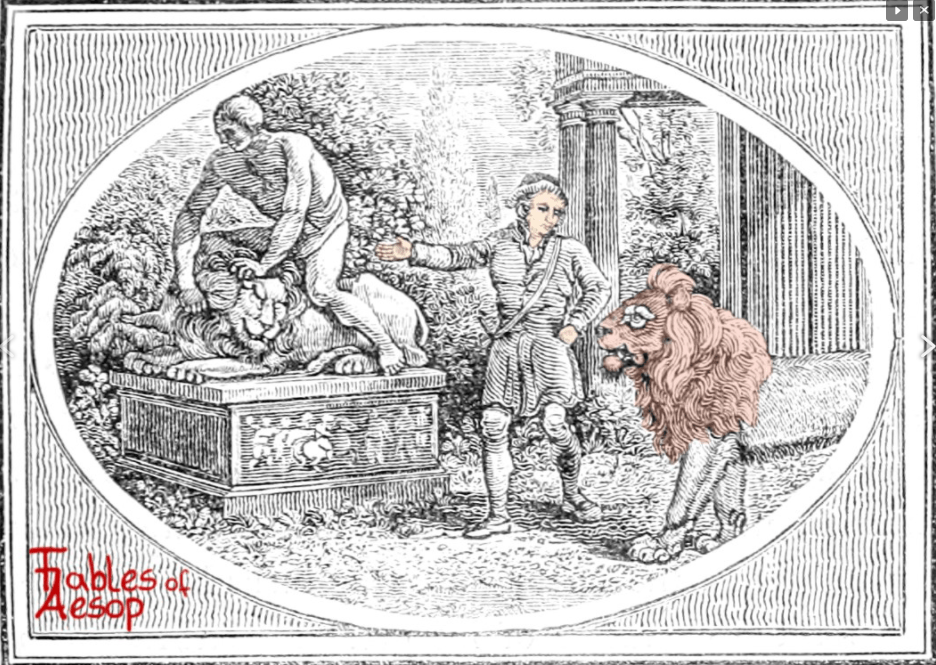
This made me wonder if I could find a story that fits well with the Rashomon Effect—one that reflects multiple perspectives or subjective interpretations. Eventually, I came across The Man and the Lion, which I believe is one of the closest examples to the concept I was seeking.
Unfortunately, Marc Chagall did not illustrate this particular fable. However, I discovered that there are many variations of The Man and the Lion. Among them, I chose the version by Jefferys Taylor, as his version includes an “after-story”—a reflection on how the outcome might have changed if the man had been wiser. This additional layer introduces a new perspective and enhances the story’s alignment with the Rashomon Effect, making it an ideal narrative for my project.
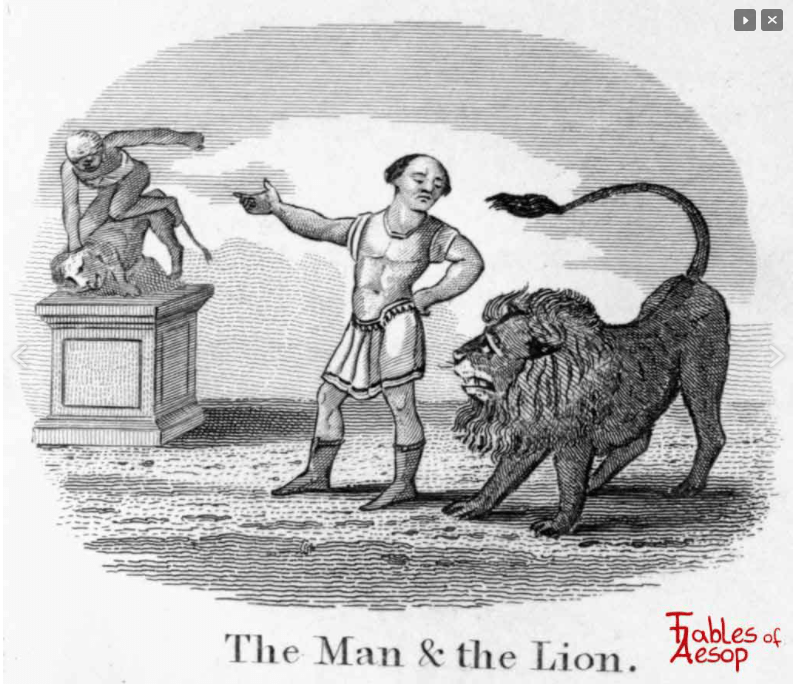
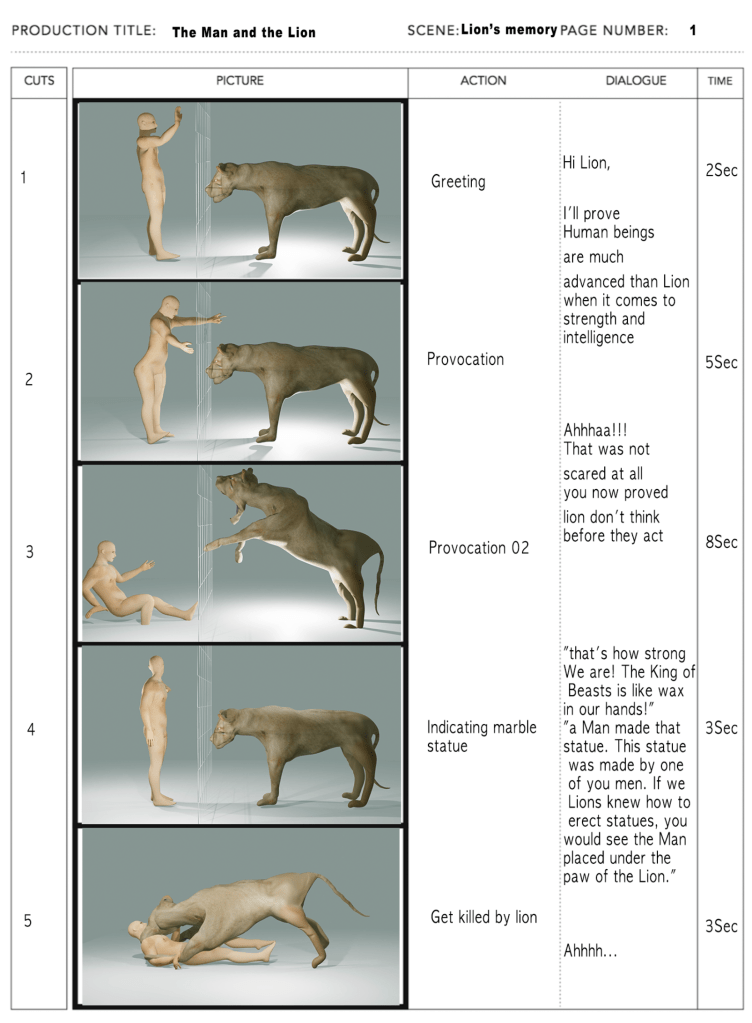
The Man and the Lion – Jefferys Taylor
A MAN and a lion once had a dispute,
Which was reckoned the greatest, the man or the brute,
The lion discoursed on his side at some length,
And greatly enlarged on his courage and strength.
The man, one would think, had enough to reply
On his side the question, which none could deny;
But, like many others who make a pretence,
He talk’d perfect nonsense and thought it was sense.
“So,” said he, “don’t be prating, look yonder, I pray,
At that sculpture of marble, now what will you say?”
The lion is vanquish’d; but, as for the man,
He is striding upon him; deny it who can.
“But pray,” said the lion, “who sculptured that stone?”
“One of us,” said the man, “I must cand’dly own;”
“But when we are sculptors,” the other replied
“You will then on the man see the lion astride.
The man might have added, if he had been wise,
“But a beast cannot sculpture a stone if he tries.”
That sufficiently shows where the difference lies.
Moral
“It all depends on the point of view, and who tells the story”.
Corresponding illustrations
In order to sculpt the characters in 3D, I need to gather as many visual and narrative details from the story as possible to ensure that the designs closely match the source material. However, since each version of the story contains only a few descriptive elements, I’ve decided to combine and reinterpret multiple versions into a single cohesive narrative for character development.
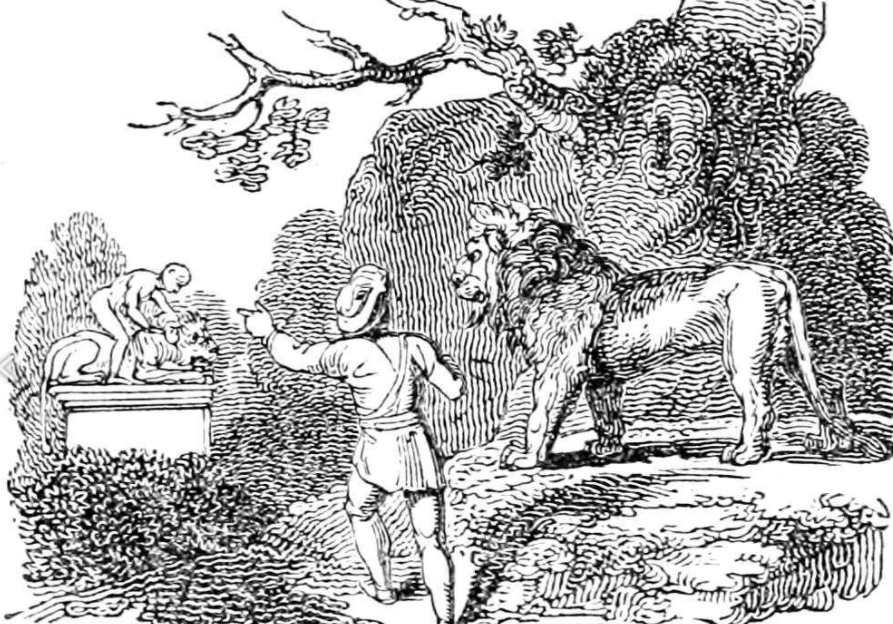
The man in the story, who wears ordinary medieval-style clothing and often a hat, is described in some versions as a forester. While there is no explicit indication of his age, the clothing typically consists of a tunic-length garment that falls to the hips. In some illustrations, he also wears a brimmed hat. These visual cues help shape his character design.
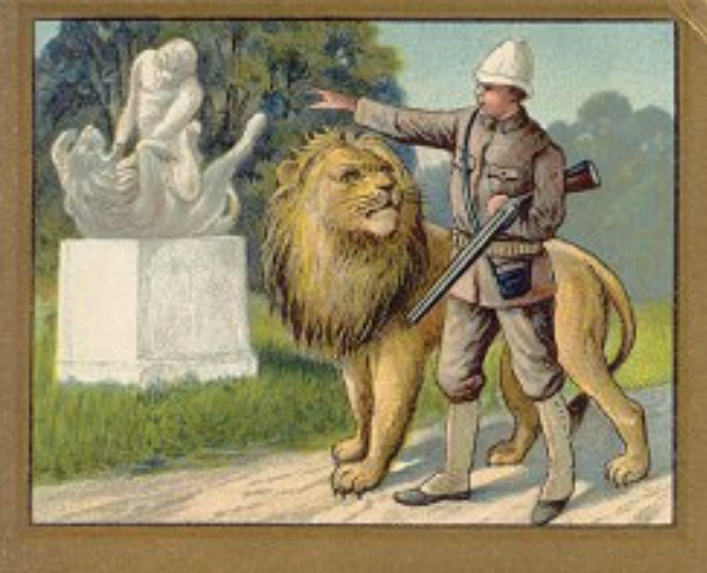
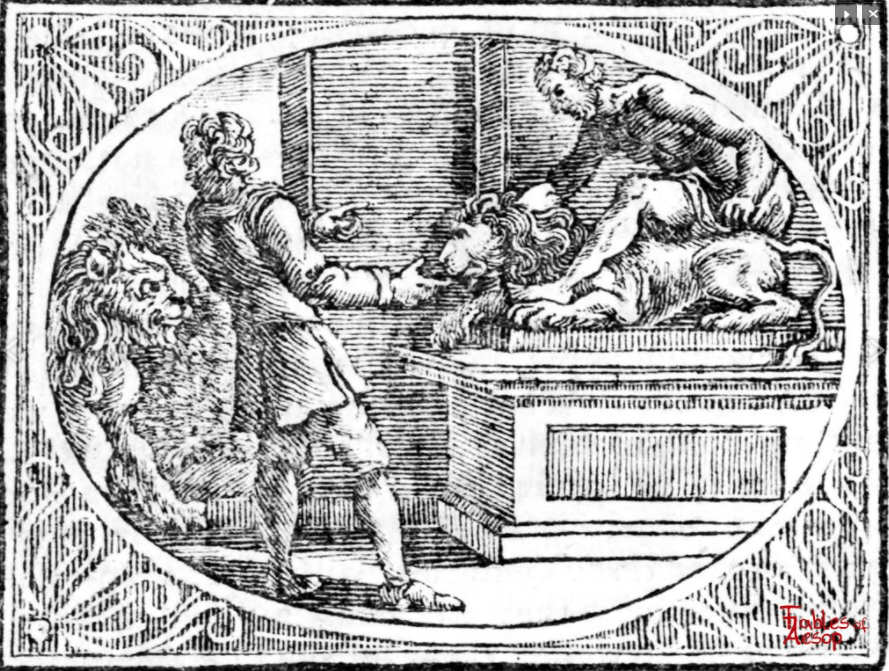
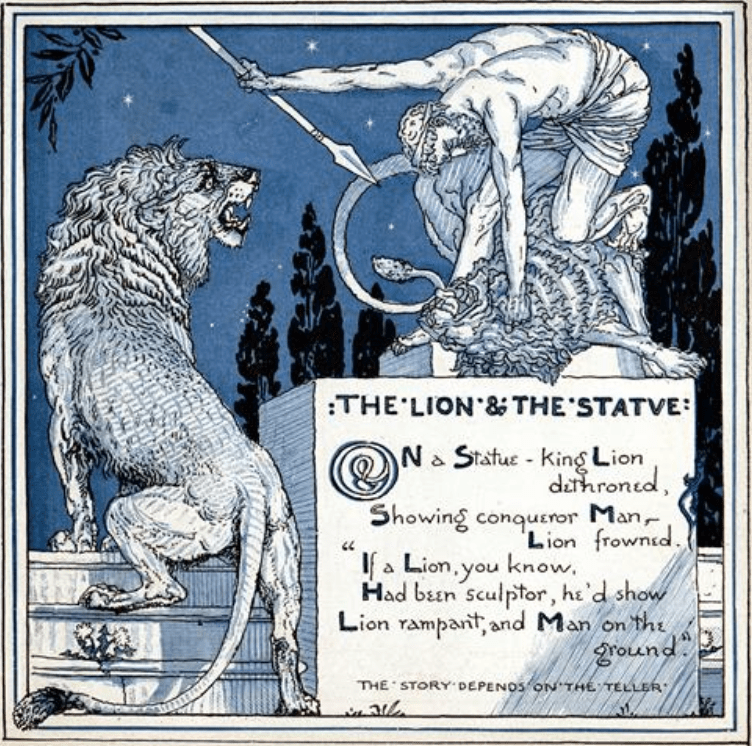
A prominent symbol in the story is the statue of a man striding over a defeated lion, which represents Hercules’ victory over the Nemean Lion. This statue, made of marble stone, plays a significant role in the fable and will serve as a key object in the game.
Additionally, I found a compelling “what-if” line in the version written by Jefferys Taylor, which expands the narrative beyond its traditional ending:
“But a beast cannot sculpture a stone if he tries.”
That sufficiently shows where the difference lies.
This speculative ending reflects on power, representation, and bias, aligning well with the Rashomon Effect and the broader theme of cognitive subjectivity. I plan to incorporate this line into the game, possibly as a reflective monologue or epilogue.
All the reference images and story variations were sourced from the website:
Fables of Aesop – The Lion and the Statue,
which presents various versions of Aesop’s fables and was instrumental in shaping my interpretation.
VR Game Synopses
Character design – MAN
MAN thumbnail sketches
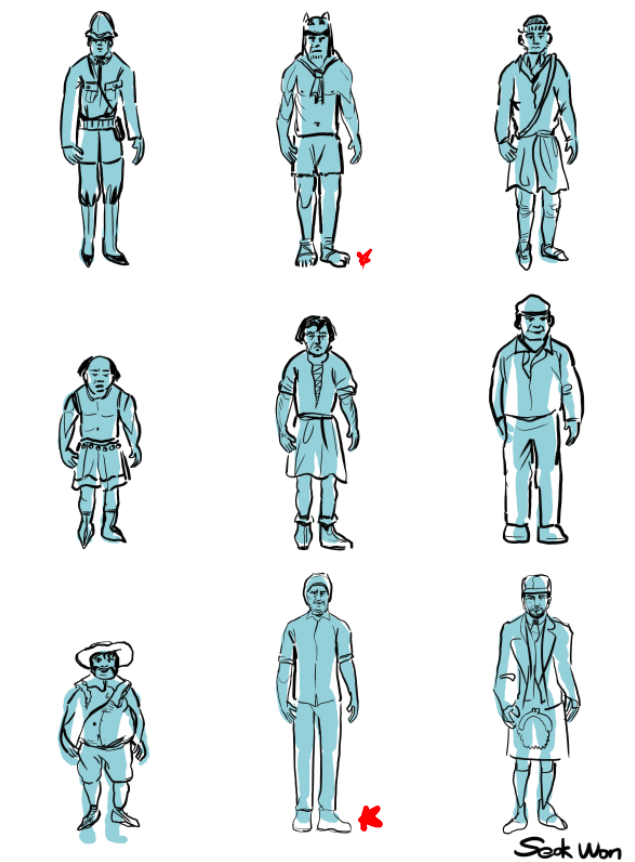
One of the main challenges in designing this character was the lack of personal detail in the original story. Aside from the fact that the man is described as a forester, there is no information about his name, height, or physical features. The Man and the Lion, like many Aesop’s Fables, originates from stories attributed to Aesop, a slave and storyteller from ancient Greece. Additionally, the marble statue depicted in the story—of a man defeating a lion—references Hercules and the Nemean Lion, one of the legendary Twelve Labors. This connection opens up possibilities for incorporating elements of Greek and Roman mythology into the character’s backstory or visual design.
While working on the thumbnails, I realized that the more visually complex or layered the clothing, the more the essence of the character became obscured. Simplicity, in contrast, revealed more about the character’s raw identity. For example, the second character design—featuring a furry hat, no shirt, and simple shorts—felt more compelling. The minimal clothing made the character feel more grounded, unpretentious, and visually clear. This taught me that restraint in design can often result in stronger storytelling through visual language.
Problem


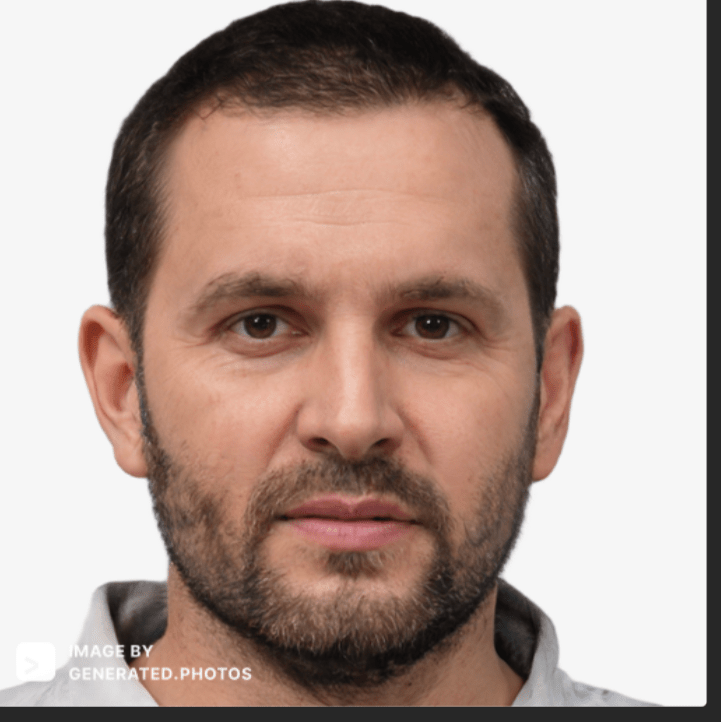

For this exercise, I set the age range of the characters to approximately 40–50 years old. However, I was mindful of not unintentionally associating any specific race or ethnicity with negative traits, as I believe the character’s moral flaws should reflect universal human tendencies, not cultural or racial identity. Furthermore, I came to question whether the male character needed to be portrayed as inherently “bad” at all. Instead, I began considering a more nuanced portrayal, where his actions are shaped by perspective rather than clear-cut morality—mirroring the ambiguity found in the Rashomon Effect.
The images I used for reference were inspired by men of Indian, Pakistani, and Turkish descent, as these regions are historically associated with the natural habitat of Asiatic lions. This geographic connection provided a logical and contextually appropriate visual reference for character development, without relying on cultural stereotypes.
Solution
Character design – LION
As with the development of the male character, I’ve been careful to avoid assigning specific regional, linguistic, or cultural attributes that might disrupt the character’s neutrality or dilute the universality of their identity. Since The Man and the Lion is a fable that transcends race, culture, and geography, my goal is to design characters that feel universally human—free from associations that might localize or stereotype them.
In this way, both the man and the lion are intended to serve as symbolic representations, rather than figures rooted in a specific place or time. By emphasizing universality over specificity, I hope to allow a wider audience to connect with the story and its themes on a more personal and reflective level.
Problem:
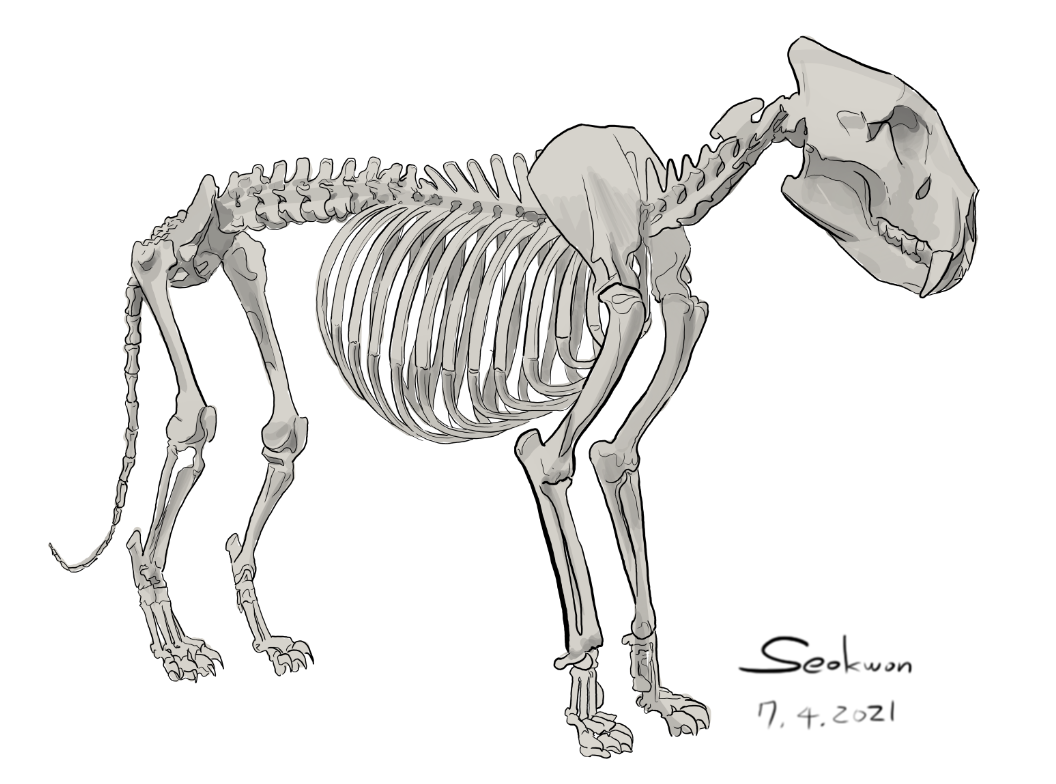
Before beginning the design of the lion character, I researched the distribution and classifications of lions. Historically, most lions have inhabited Africa and India, and in ancient times, they were also found in the warmer regions of southern Europe, such as the Iberian Peninsula, southern France, Italy, Greece, and Macedonia. These lions are often referred to as European lions, though they are typically classified under the broader category of Asiatic lions. The lions referenced in Aesop’s fables and Greek mythology are likely to have been Asiatic.
When designing the lion character, however, I initially considered lion populations in more recent historical contexts—specifically those in India and Africa. This led me to explore a historical-political backdrop for the human counterpart to the lion. I drew inspiration from 19th-century European powers, such as the British Empire in India, and the colonial division of Africa by countries including Britain, France, Germany, Italy, Portugal, Spain, and Belgium. I also experimented with visual references to indigenous populations in these regions, imagining a character who, like the lion, existed before colonization—eventually designing him with Turkish-Indian features.
While this historical lens offered some compelling visual ideas, I realized that basing character design too heavily on historical or geopolitical contexts risked overshadowing the universal themes of the story. It also posed potential cultural sensitivities and controversy, which could distract from the core narrative. As a result, I decided to move away from designs rooted in historical fact and instead focused on creating symbolic, culturally neutral characters that better reflect the timeless and universal nature of The Man and the Lion.
Solution:
In addition to designing the man, I approached the lion character with the goal of creating the most universal and symbolic representation possible. Rather than tying the lion to a specific region, species, or cultural reference, I focused on capturing the essence of the lion as a timeless figure of strength, dignity, and wild nature—allowing it to resonate universally across different cultures and eras.
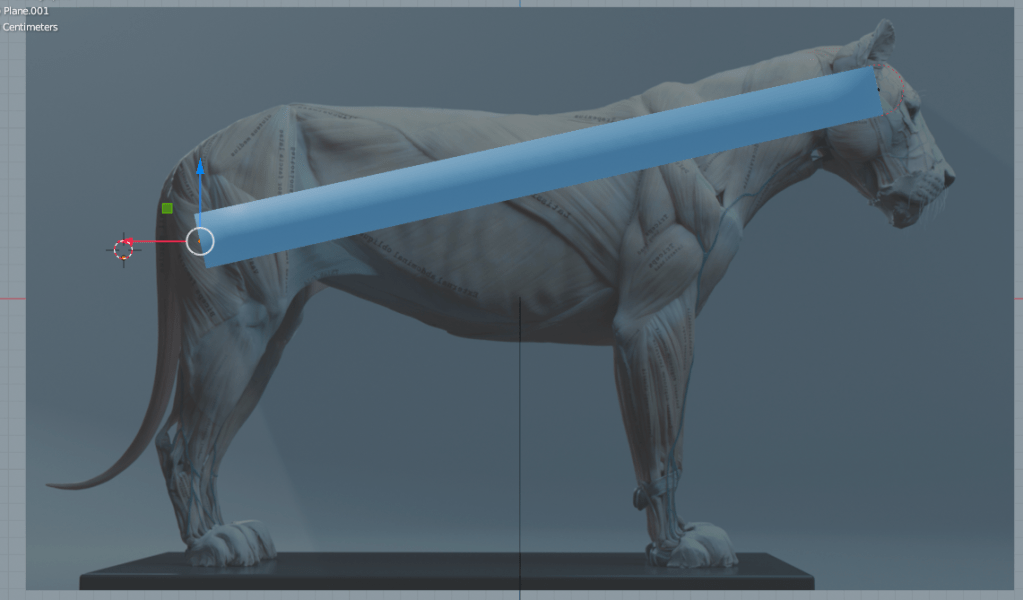
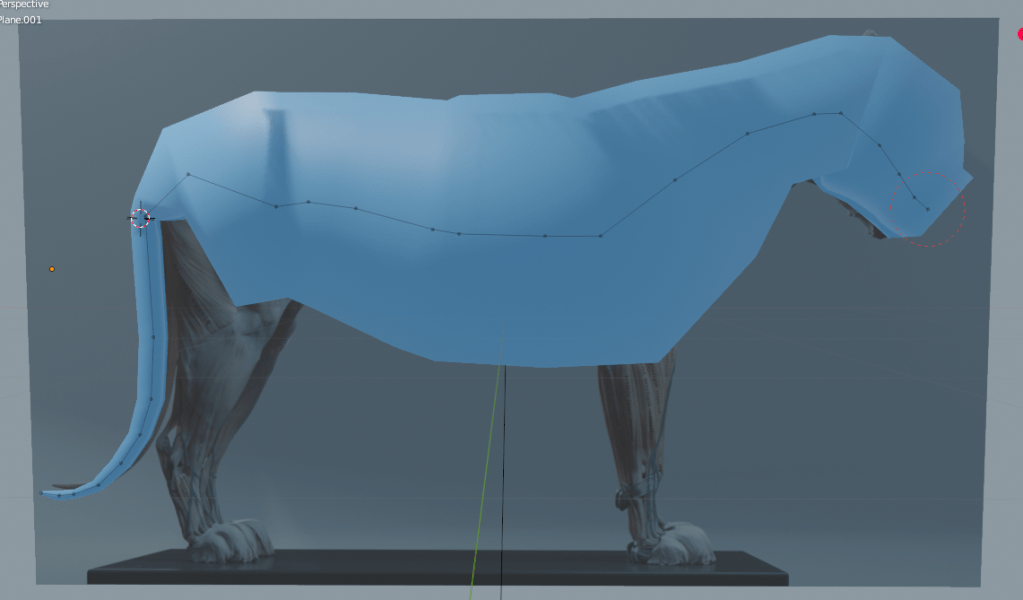
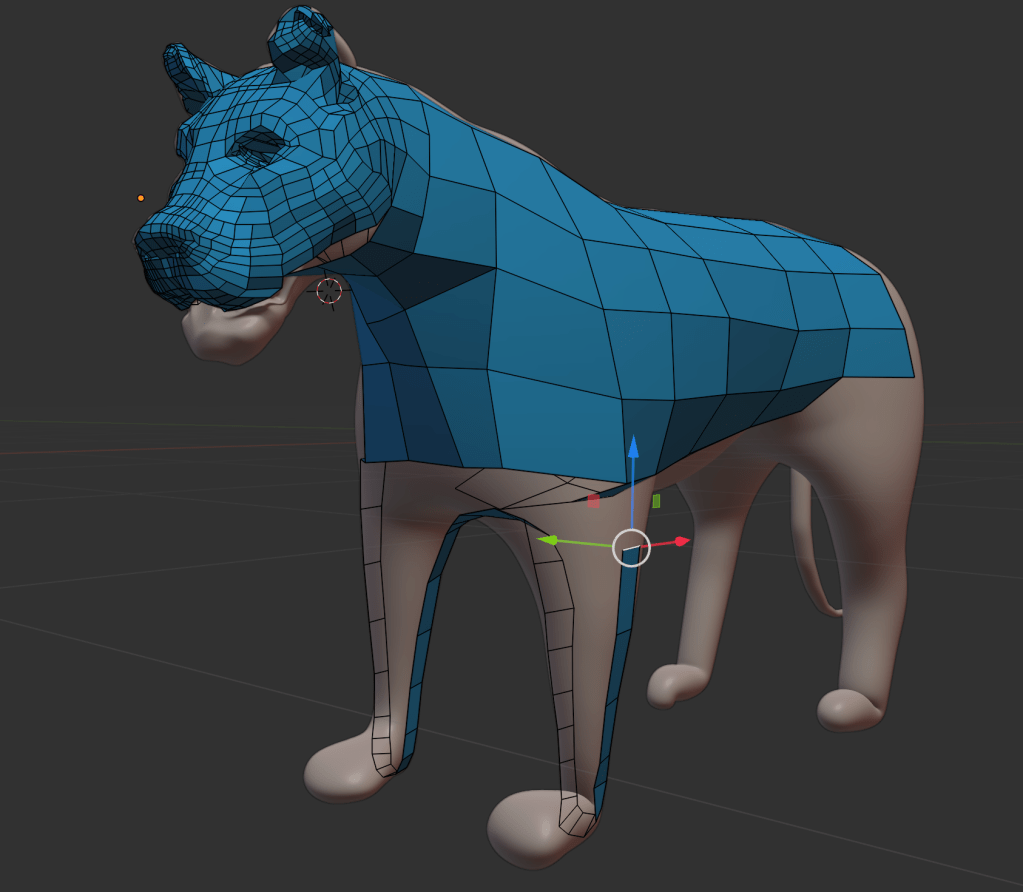
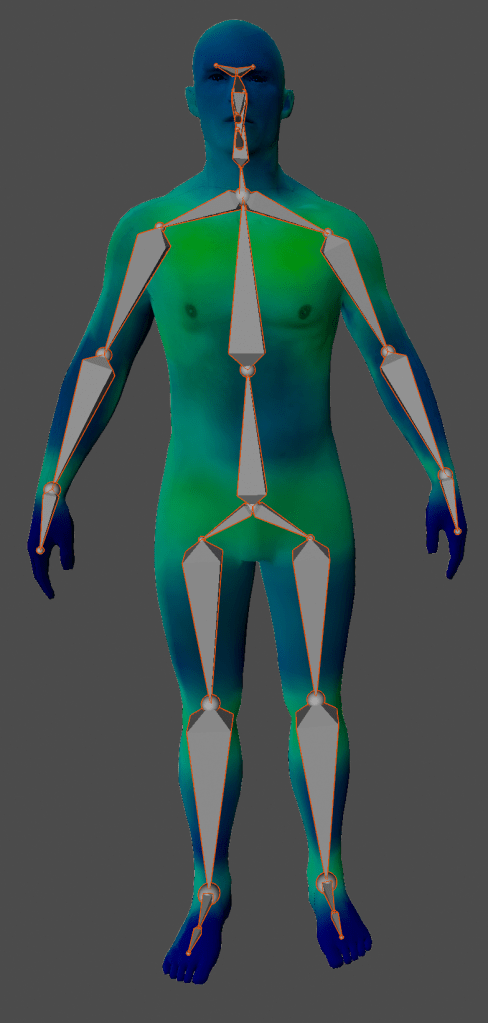
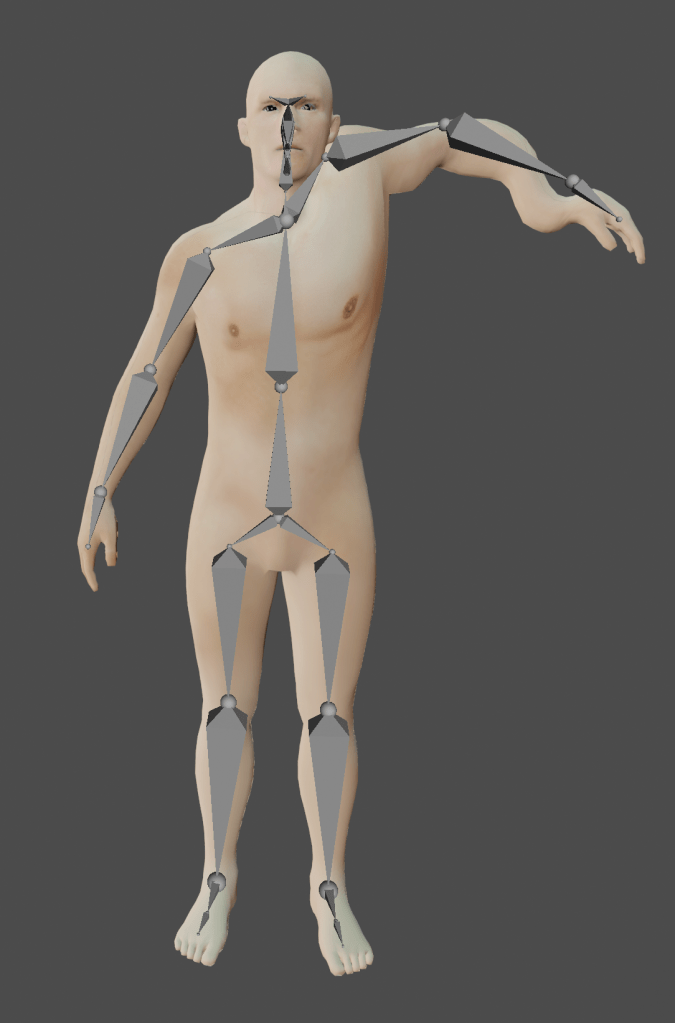
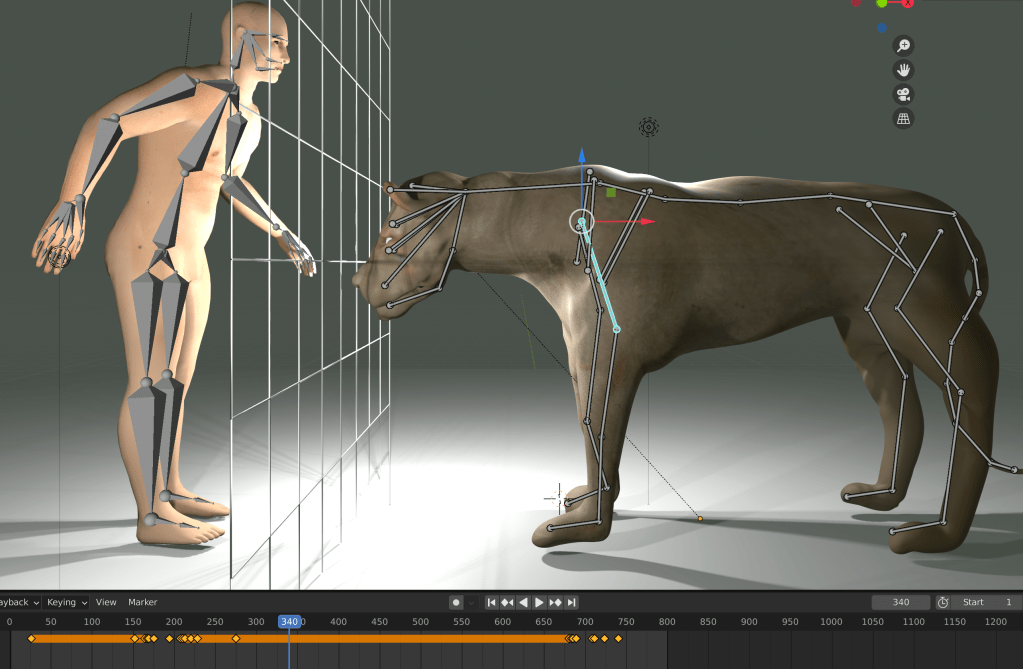
3D Weight paint based drawing
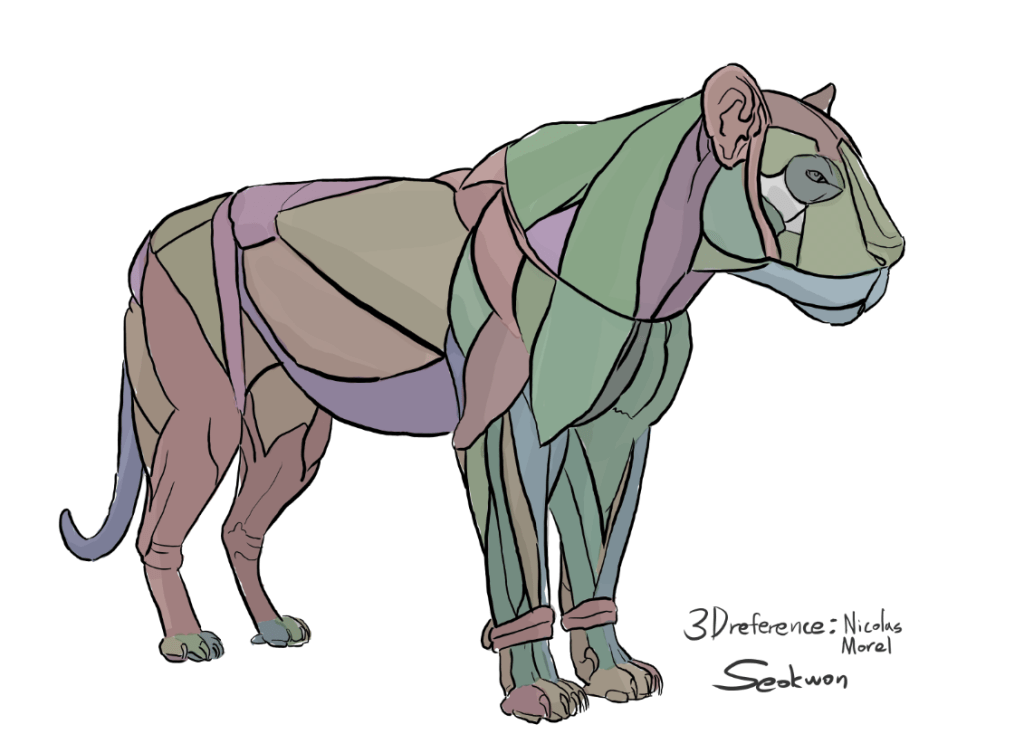
According to his model:
Blue muscles represent light, soft tissue such as fat or flesh, which tend to swing or shift when the lion moves—similar to how a human belly jiggles.
Red muscles are the heaviest and most rigid, akin to ligaments or strong leg muscles, and retain their form even during intense movement.
Green muscles indicate medium-weight tissues, such as neck muscles or specific forelimb groups, which provide both flexibility and structure.
However, I encountered a problem during my own sketching process. When I couldn’t identify a specific forelimb muscle from Morel’s 3D reference, I mistakenly labeled it as a green (medium-weight) muscle. In hindsight, this was clearly an error. The forelimbs play a crucial role in quadrupedal locomotion, especially for animals like lions that rely on powerful strides and impact resistance. If those muscles were as soft as, say, nasal cartilage, they would not be able to withstand the shock from rough terrain, leading to muscle damage or failure.
This mistake helped me realize the importance of anatomical accuracy in character design, particularly when animating realistic motion and physical interaction in a 3D environment.
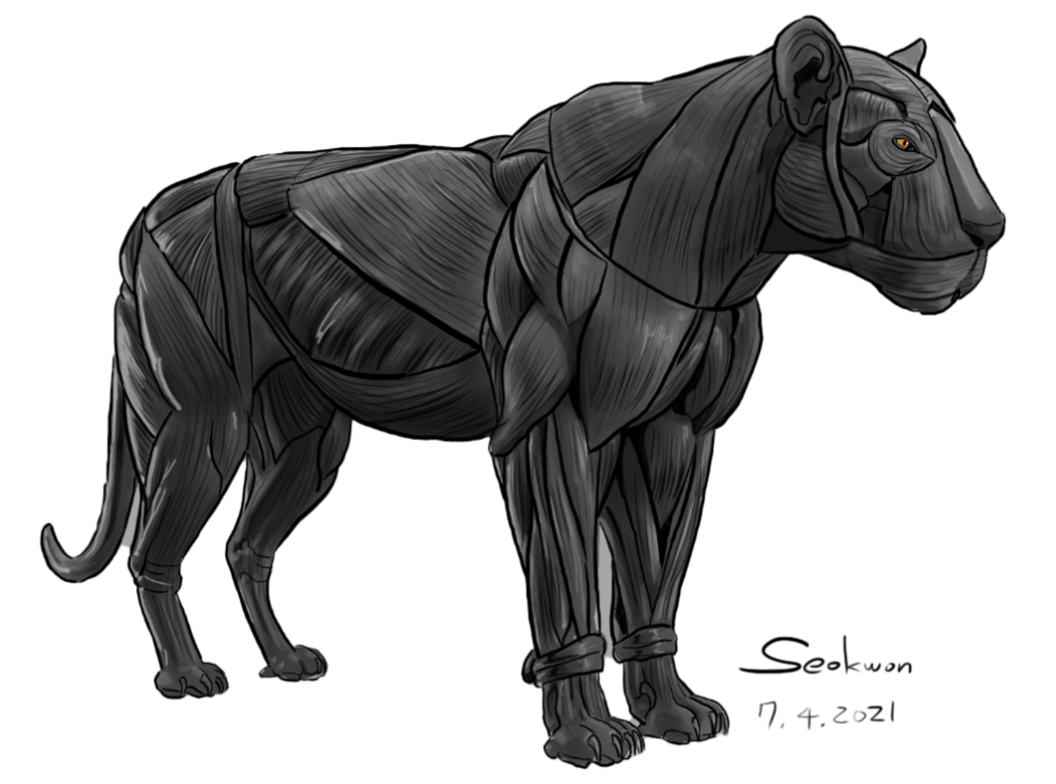
While drawing, I observed that the lion’s neck muscles are much thicker than I initially expected. The neck is one of the most vulnerable areas for most animals, which likely explains the evolutionary development of strong, dense neck musculature. For example, when humans sense a threat, they instinctively raise their shoulders and lower the neck, reducing its exposure. Similarly, when a lion is in a defensive or aggressive posture, its body lowers and the cervical vertebrae align with the spine, minimizing the neck’s visibility and protecting it from potential attacks.
However, I also faced certain limitations during the drawing process. Due to the inherent constraints of 2D illustration, it was difficult to fully understand or visualize the lion’s muscle and bone structure from multiple angles. This highlighted the importance of transitioning to 3D tools like Blender, where muscle deformation and anatomical accuracy can be explored more comprehensively through dynamic simulation and multi-angle modeling.
Game concepts sketches
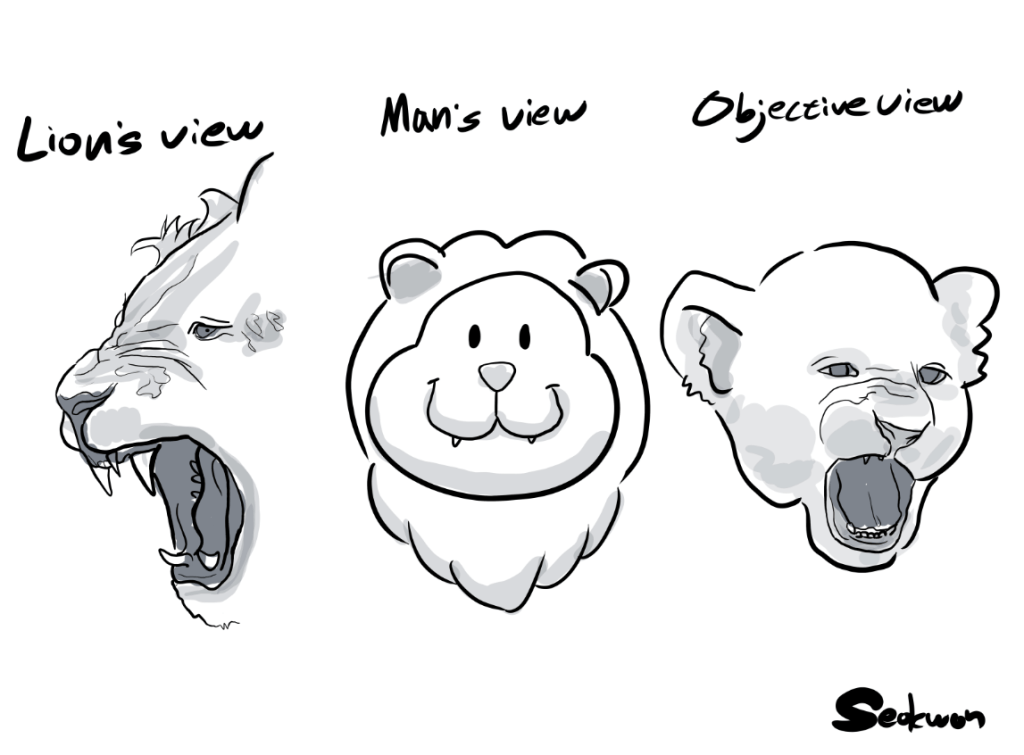
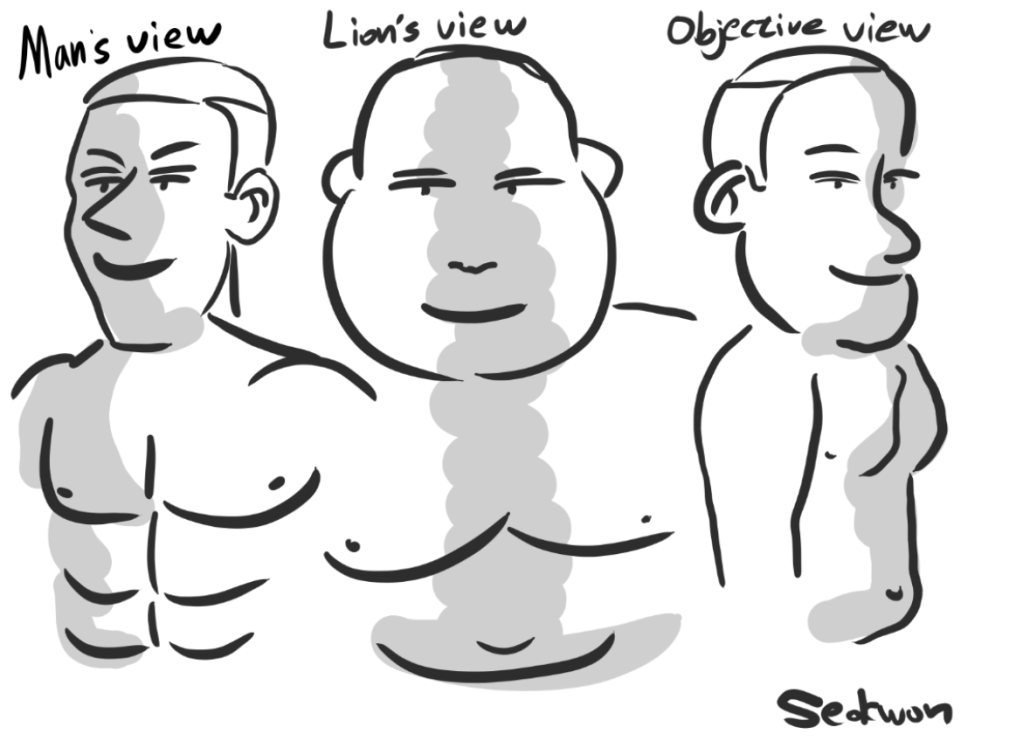
From the lion’s point of view, he sees himself as a terrifying and powerful beast, while perceiving the man as a clumsy, overweight, and incompetent figure. In contrast, from the man’s perspective, he envisions himself as a strong, muscular hero, and sees the lion as nothing more than a small, harmless, and even cute animal.
However, the objective reality is quite different: the lion is simply an ordinary lion—neither monstrous nor adorable—and the man is just a normal human being, neither particularly fat nor especially strong.
This contrast between self-perception, external perception, and objective truth lies at the heart of the game’s narrative and reflects the core theme inspired by the Rashomon Effect: the distortion of reality through personal bias.
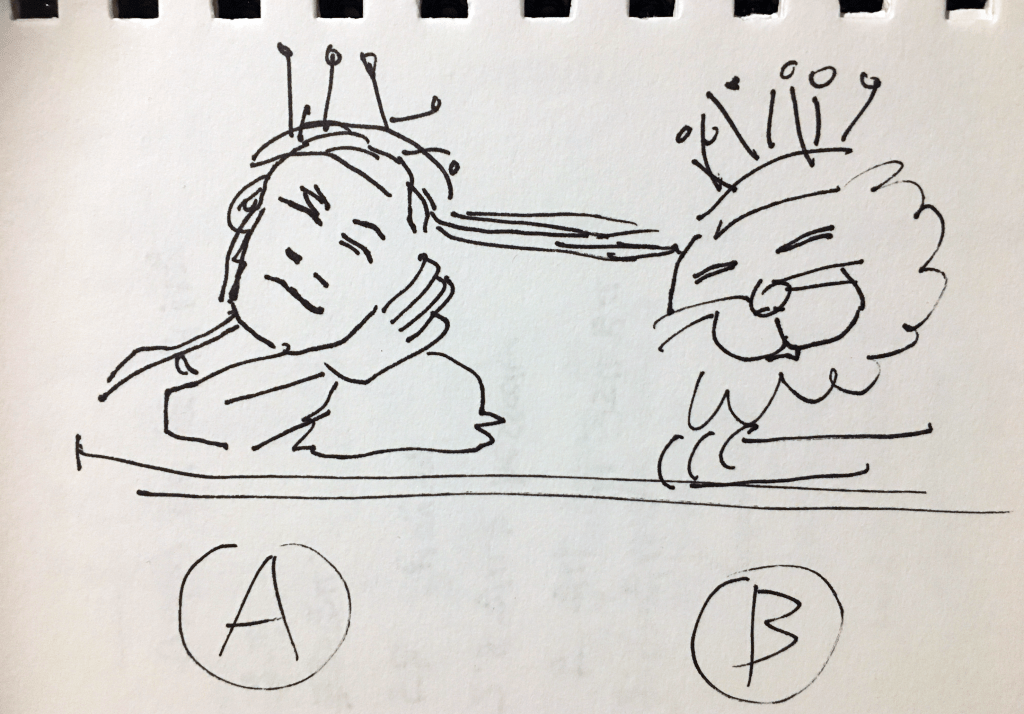
In the game, the threatening confrontation between the man and the lion creates exactly that kind of high-stress situation. Players access each character’s recollection using mechanical headsets worn by both the man and the lion, symbolizing entry into their personal memory. The player is free to choose which perspective to explore first—for example:
A: the man’s memory
B: the lion’s memory
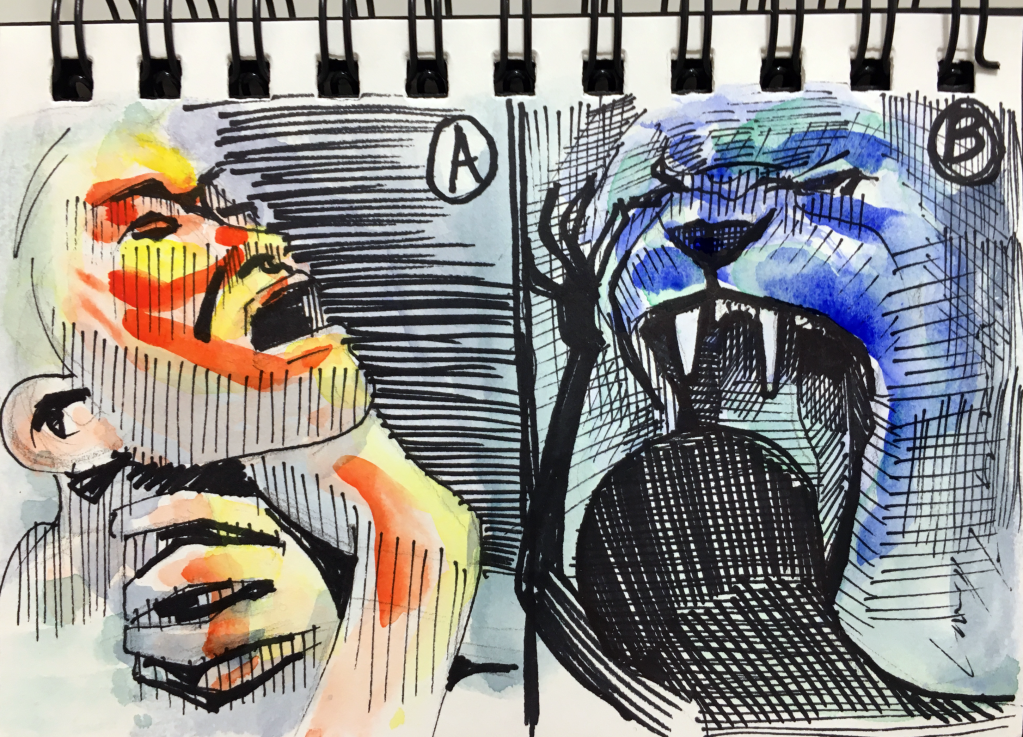
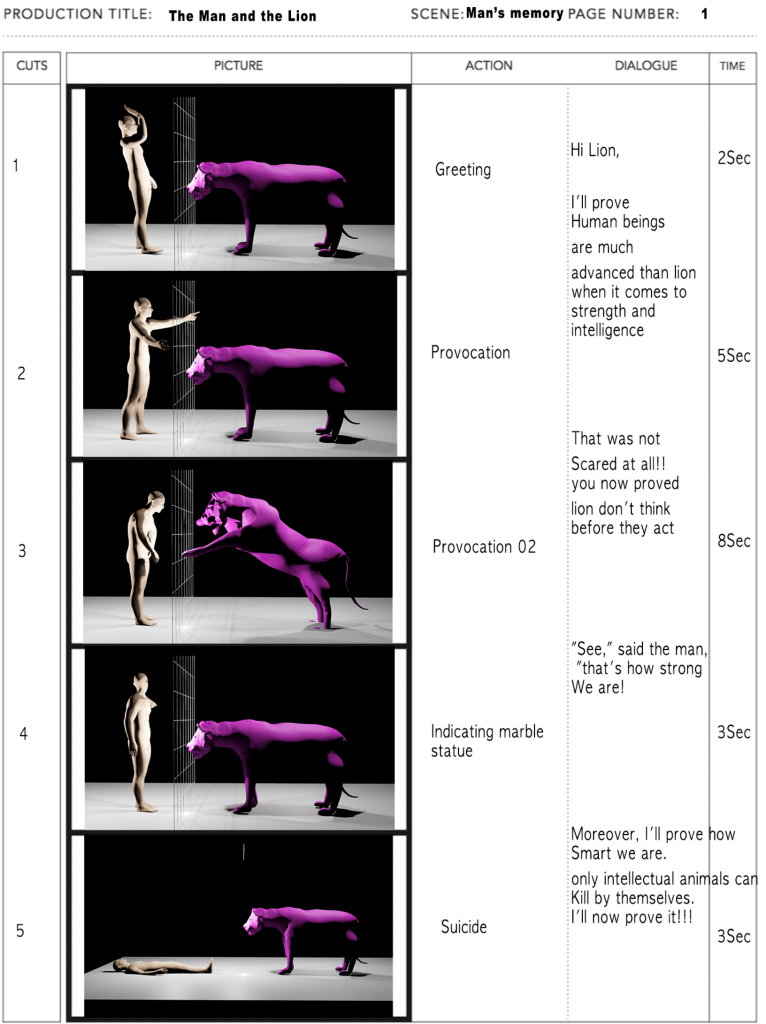
I illustrated each version of the memory:
The Man’s Memory:
“Only humans are clever enough to end their own lives. I will take my life here to prove that humans are more intelligent than lions.”
→ In this version, the man commits suicide to win the philosophical argument.
The Lion’s Memory:
“Man may be intelligent, but he is weaker than a lion in strength.”
→ In this version, the lion kills the man in a direct physical attack.
In both accounts, the objective fact remains the same: the man is dead. However, the cause of death is left ambiguous. Did the man take his own life, or was he killed by the lion?
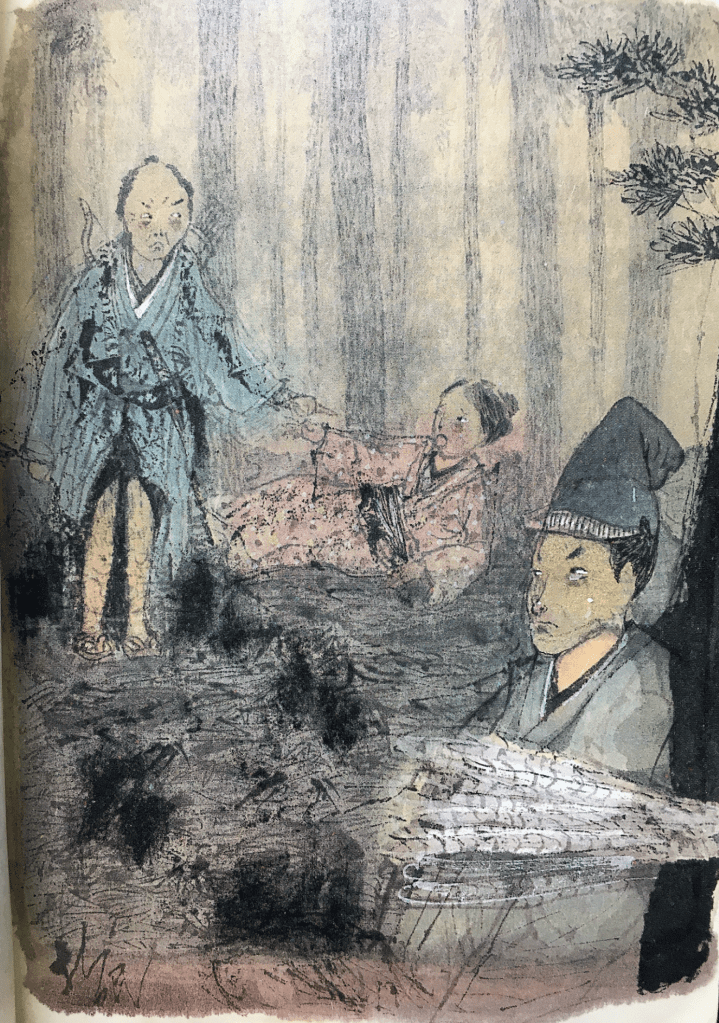
If the man’s version is true, he wins the debate through a symbolic, self-sacrificial act. If the lion’s version is true, then the man was defeated and killed, exposing the lion as dominant. This narrative structure mirrors the storytelling approach in Akira Kurosawa’s film Rashomon, where conflicting testimonies are given about a samurai’s death: one claims the samurai committed suicide, while others insist he was murdered—either by the thief or the samurai’s wife.
While both the man in The Man and the Lion and the samurai in Rashomon distort the truth for their own purposes, their motivations differ:
The man wants to win the argument and assert human superiority.
The samurai, depending on the version, may want to preserve his honor or deflect blame.
This structure reveals how memory, perspective, and self-interest can blur the line between truth and fiction, inviting the player to actively question what really happened.
3D character creation
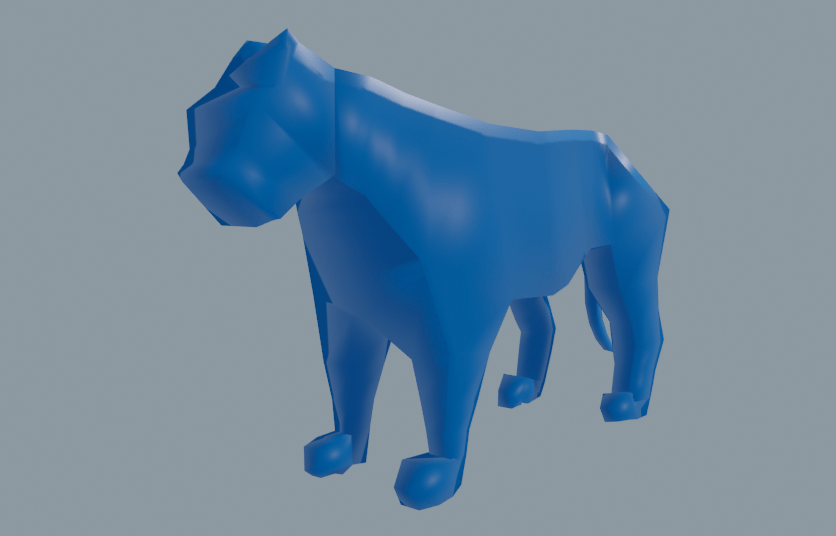
1. Modelling
Create the big part first
To begin, I created two base particles and applied a Skin Modifier in Blender. In Edit Mode, I used the ‘E’ key to extrude cube-like segments from the original structure. The Skin Modifier was especially effective for blocking out the lion’s basic form because it allowed one control point to influence a cubic form composed of four linked particles, resulting in a fast and efficient way to shape the overall body. This technique significantly reduced modeling time and improved structural accuracy. Additionally, since the model consisted of a single unified mesh, there was no need for complex recombination using Boolean Modifiers later on.
Disadvantages:
One of the challenges I encountered was my inexperience with the Mirror Modifier. As a result, I modeled each of the lion’s four legs separately, which was time-consuming and made it harder to maintain perfect symmetry. This issue becomes especially problematic when preparing characters for auto-rigging tools like Mixamo, where symmetry is critical for correctly placing bones and achieving proper animation results. If I had used the Mirror Modifier from the beginning, the process would have been more efficient and rigging-ready.
However, my goal is to eventually create a high-poly, highly detailed version of the lion. To achieve this, I plan to increase the polygon count by applying a Subdivision Surface modifier, which will smooth and refine the geometry. After detailing the high-poly version, I will perform retopology to convert it back into an optimized low-poly mesh that retains the essential shape and detail—while remaining efficient and game-ready.
This approach allows me to balance visual fidelity and performance, ensuring the model is both animation-compatible and suitable for real-time rendering.
To solve this, I will use a retopology process to convert the high-poly mesh back into a low-poly mesh. At first glance, going from low-poly → high-poly → low-poly again might seem redundant. However, retopology enables artists to control polygon density precisely, allowing for optimized topology in areas that need more detail, while minimizing unnecessary geometry in less important regions. This approach ensures that fine detail can be preserved even in a low-poly version, making it suitable for animation and game integration without sacrificing visual quality.
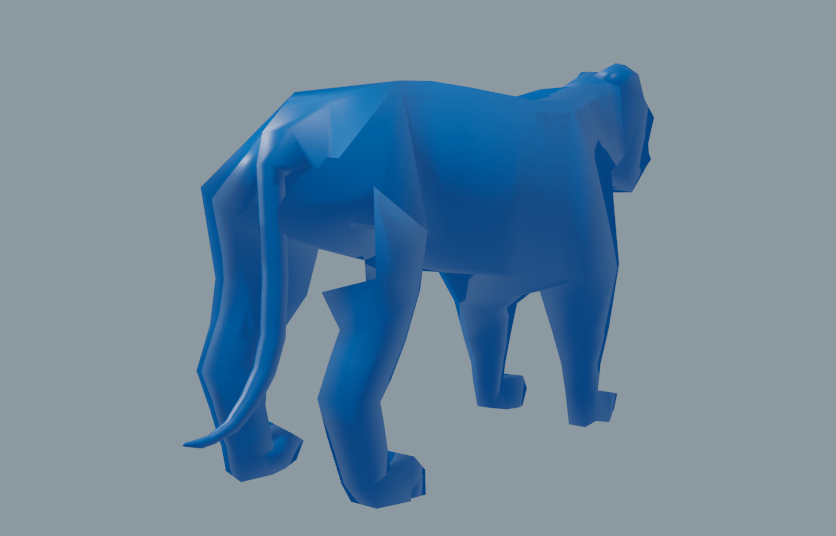
Problem
I encountered a problem during the retopology process. Retopology should ideally be performed after sculpting is fully completed, but in my case, I started retopology too early. As a result, when I attempted to re-sculpt the mesh after retopology, the mesh became high-poly again, essentially undoing the optimization.
Another issue arose from the uneven distribution of polygons. As shown in the image above, the face of the lion had significantly more geometry compared to the body. When applying the Subdivision Surface modifier, this imbalance caused a disproportionate increase in polygon count in the high-density areas, leading to inefficiencies and inconsistent surface smoothness.
Good:
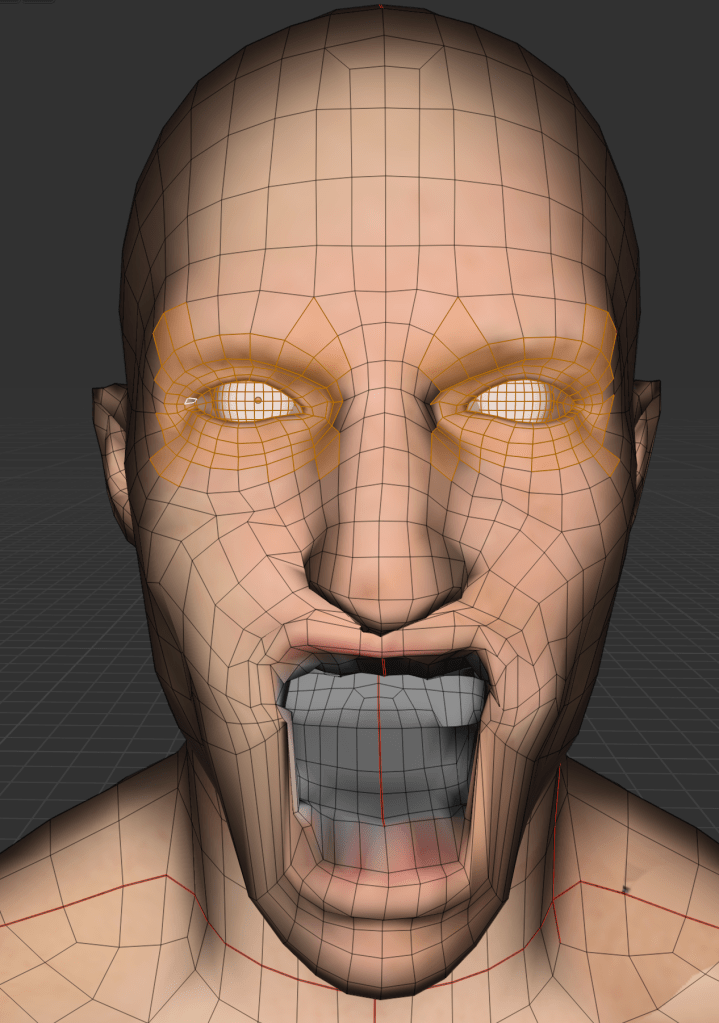
On a positive note, with the support of Mr. Tom, I successfully modeled the lion’s mouth. By leaving a slight gap between the upper and lower lips, I was able to construct a proper inner mouth cavity. This is a notable improvement compared to my previous project (Unit 12), where the character’s upper and lower lips were fused together, limiting animation flexibility. This new approach will allow for more realistic mouth movement and better deformation during animation.
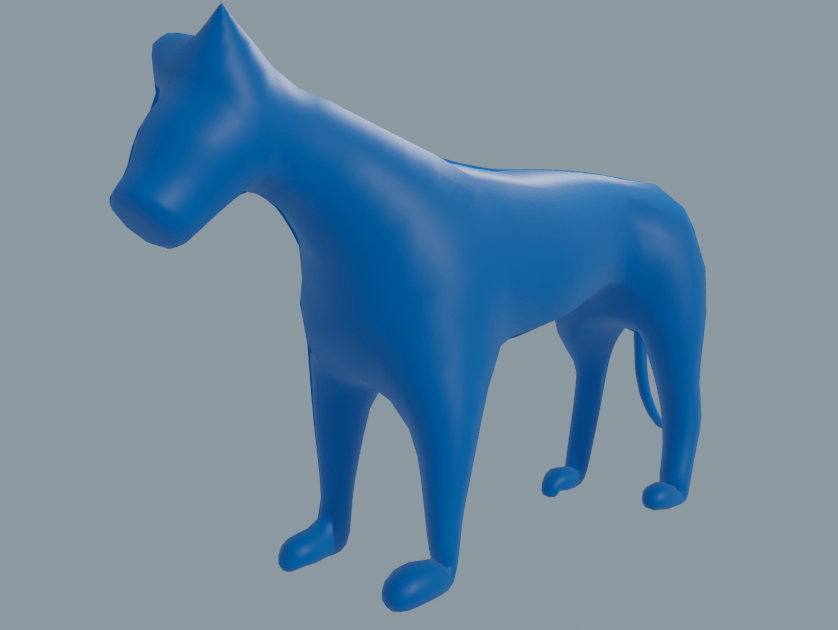
1-2. Create the second (detailed) part
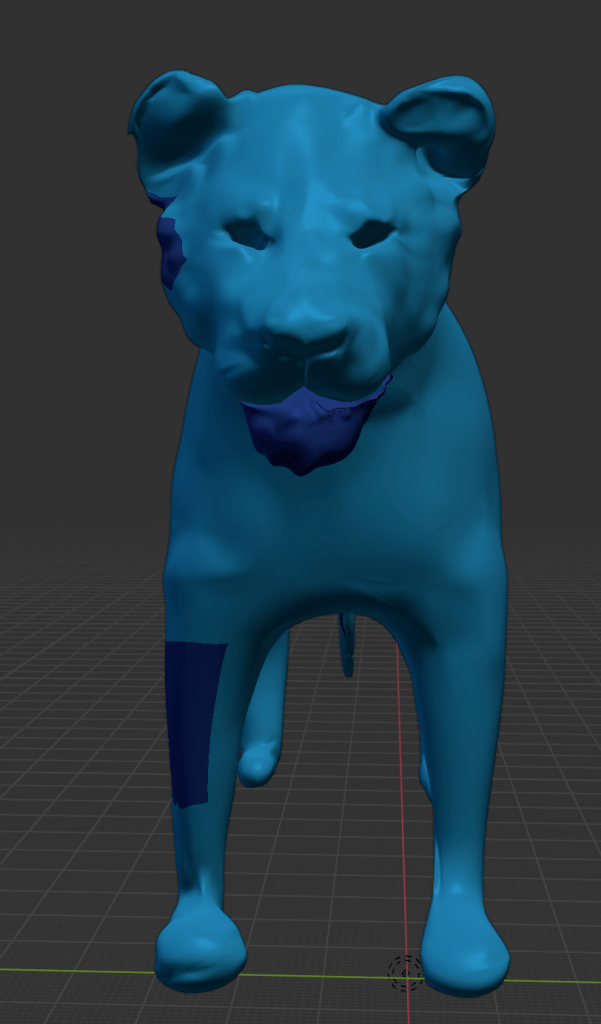
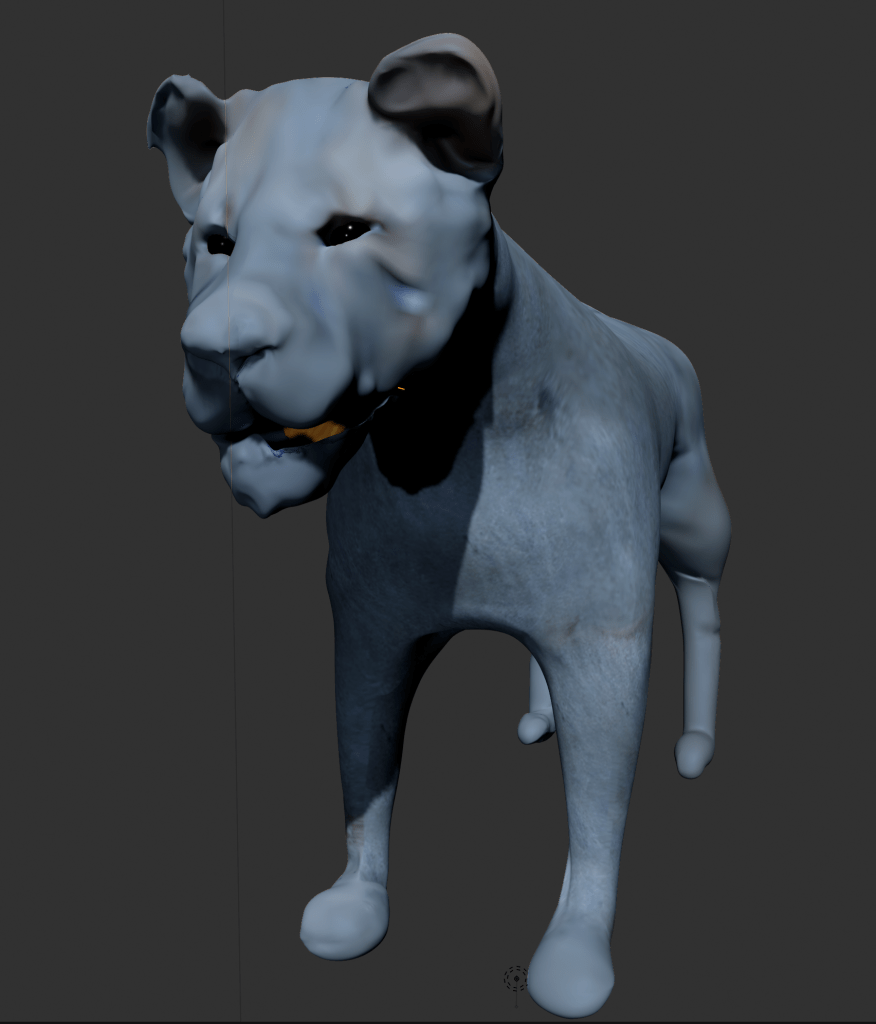
What I liked about the lion design:
Overall, I was very satisfied with how the lion’s sculpted appearance turned out. This was my first time creating a quadrupedal animal using 3D software, and I consider it a successful outcome.
Back in Unit 8, I first attempted to sculpt a lion’s face for a project focused on gargoyles and grotesques. At that time, my sculpting skills were still developing, so the lion only resembled an animal when its facial features were exaggerated in a grotesque style. In contrast, the lion I created for Unit 13 feels more anatomically accurate—the animal’s form comes through without needing to distort or exaggerate the structure.
Creating a character in 3D, as opposed to 2D, posed additional challenges. In 3D, you must constantly consider the X, Y, and Z axes, which adds complexity, especially in organic forms like animals.
Points for improvement:
Currently, the character appears more like a lioness than a male lion. This is primarily because I did not include the mane, which is a defining feature of male lions. While I considered using hair particles to generate the mane, I ultimately decided against it. Hair systems are complex to export into game engines and can cause performance issues, such as lag or reduced frame rates. For these reasons, I opted not to include the mane in this version of the model.
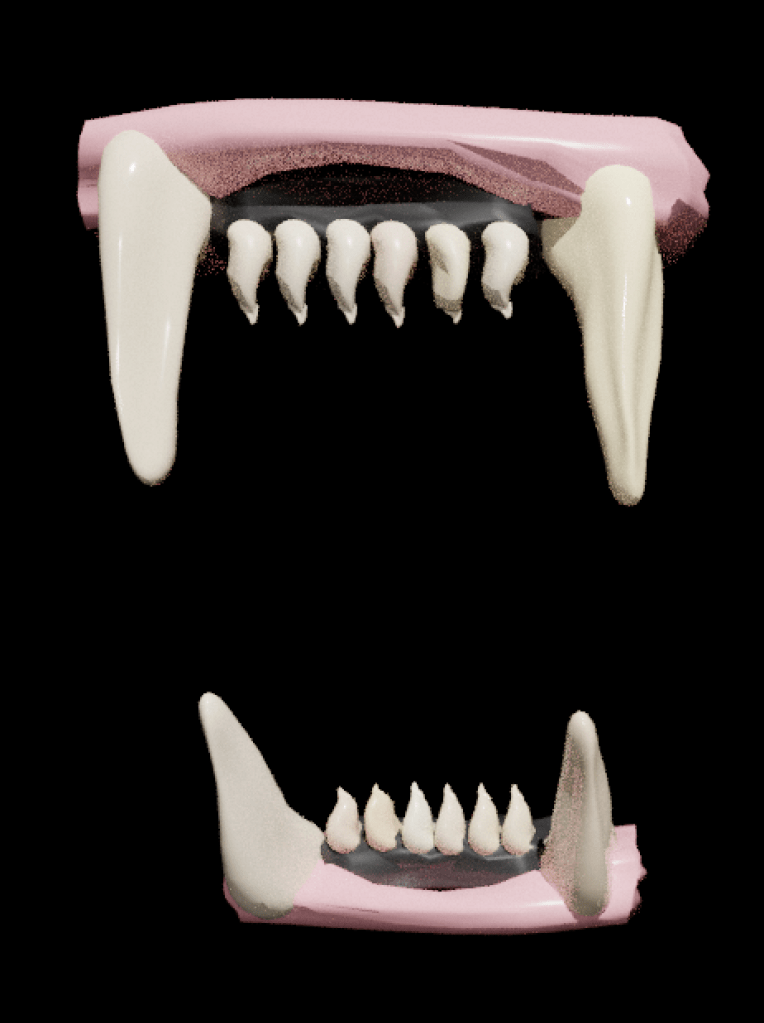
However, during the rigging process, an error occurred: the upper and lower jaws became fused together, preventing them from moving independently. As a result, I was unable to animate the lion’s mouth, and the teeth could not be properly implemented.
This issue highlighted the importance of maintaining separation and hierarchy in the mesh components—particularly when preparing a character for jaw movement and facial rigging. Moving forward, I will look into alternative methods, such as using vertex groups, armature constraints, or shape keys, to ensure better control over jaw articulation.
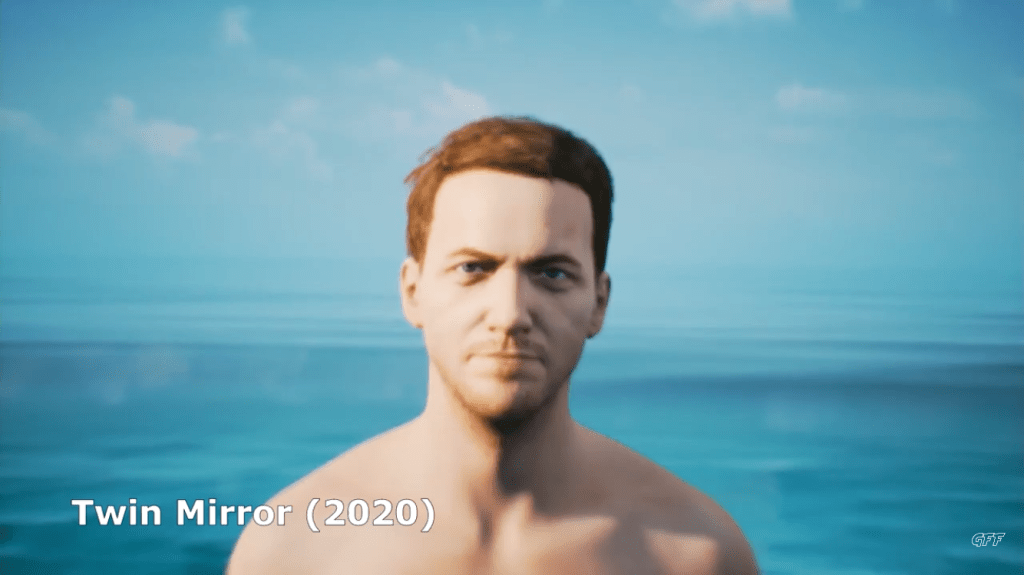
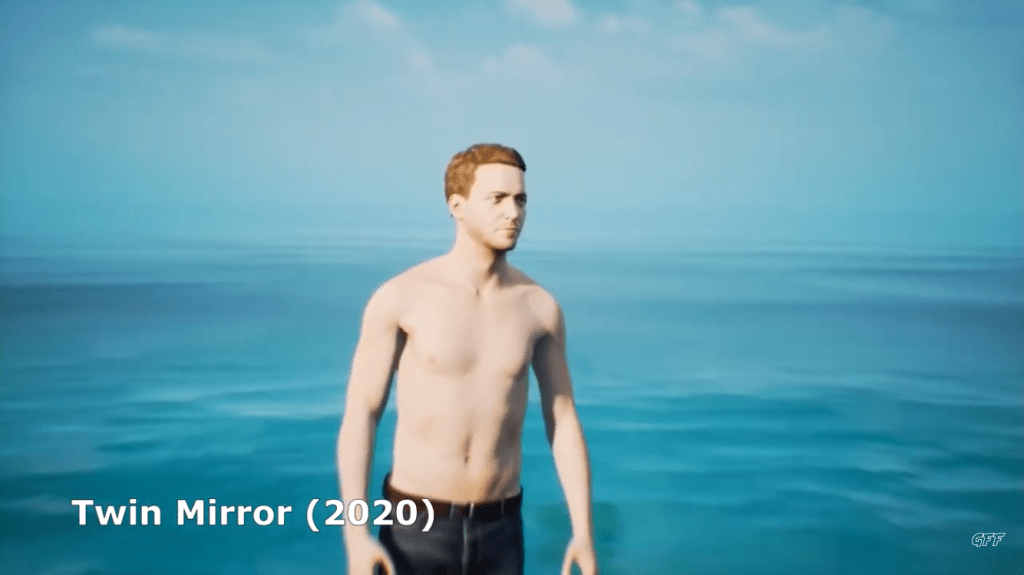
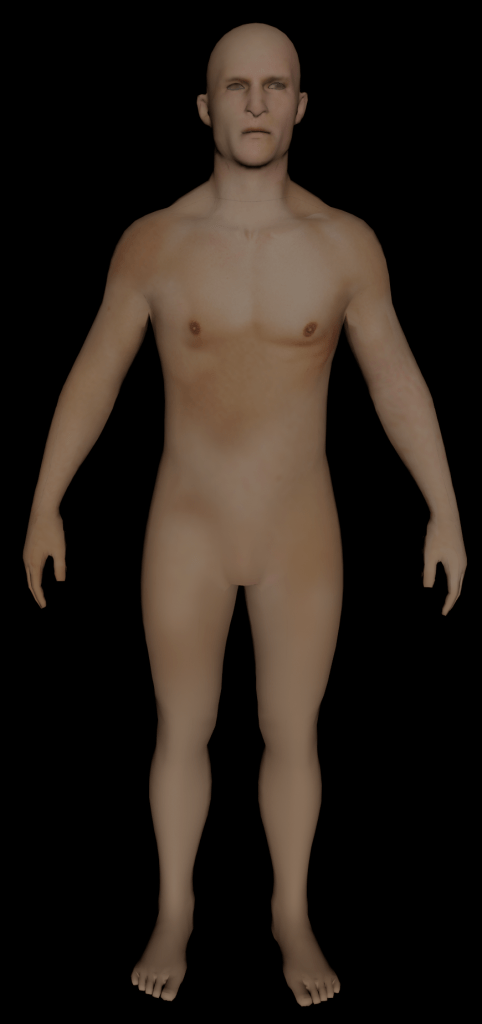
MAN
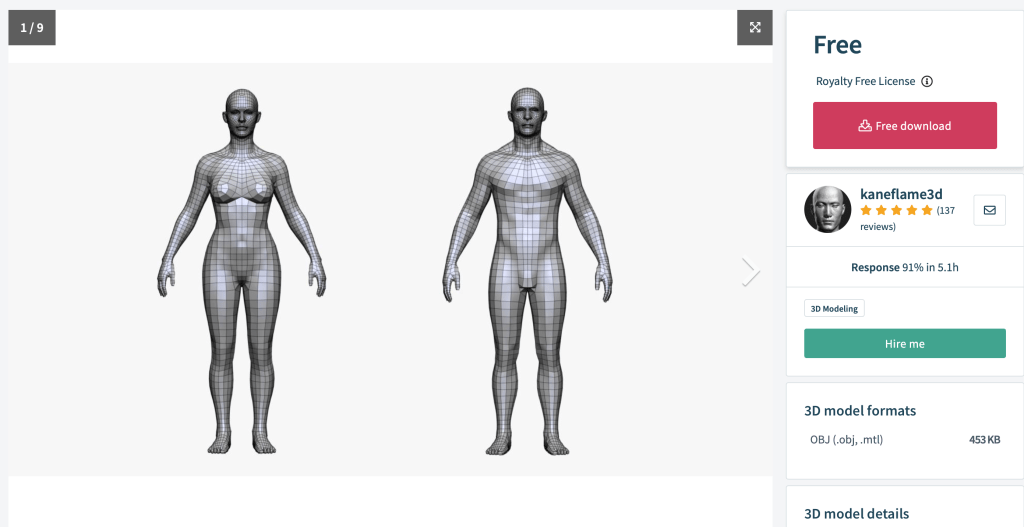
Although I didn’t model the character myself, I plan to take full ownership of the creative process by doing the texture painting, rigging, and animation entirely on my own.
After saving the mesh as an .obj file, I imported it into Blender. Initially, I considered applying a Subdivision Surface modifier to smooth the geometry. However, as I experienced with the lion mesh, this dramatically increased the polygon count, which could make texture painting and optimization difficult.
Instead, I applied the Smooth Shading option, which visually softens the surface without adding excessive geometry, maintaining a balance between visual quality and performance. This makes the model more manageable for texturing and animation while preserving the neutral appearance I intended for the character.
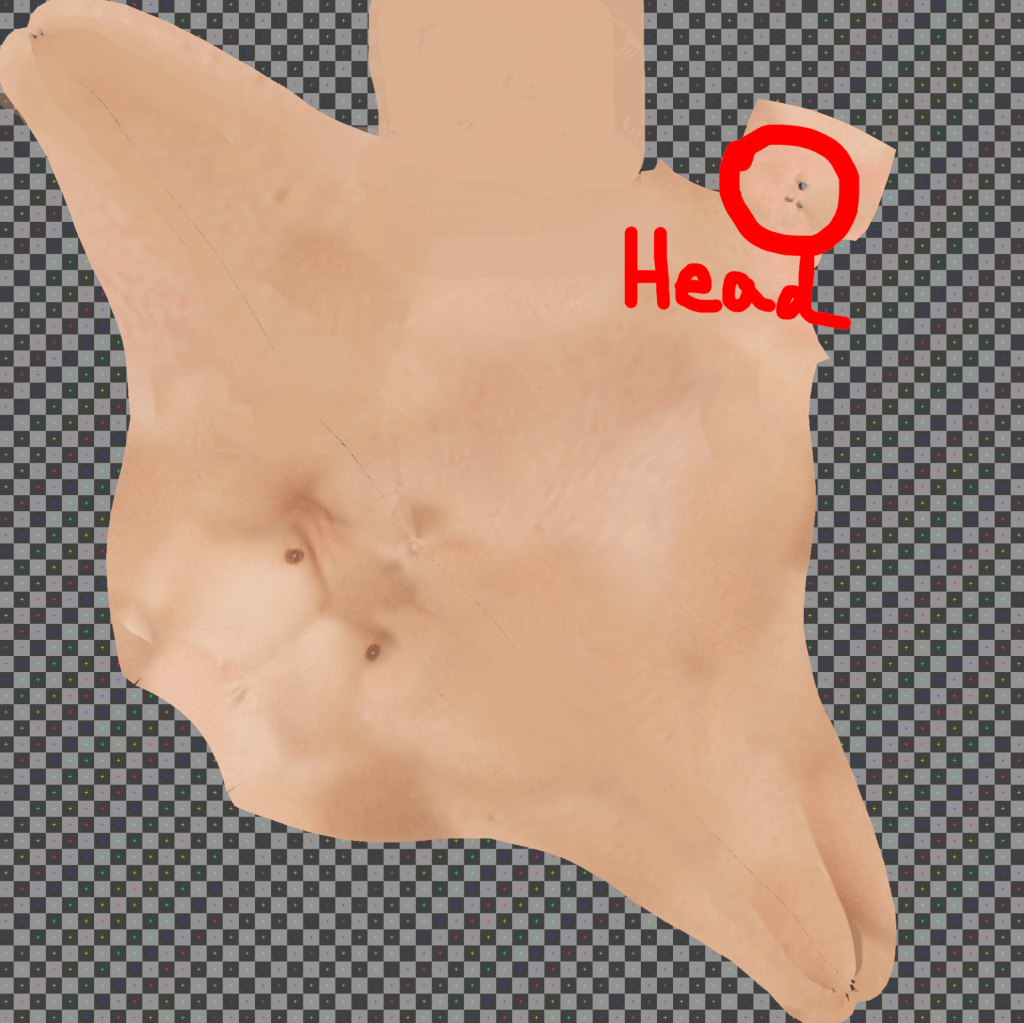
Wrapping
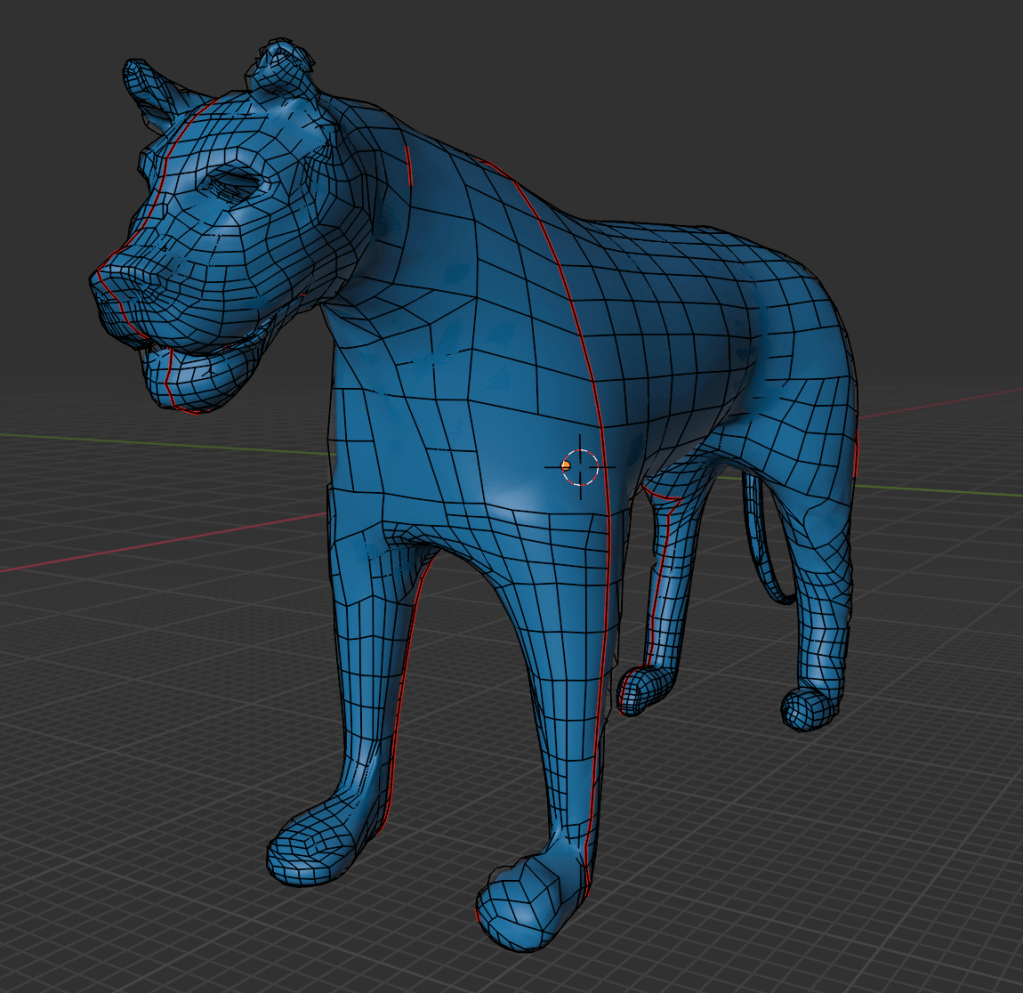
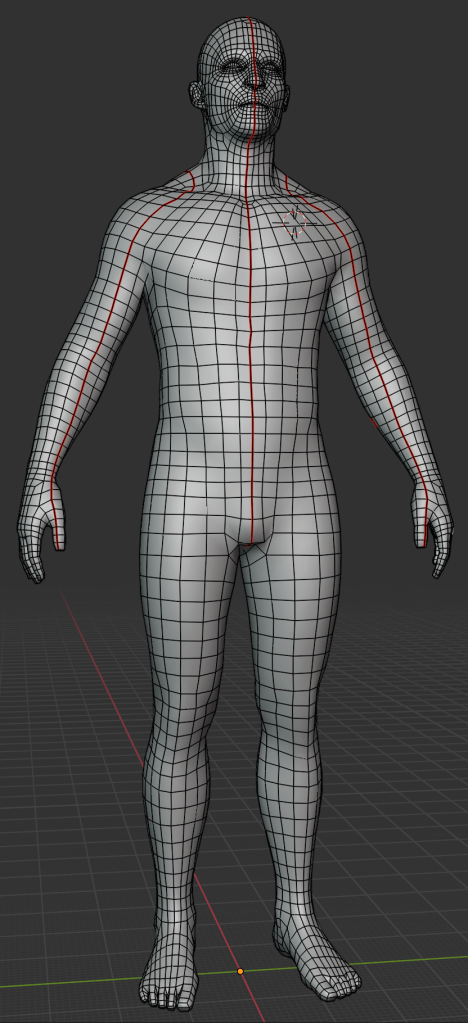
UV editing is similar to creating wrapping paper for a Christmas present. Since the object (the present) is 3D, and the wrapping paper is 2D, the 2D surface must be carefully unfolded and laid out to properly cover the 3D model. In Blender, this process involves entering Edit Mode, selecting edges, and using the “Mark Seam” function. These seams act like scissor cuts on the wrapping paper, defining where the 3D surface will be “unwrapped.”
Looking at the two images above, you can see red lines on the mesh—these are the marked seams. By strategically placing these cuts, I can unfold the 3D model into a flat 2D UV map, allowing textures to be accurately painted or applied.
This step is essential for achieving realistic texture placement on complex surfaces, especially when working with detailed materials like skin, fur, or cloth.
2. Poly-Colouring (UV Painting)

Image texture painting is a powerful tool that allows existing 2D photographs to be projected onto 3D meshes. For example, using high-resolution textures—such as 4K skin images—I can transfer realistic surface details directly onto the model. In the image above, I first applied an image texture to the lion’s mesh, and then painted over it with a purple overlay to test direct painting on top of the texture.
If UV unwrapping is done correctly, high-resolution image textures can be mapped cleanly onto the 3D surface. In my case, texture painting on the lion’s body worked well, and I was satisfied with the result. However, I ran into limitations when working on the lion’s face—where only low-pixel textures could be applied. This reduced the visual fidelity in that area and was a bit disappointing, as the facial region typically requires the most detail.
This experience highlighted the importance of UV accuracy and resolution management when working with texture painting—especially for characters meant for close-up rendering or animation.
Problem:
One issue I encountered during UV unwrapping was that I placed a seam directly across the center of the lion’s face. This caused visible distortions and texture stretching in the most noticeable part of the model—the facial features. As a result, the texture did not align smoothly, and it broke the realism of the character’s expression and surface detail.
Solution:
In future projects, I will ensure that seams are not placed across key facial features, such as the eyes, nose, or mouth. Instead, I will position seams in less visible areas, such as the back of the head, under the jaw, or along natural creases in the topology. This approach will help preserve the visual integrity of the face, ensuring that textures appear clean and uninterrupted.
While working with image texture painting, I realized the importance of having photos of a single character from several consistent angles. Many reference photos found online are captured with inconsistent lighting directions, which means shadows fall differently in each image. If shadows are already embedded in the texture and the lighting in the 3D environment doesn’t match, it can result in unwanted visual blotches or mismatched shading—breaking the realism of the render.
For the body, I used a high-resolution skin texture sourced from a fashion model photo. While this gave the model a detailed appearance, I later felt that the quality might have been unnecessarily high, especially considering the character’s role and distance from the camera in the scene.
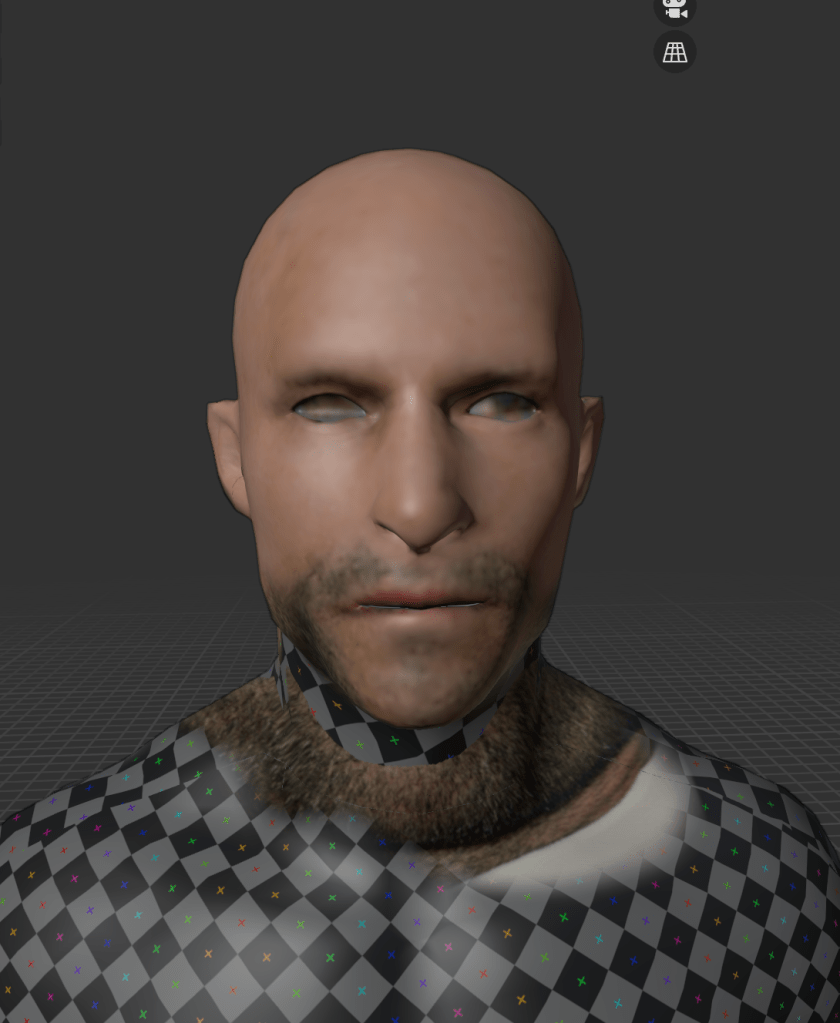
Problem:
I encountered the same issue as I did with the lion. When setting up the UV seams, I accidentally placed a seam through the center of the man’s face. As a result, high-resolution textures could not be applied cleanly, and in the rendered view—particularly in the image on the right—the face appears blurry and low-resolution.
Solution:
Moving forward, I’ll be more intentional about avoiding critical areas like the face when placing seams. Proper seam placement is key to ensuring that high-pixel image textures display clearly, especially in areas of high visual importance like the face.
However, at this stage, I’m still not familiar with how to separate the face and body properly within the UV layout. As a result, both the face and body are currently sharing the same UV space, which can lower the texture quality, especially on the face where higher pixel density is often needed.
Learning how to create dedicated UV tiles or separate UV islands for key areas like the face will be an important next step in improving the texture resolution and clarity of my characters.
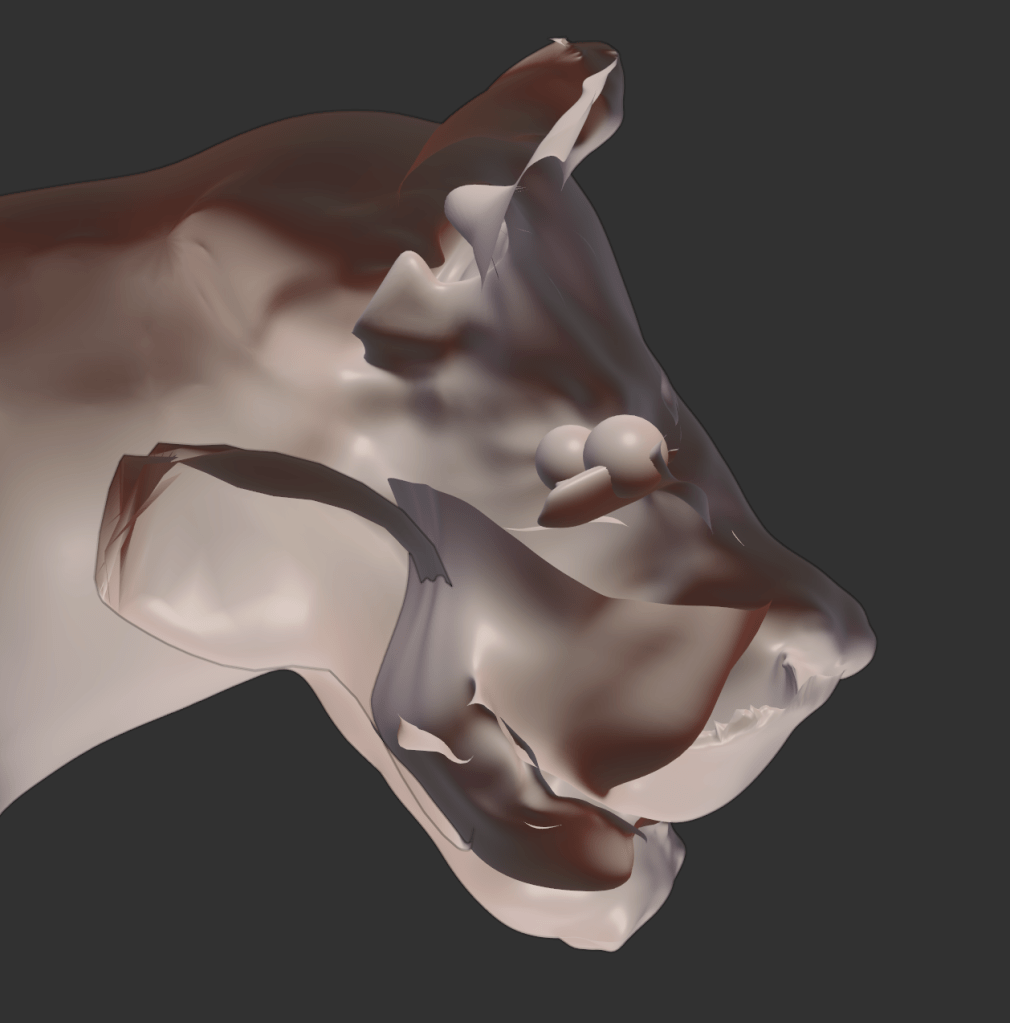
Lion’s eyes – Problem
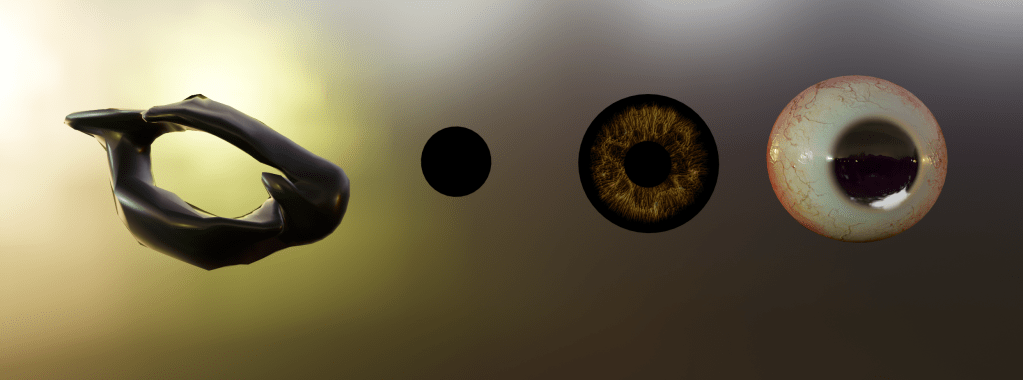
Surrounding the eye, the immediate flesh is dark, almost black, which is then encircled by a layer of lighter, whitish tissue. The black rim on the outermost edge acts as a natural border, framing the eyeball. I approached the modeling of these parts as if constructing distinct layers, treating each type of tissue—pupil, iris, corneal reflection, eyelid structure, and surrounding skin—as an individual element.
However, once assembled, the eye ended up resembling a human eye, rather than an animal’s. The result felt unnatural and uncanny, even bordering on bizarre, due to the unintended realism and symmetry commonly associated with human eyes. This outcome highlighted the challenge of balancing realistic anatomical layering with the visual identity of a non-human creature.
Lion’s eyes – Solution
This minimal approach avoided the overly detailed and human-like appearance from my previous attempt and proved to be a more effective fit for the lion’s overall aesthetic.
Rig + Weight paint
(Note: Rigging is the process of inserting bones into a mesh—when a bone moves, the mesh (muscle/skin) moves accordingly, enabling animation.)
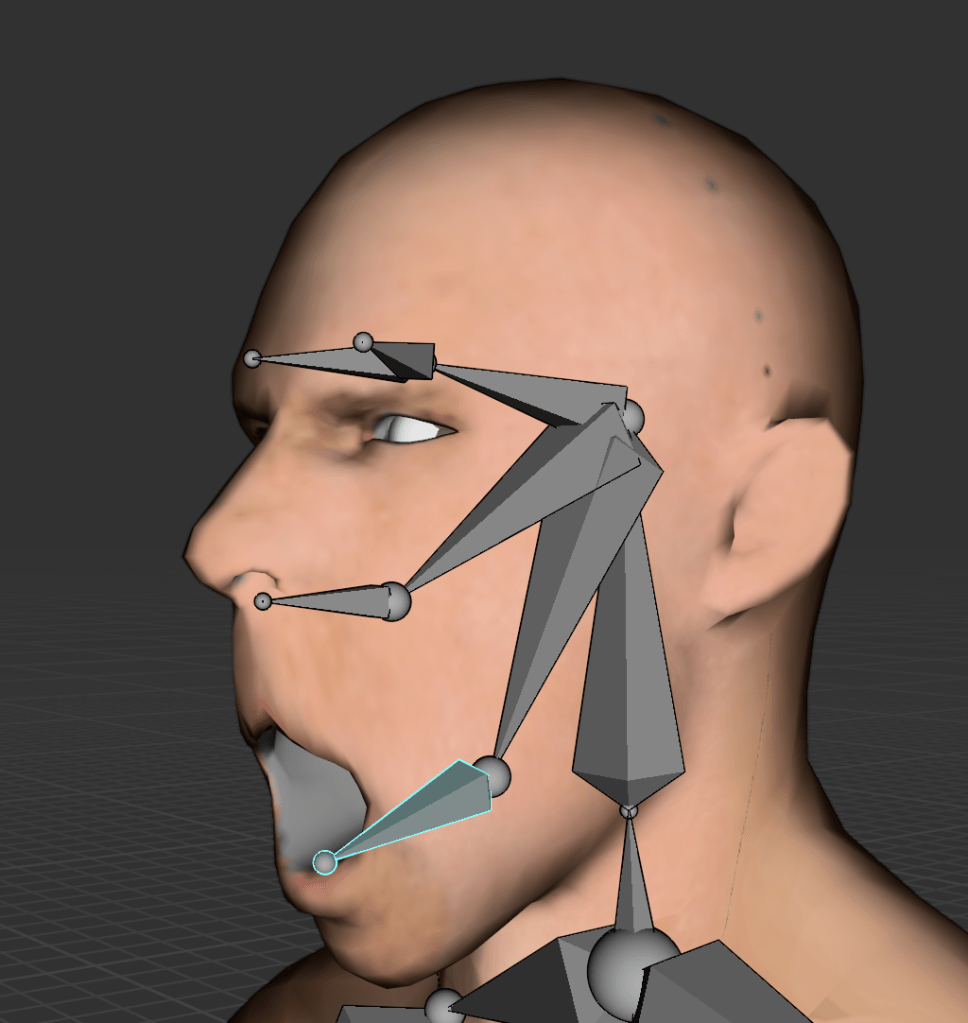
The default rig includes many unnecessary bones, and its scale and proportions did not align well with my custom 3D male character. Instead, I created a single bone in Edit Mode and used the ‘E’ key to extrude additional bones, gradually building a custom, simplified rig that fit the model’s proportions.
Once the rig was complete, I selected both the mesh and armature, pressed Ctrl + P, and chose “With Automatic Weights” to bind the mesh to the skeleton. This method was intentionally minimal to avoid complications I had previously encountered—such as in Unit 10 (Persephone)—where I used a more complex rig that ultimately caused errors and animation issues. Through this, I realized that overly complex rigs can introduce unnecessary difficulties, especially when the goal isn’t hyperrealistic animation.
3. Animating
No Mixamo
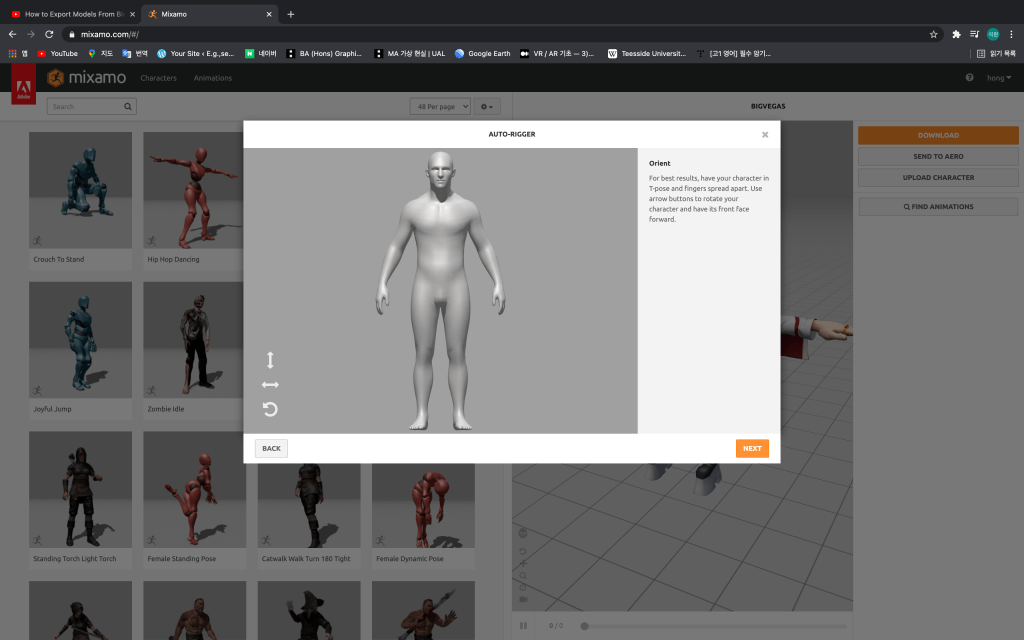
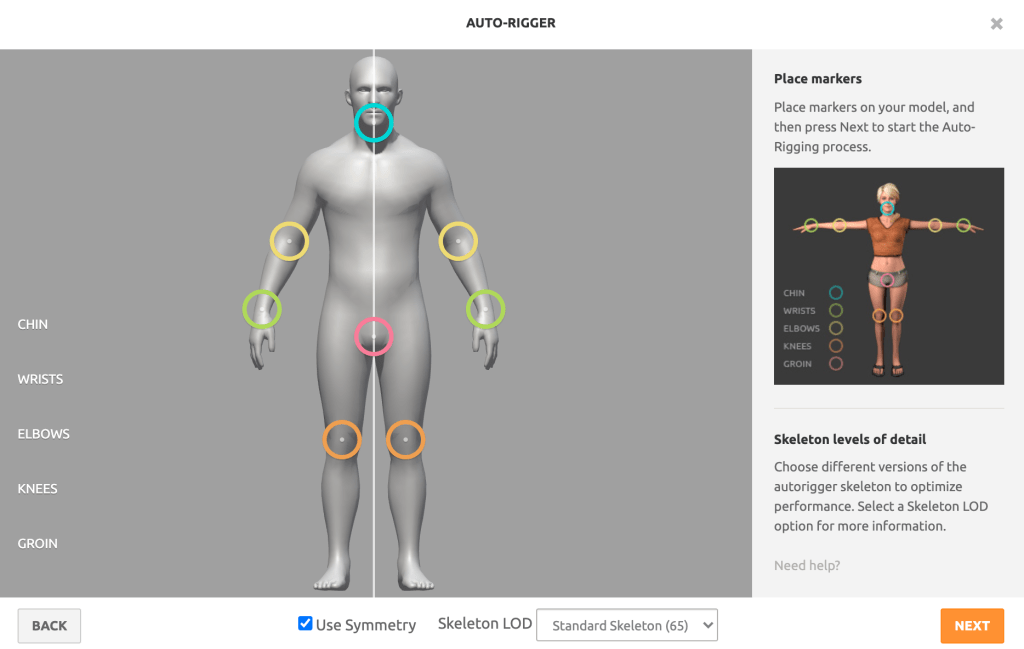
Given the time constraints of the project, I thought exporting my 3D male character to Mixamo would be an efficient way to develop an animation-based game. However, I eventually decided not to use Mixamo for the following reasons:
1. Lack of Facial Expression Control
One major limitation of Mixamo is that it does not support facial animation. As my animation tutor Ali pointed out, a key emotional driver in my game, The Man and the Lion, is the variety of facial expressions shown by each character. Especially in dialogue-driven games, subtle animations—such as mouth movement, eye blinking, and emotional shifts—are critical to enhancing player engagement and storytelling depth. Mixamo’s inability to animate these aspects limited its suitability for my project.
2. Short Animation Clips and Limited Customization
Mixamo primarily offers short, pre-set animations, and at the time, I lacked the technical knowledge to blend or sequence multiple animations for a single character. This made it difficult to build complex, continuous performances. (However, I have since learned how to manage and combine multiple motion clips on a single character.)
3. Creative Ownership
Since I had already downloaded the 3D male model from an external source, I wanted to take more creative control over the final product. Even though I didn’t model the character from scratch, I wanted to ensure that the animation was original and reflected my own decisions and style. Creating the animation myself gave me a greater sense of authorship and connection to the character.
In conclusion, while Mixamo is a fantastic tool for quick, high-quality animation, I opted for a more manual approach to better align with the creative and narrative goals of my project.
Man animation reference filming
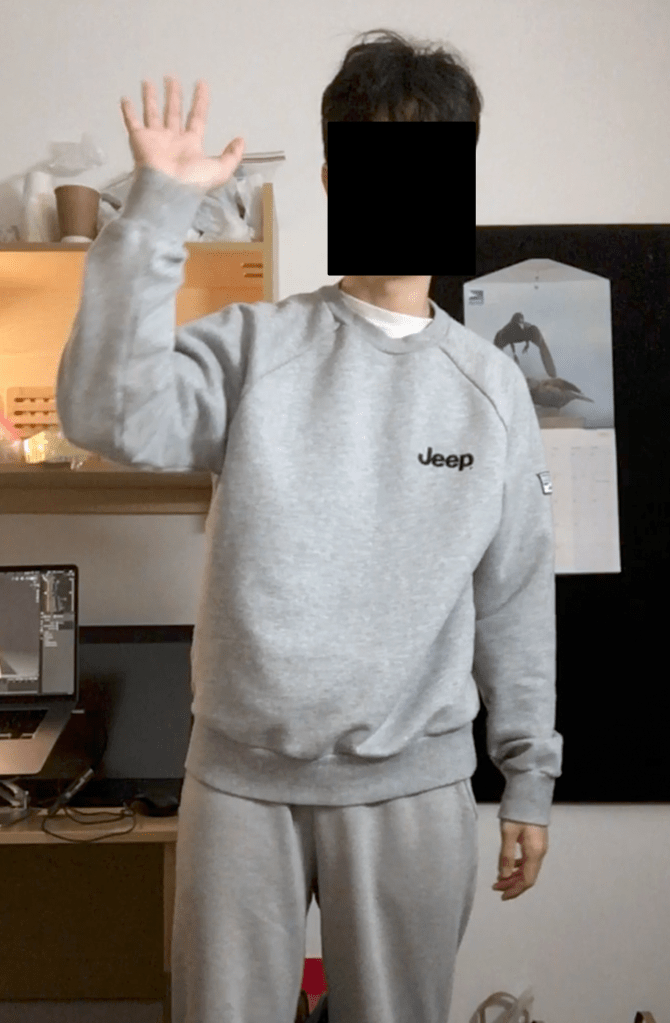
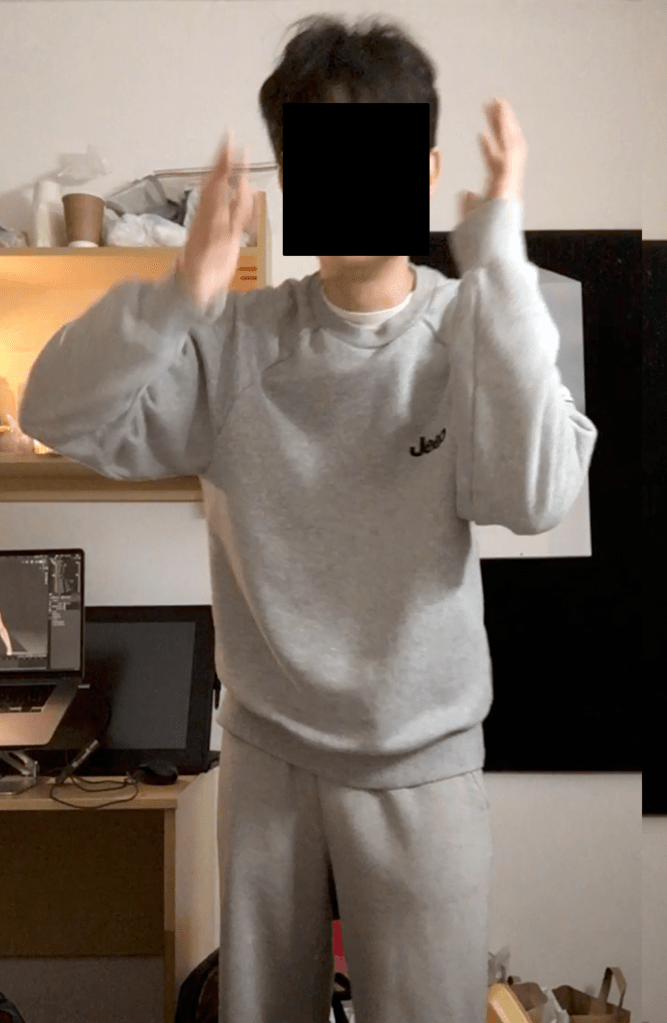
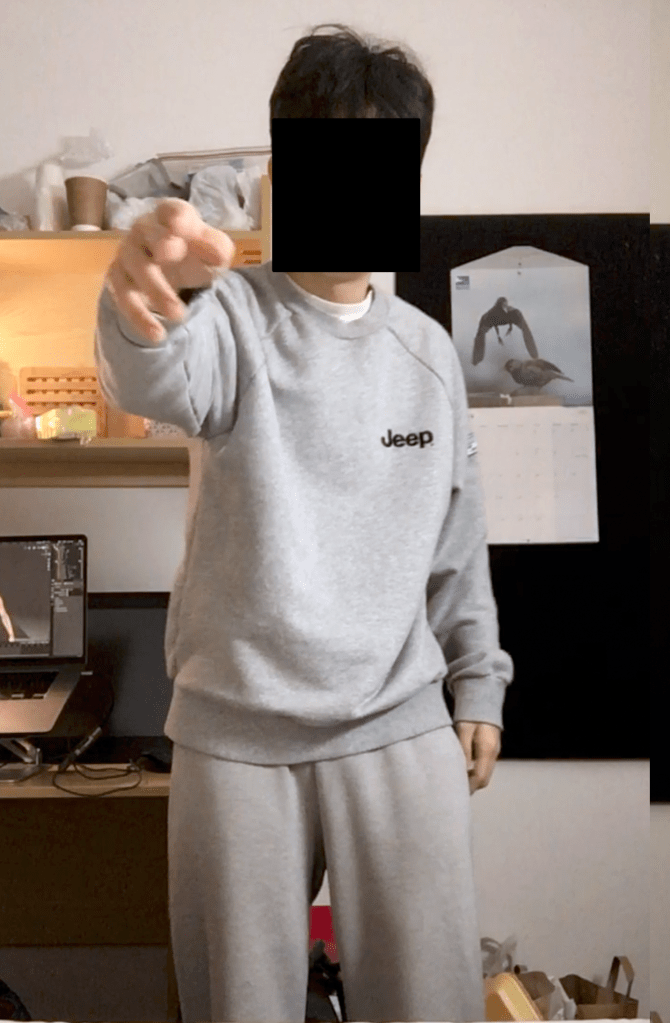
Reflection:
Watching the footage of myself—both in terms of movement and voice acting—felt more unnatural and awkward than I had anticipated. The motions were clearly unrefined and clumsy, lacking the smoothness of professional performance capture. However, despite the imperfections, I felt there was no better alternative at the time. This method still provided a valuable reference point for timing, posture, and emotional expression, and gave me a deeper understanding of the challenges involved in animating human behavior manually.
Regrettable Points:
Complex Hand Rigging and Time Constraints
To achieve detailed hand movements, I created over 14 bones for both the left and right hands of the male character. However, I soon realized that spending too much time on complex animation would jeopardize the overall project, especially given the limited time available for completing the game.
As a compromise, I decided to limit finger animations to only two key moments:
When the man points at the marble statue, and
When he clenches his fist.
These moments were chosen because they carry symbolic and narrative weight, making them worth the extra effort.
Lack of Bone Hierarchy
Another challenge I faced was the absence of a proper bone hierarchy in my rig. Because of this, I occasionally struggled to produce smooth, continuous motion, especially when animating full-body actions. The lack of parent-child relationships between bones made it harder to control and adjust the movement flow across different parts of the body.
This experience taught me that while custom animation provides flexibility, it also requires careful planning in both technical structure (like bone hierarchy) and time management to ensure a balance between quality and completion.
Animating – Shape Keys
In this system:
A value of 0 represents the default pose (e.g., the man’s mouth is closed),
A value of 1 represents the target pose (e.g., the man’s mouth is open),
Blender then interpolates the motion between 0 and 1 to create a smooth animation.
This is how facial animation is typically handled in many 3D workflows. One of the key advantages of shape keys is that they store vertex positions at different states and automatically generate the in-between frames.
If I had used rigging for this same task, I would have had to manually adjust bone positions for every single frame to simulate mouth movement—an approach that is far more time-consuming and labor-intensive.
The image on the left shows facial animation created using Shape Keys; the image on the right shows facial animation using rigging.
How to create facial animation using Shape Keys in Blender:
Select the mesh, then go to the Object Data Properties tab while in Edit Mode.
Ensure that the current Shape Key value is set to 0.
Select the vertices (particles) that will be animated.
Drag the Shape Key value slider to 1, and move the selected vertices to form the desired expression (e.g., open mouth).
Blender will now animate the transition between the default (0) and modified (1) states.
Using Shape Keys has allowed me to animate facial expressions much more efficiently, especially for dialogue-based animations where subtle mouth and eye movements are essential. This method not only saved me time but also gave me more precise control over facial details without having to deal with complex bone setups.
Facial animation using Shape keys
I created four Shape Keys for the male character’s facial expressions: talk, shout, blink, and angry. One of the main advantages of using shape keys is that multiple expressions can be activated simultaneously, allowing for more nuanced and layered emotional states.
However, I noticed that if the values of the shape keys are set too high, the character’s face can become visibly distorted. This happens because the combined deformations of the vertices exceed the mesh’s natural structure, leading to unintended stretching or collapsing of facial features.
To avoid this, it’s important to fine-tune the intensity of each shape key and blend them carefully, especially when multiple expressions are active at once.
Man’s viewpoint
Lion’s viewpoint
Extra meshes
Failure – Cloth making
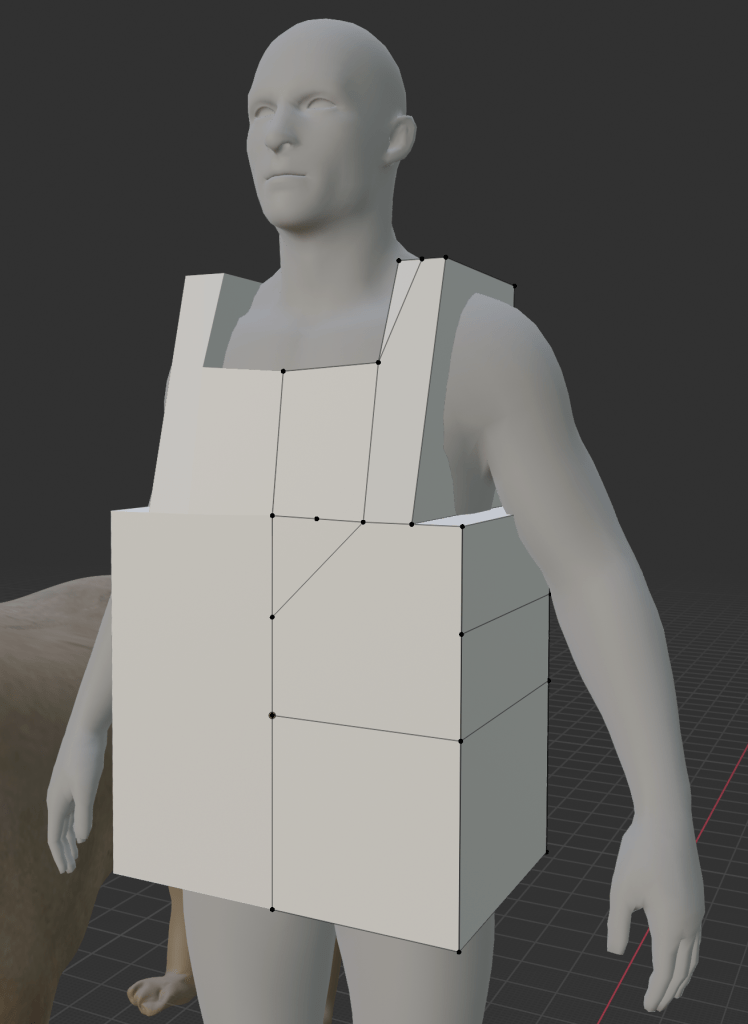
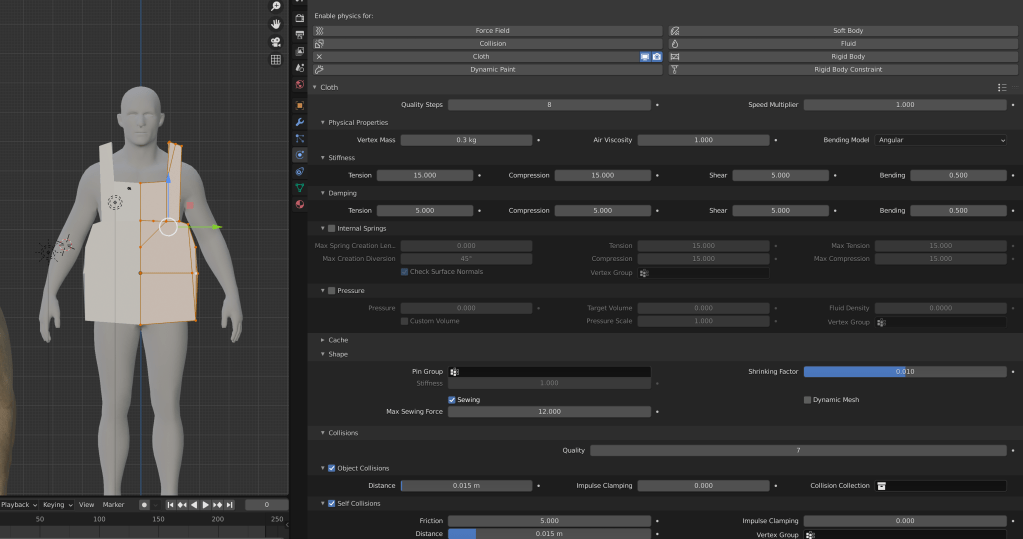
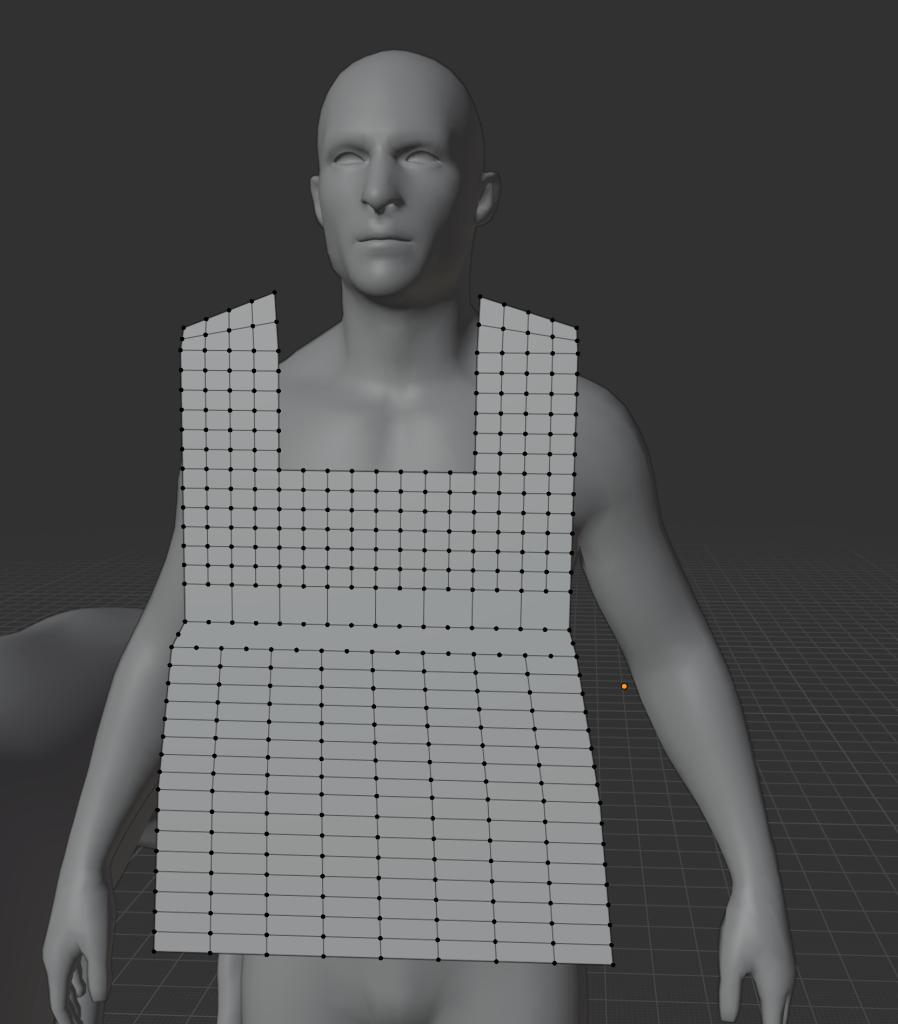
I then adjusted the shape of the subdivided plane to fit the contours of the man’s body, identified the areas that needed to be sewn together, and applied Blender’s cloth simulation to generate realistic folds and behavior.
Reflection:
This was my first time creating clothing for a 3D character, so my skills are still developing. Additionally, I found that creating medieval-style garments—especially ones that match the historical aesthetic and fit the character properly—required a significant investment of time and experimentation. Despite the challenges, it was a valuable learning experience that helped me better understand cloth behavior and character dressing in 3D.
The final result was terrible—but admittedly quite funny. The clothing ended up resembling a pink plastic Tesco bag. In the original story The Man and the Lion, the man’s profession as a forester is mentioned, but there is no reference to his geographic location or historical era. This ambiguity seems intentional—as if to present him as a universal representation of “man” rather than a culturally or historically specific figure.
With that in mind, I decided to abandon the idea of giving him medieval clothing. I felt that assigning real-world clothing styles might lead to unintended interpretations, which would go against my goal of maintaining the character’s symbolic and neutral identity.
Additionally, my current skill level in 3D clothing design is still quite limited, and the results were not aesthetically pleasing. The poorly constructed garment could easily be misinterpreted by the viewer, which is something I wanted to avoid.
From a technical perspective, I also realized that cloth simulations, especially ones involving fibrous structures and dynamic physics, can be difficult to implement in real-time game engines. This added another reason to simplify the character’s design and focus on clarity over complexity.
Marble Statue
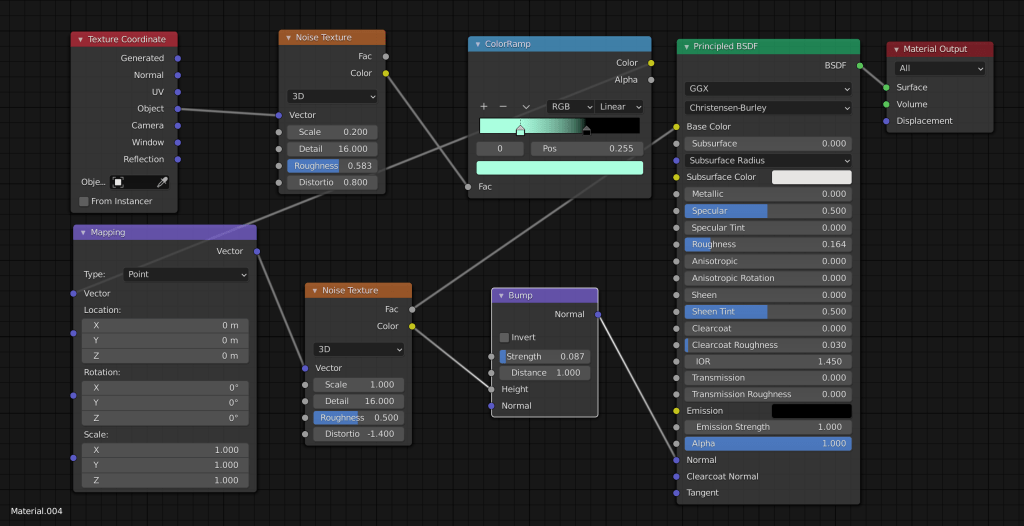
For guidance, I followed YouTuber Ryan King Art’s tutorial titled “Procedural Marble Material”. By incorporating a Noise Texture node, I was able to simulate the natural, irregular vein patterns found in real marble. This method allowed me to control the scale, distortion, and contrast of the marble effect more easily, and avoid the complications that come with image-based UV mapping.
While I’m still learning, this approach gave me more flexibility and a cleaner result, and it was a valuable opportunity to deepen my understanding of procedural texturing in Blender.

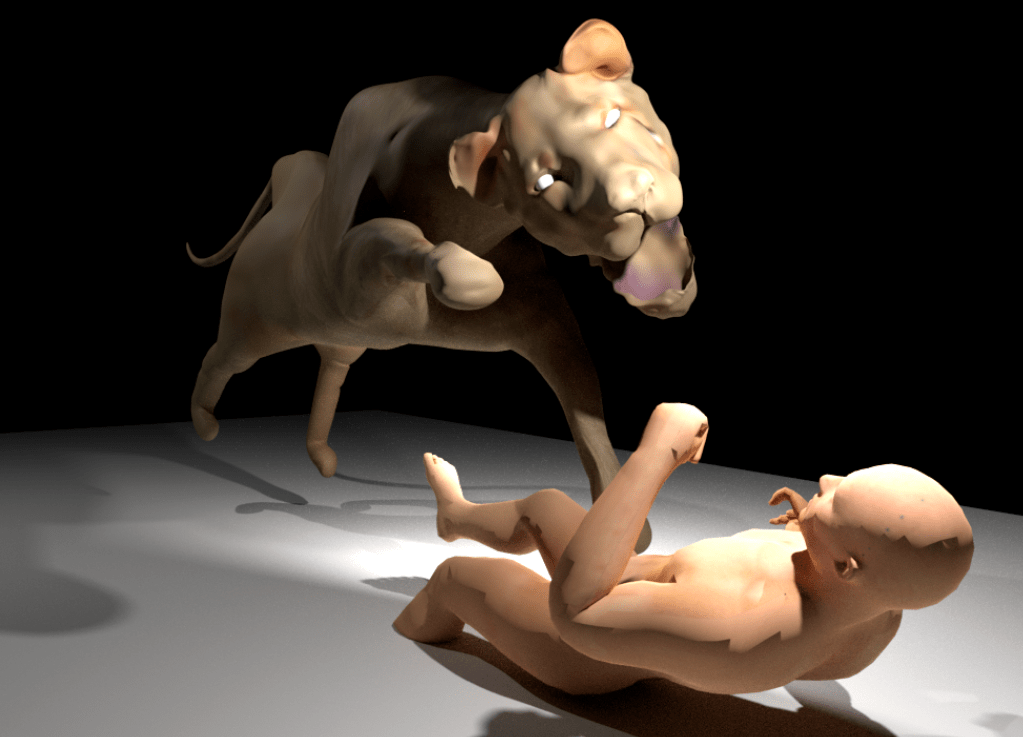
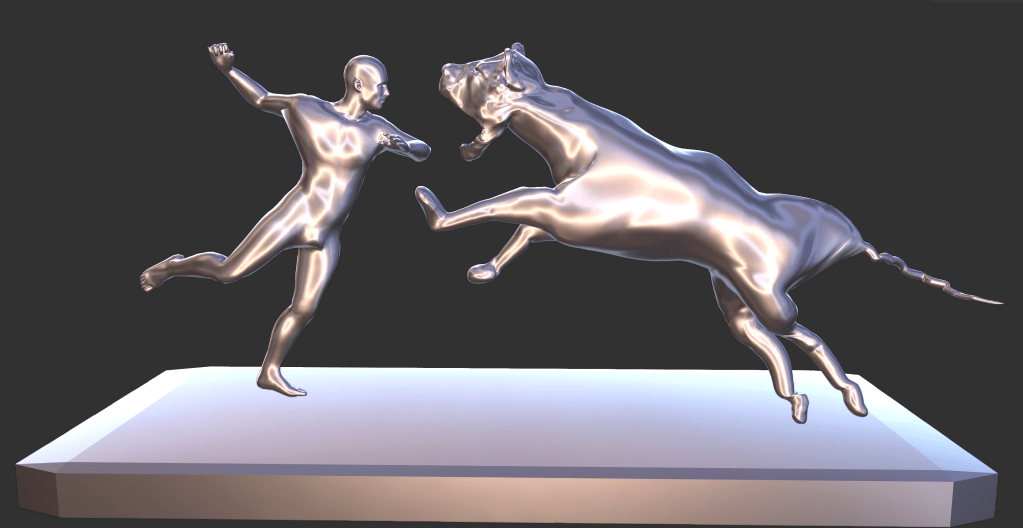
For the man’s pose, I used one of the “victory” animations from Mixamo as a reference. In contrast, I manually posed the lion’s rig to create a figure that clearly appeared to be overpowered and subdued by the man.
I’m very happy with the final result. Although the pose is relatively simple, it successfully conveys the symbolic image of dominance—a man stepping over a lion—which ties directly back to both the original fable and classical heroic imagery.
Environmental design 1 – 1
Problems & Areas for Improvement:
One issue I noticed was that the background width was too large, which tended to draw attention away from the man and the lion. The excessive scale of the environment made it more difficult to focus on the core interaction between the characters and undermined the clarity of their facial expressions and emotional dynamics. In hindsight, a more confined or intentionally framed space would have helped convey the message more effectively and maintained the player’s focus on the symbolic confrontation.
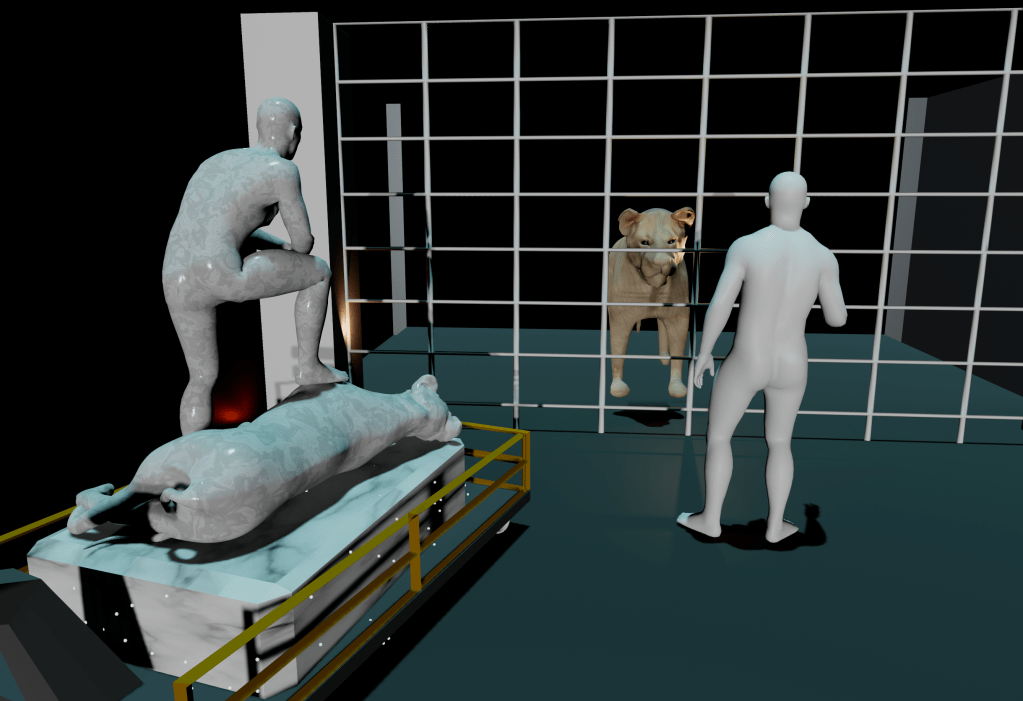
1 – 2
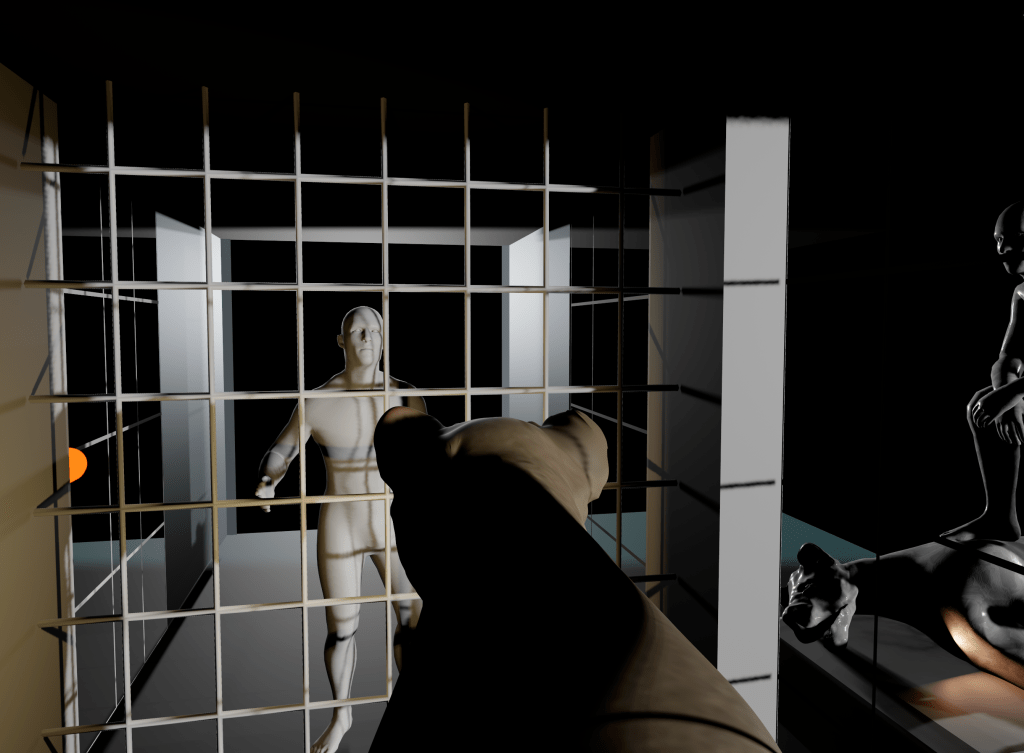
As I was not satisfied with the first background design, I created a second version. In this version, both the man and the lion are confined in small, narrow cells, emphasizing their emotional tension and isolation. Separating them is an iron spear fence, which serves as a visual element to highlight the shifts in their emotional expressions throughout the conversation.
To the left of the man, I placed a marble statue of a man trampling a lion—symbolizing his version of the story and reinforcing his claim of human superiority. In contrast, to the left of the lion, I added an illustration depicting a lion devouring a naked man, symbolizing the lion’s counter-argument.
What I Liked:
This second design is much more concise than the first and better fits the thematic tone of Rashomon, which explores contrasting perspectives within confined, ambiguous settings.
Problems & Areas for Improvement:
Despite being more focused, the background is still somewhat visually complex. Additionally, the illustration on the lion’s side did not appear in the original version of The Man and the Lion, which may introduce unintended narrative ambiguity. To stay more faithful to the core message and maintain symbolic clarity, it may be better to remove the lion’s picture altogether.
Instead, allowing both characters to base their arguments solely on the marble statue would make the scene simpler, more balanced, and potentially more engaging, as it emphasizes how a single object can be interpreted in two completely different ways—a concept central to the Rashomon Effect.
Forest


To begin, I created a plane and used Sculpt Mode to make the terrain uneven and organic. However, I made sure to flatten the central area where the characters stand. This was important because the animations had already been created, and if the characters’ feet didn’t align properly with the ground, I would have had to re-edit the animations, which could be time-consuming.
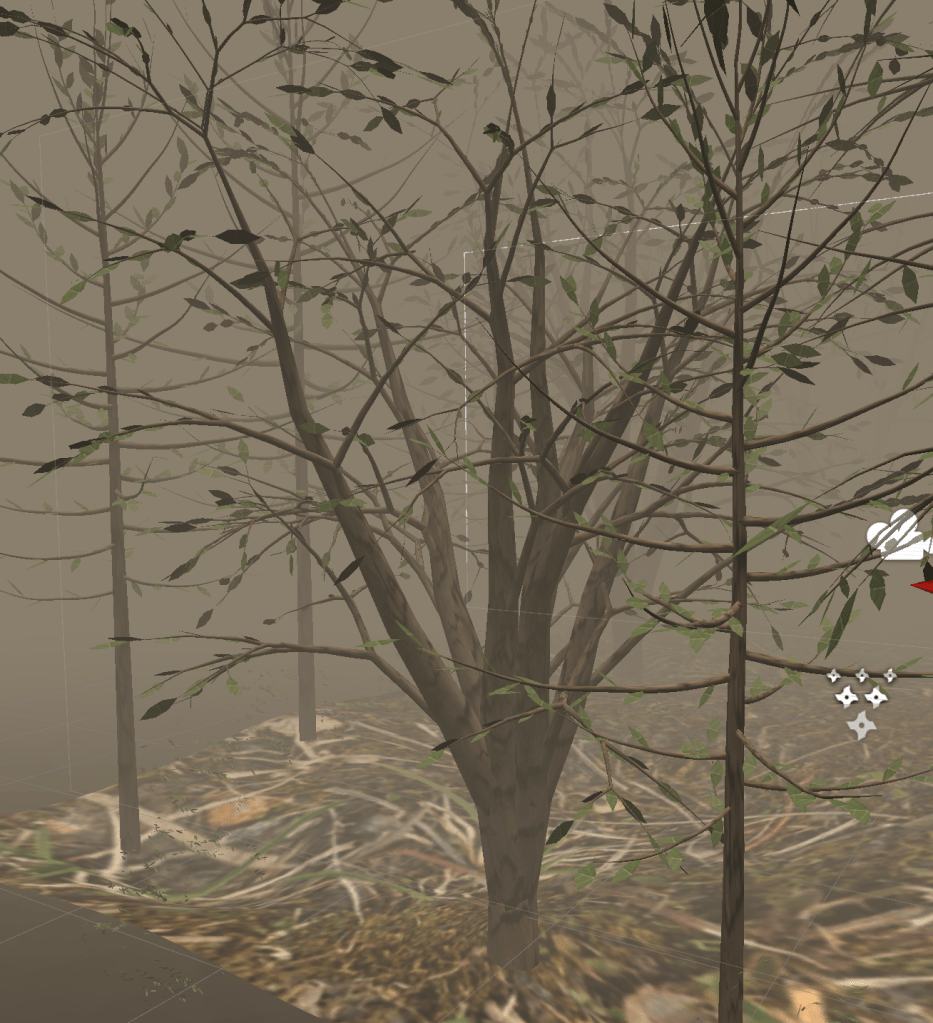
In Edit > Preferences, I enabled a tree generation add-on to help plant trees and foliage across the terrain. Since I envisioned the scene as taking place in a chestnut forest at dusk or nighttime, I designed the leaves and canopy to be dense with narrow gaps, based on the idea that trees don’t need wide gaps for photosynthesis at night.
I also took into account the geographic context—since lions are not native to Northern Europe, I avoided using coniferous trees or very tall forest types, which might feel visually or thematically out of place.
Finally, I designed the trees with a high number of branches to create a complex, organic backdrop that contrasts with the simplified geometry of the man and the lion. This juxtaposition helps keep the characters visually distinct and reinforces their symbolic presence within a natural yet abstract environment.

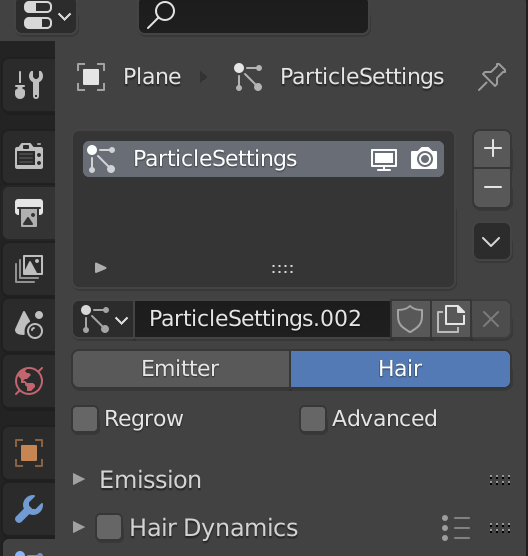
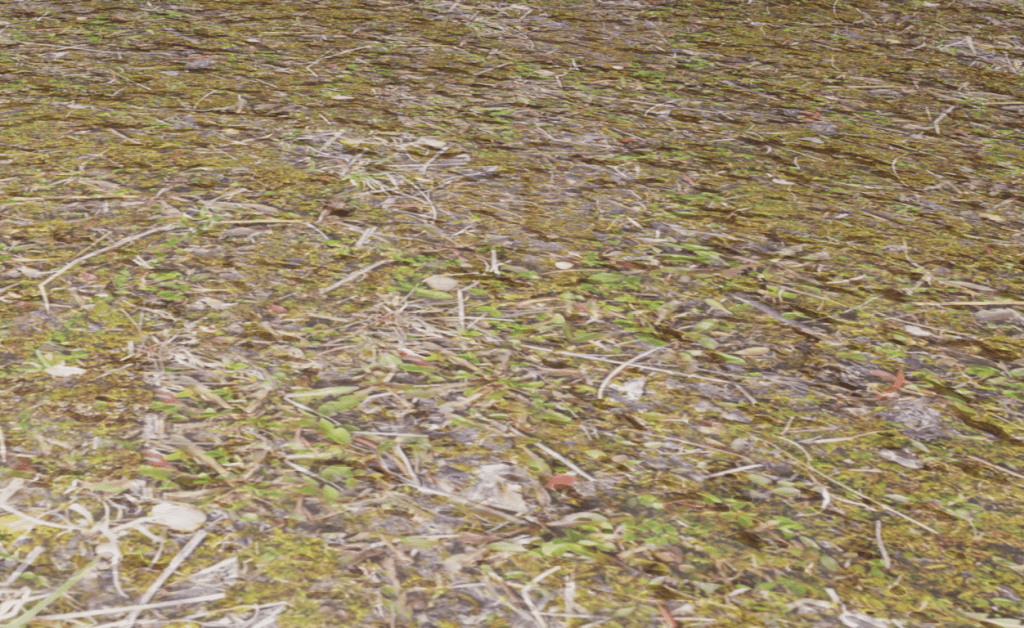
To generate the grass, I applied a Hair Particle System to the ground plane. I configured the particles to grow hair strands, and then replaced the hair with a simplified grass mesh—in this case, a reduced tree-like shape to simulate blades of grass.
Since rendering or placing too much grass can cause performance issues or errors in game engines, I limited the amount of grass to a reasonable density. This allowed for a visually rich environment while still being optimized for potential real-time use.
One of the biggest advantages of using the Hair Particle System was that the grass instances were automatically and evenly distributed across the surface, fully attached to the plane. This eliminated the need for manual placement, saving time and ensuring a consistent coverage across the terrain.


Next, I moved on to weight painting for the grass distribution. Although grass is relatively small in scale compared to the trees, I realized it could still disrupt the visual clarity of the animation by obscuring the man and the lion.
In the weight paint map, the red areas indicate regions where little to no grass has been generated—these are kept clear to ensure that the characters remain visible during the animation. In contrast, the blue areas represent zones of high grass density, forming a natural perimeter around the characters and helping to frame the central scene without interfering with it.
To avoid visual monotony, I made sure the grass instances did not all share the same shape, direction, or size. I introduced randomized scaling, setting the grass height to vary between 30% and 50%, which helped create a more organic and natural look across the terrain.

After completing the texture setup on one sample mesh, I optimized the workflow by using “Group by Material” to apply the appropriate textures to other meshes with the same material properties. This method saved a significant amount of time and ensured consistency across the scene.
Problem – There was no need to make textures in Blender
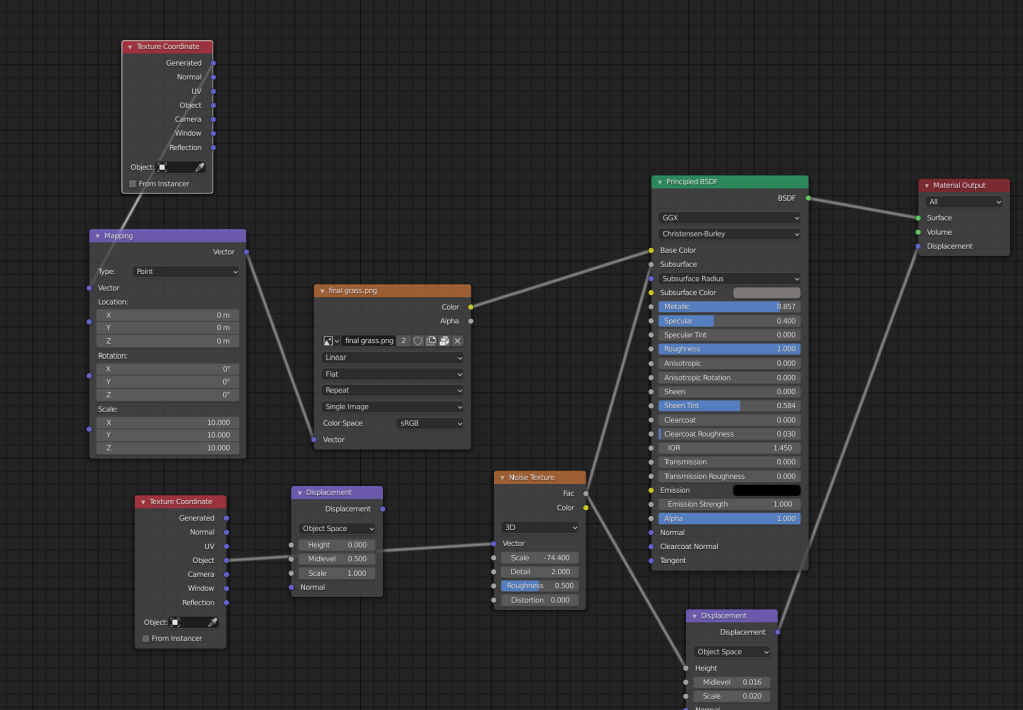
In Blender, textures are created using a node-based system, similar in concept to Unreal Engine’s Blueprint. By building a network of multiple shader nodes and connecting them to the Principled BSDF shader, complex and detailed materials can be rendered within Blender’s environment.
Unfortunately, this node structure does not transfer directly to Unity, which uses a different material and shader system. As a result, textures that appear rich and realistic in Blender cannot be replicated 1:1 in Unity, unless manually rebuilt using Unity’s Shader Graph or custom shaders—something that requires additional time and technical knowledge.
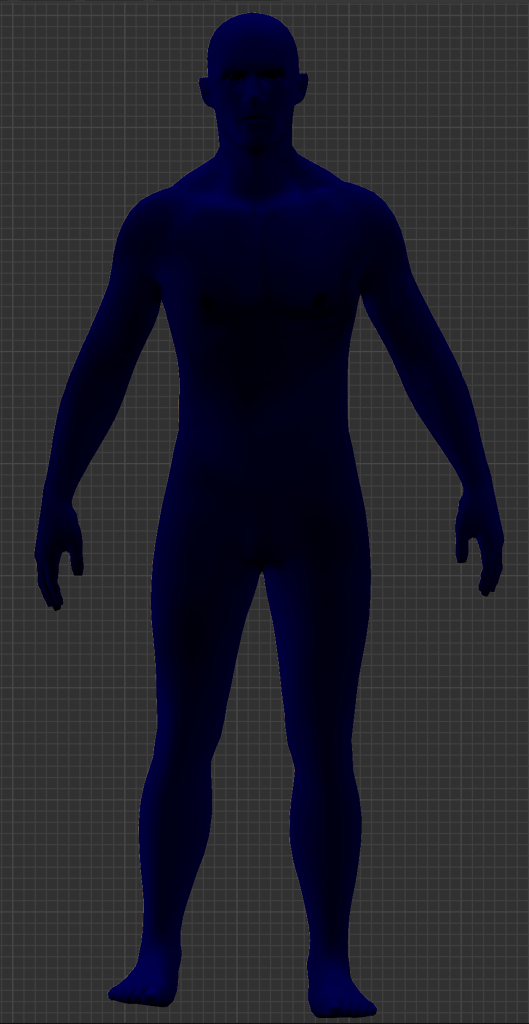
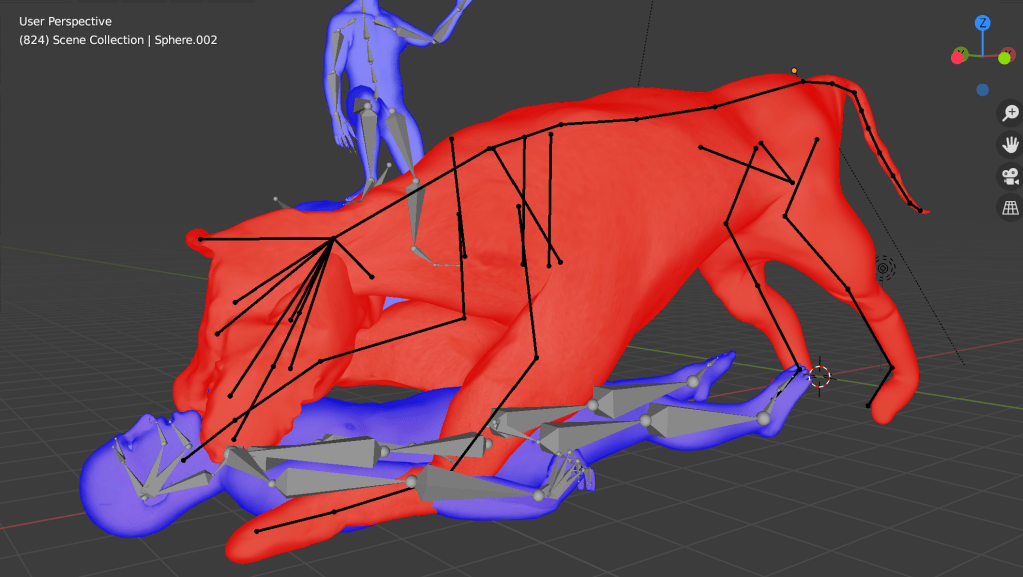
I I changed the background color to help convey the overall mood of the game and to support the narrative perspective shift. From the lion’s point of view, the background is rendered in blue, evoking a sense of calm, dignity, or detachment. In contrast, when the perspective shifts to the man’s point of view, the background transitions to red, suggesting aggression, urgency, or emotional intensity.
This color contrast not only reinforces the psychological state of each character but also allows the player to easily distinguish between the two perspectives. It serves as a visual storytelling device, helping players intuitively understand whose memory or version of the story they are currently experiencing.
changed the background color to infer the overall mood of the game. If the background color, which was blue from the lion’s point of view, turns red from the man’s point of view, I think the player will be able to easily distinguish the two.
First Scene & Last Scene Design
However, the final choice made by the player influences how the central statue in the game transforms, serving as a symbolic resolution to the narrative.
1. Player trusts the man → The game ends with a statue of a man stepping on a lion, representing human dominance and reinforcing the man’s version of events.
2. Player trusts the lion → The game ends with a statue of a lion devouring the man, portraying the lion as the victor and truthful party.
3. Player trusts both → The game ends with a statue of a man and a lion locked in a fierce, equal battle, suggesting both have valid perspectives.
4. Player trusts neither → The statue shows both the man and the lion in fear, staring at each other with suspicion, symbolizing the breakdown of trust and the ambiguity of truth.
This mechanic not only encourages multiple playthroughs but also reinforces the Rashomon effect—the idea that truth is shaped by subjective perception, and absolute clarity may never be achieved.
UNITY or Unreal Engine 4 ?

Unity is well-suited for creating 2D games and low-poly 3D games.
Unreal Engine 4, on the other hand, is more tailored to high-detail, photorealistic 3D game development.
In terms of programming languages, Unity uses C#, while Unreal Engine relies on Blueprints—a visual scripting system that is beginner-friendly but can become complex for large-scale projects.
Ultimately, I chose to use the Unity engine for this project. One key reason is that Unity offers extensive resources and tutorials specifically focused on virtual reality (VR) game development. These tutorials are widely available on platforms like YouTube, making the learning process more accessible.
In particular, my favorite VR game development YouTuber, Valem, creates all of his content using Unity, which has been incredibly helpful and inspiring throughout my development process.
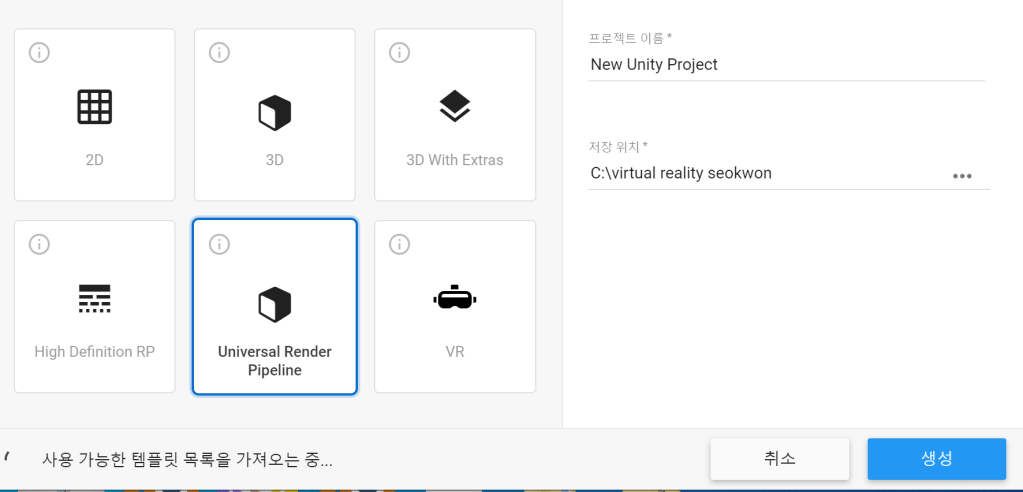
The URP is optimized for efficient and fast rendering, making it ideal for performance-sensitive projects like virtual reality games. In VR, maintaining a high frame rate is critical—any mismatch between perception and physical movement can result in motion sickness. URP helps reduce this risk by ensuring smoother performance.
Interestingly, I also noticed that Unity had recently introduced a dedicated “VR” template, which includes built-in setups like VR cameras and VR hands. Choosing this option could have saved me significant time by automatically generating foundational VR components.
However, at the time, I opted for Universal Render Pipeline because it aligned with what I was familiar with and had seen used in tutorials.
In hindsight, I regret not choosing the “VR” template, as it would have streamlined the initial setup and allowed me to focus more on development rather than configuration.
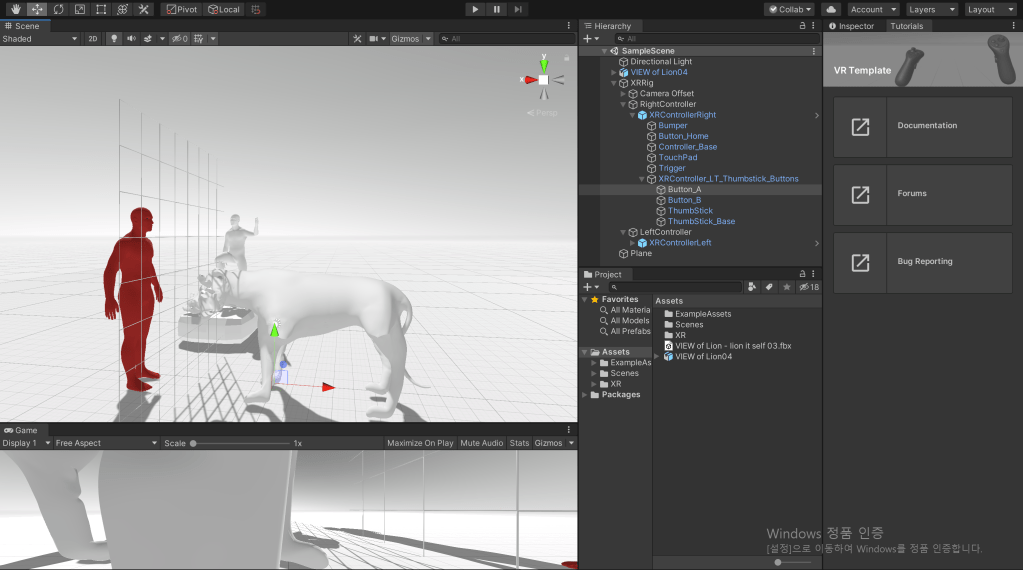
Basic VR settings
I implemented a VR camera and a VR hand for this project. The player’s right hand was configured to emit a red laser beam, allowing interaction with objects in the environment. Using the laser, players can pick up objects, attract distant items like a magnet, or press virtual buttons—a convenient and intuitive form of interaction in VR.
The two images above are from Unit 12, where I first explored VR game development. In that project, the player could actively grab and throw objects, creating a more dynamic experience. However, for this current unit, I chose not to implement object pickup functionality.The gameplay in this project focuses more on narrative exploration rather than physical interactivity, so the player’s role is limited to pressing buttons to advance the story. Therefore, dynamic object manipulation was deemed unnecessary for this experience.Additionally, in the Unit 12 prototype, the player’s hand was represented as a simple cube. For this project, I decided not to implement a visible hand model, as it was not essential to the minimalistic interaction style of the game.VR hands settings – Problem
using System.Collections;
using System.Collections.Generic;
using UnityEngine;
using UnityEngine.XR;

public class HandPresence : MonoBehaviour
{
    public List<GameObject> controllerPrefabs;
    private InputDevice targetDevice;
    // Start is called before the first frame update
    void Start()
    {
        List<InputDevice> devices = new List<InputDevice>();
        InputDeviceCharacteristics rightControllerCharacteristics = InputDeviceCharacteristics.Right | InputDeviceCharacteristics.Controller;
        InputDevices.GetDevicesWithCharacteristics(rightControllerCharacteristics, devices);

        foreach (var item in devices)
        {
            Debug.Log(item.name + item.characteristics);

        }
        if (devices.Count > 0)
        {
            targetDevice = devices[0];
        }

    }

    // Update is called once per frame
    void Update()
    {

        if (targetDevice.TryGetFeatureValue(CommonUsages.primaryButton, out bool primaryButtonValue)  && primaryButtonValue)
            Debug.Log("Pressing Primary Button");


        if (targetDevice.TryGetFeatureValue(CommonUsages.trigger, out float triggerValue) && triggerValue > 0.1f)
            Debug.Log("Trigger pressed" + triggerValue);


        if (targetDevice.TryGetFeatureValue(CommonUsages.primary2DAxis, out Vector2 primary2DAxisValue) && primary2DAxisValue != Vector2.zero)
            Debug.Log("Primary Touchpad" + primary2DAxisValue);

    }
}
The script shown above was created by Valem, a well-known VR development YouTuber, and was used to implement VR hand functionality. Since I’m still learning how to program, I relied on his code as a reference—typing it out manually to better understand how it works.
Initially, my goal was to enable joystick-based gaze control, allowing the player to change their view by moving the joystick on the VR controller. I also wanted to create a VR hand capable of complex animations, such as clenching into a fist or pointing with a finger to enhance realism and immersion.
However, I encountered persistent errors during implementation, and as a result, I had to abandon the idea of creating a fully articulated VR hand. The complexity of the hand rigging and animation exceeded the current scope and my technical capacity within the available time.
VR hand I’ve done so far
However, the issue appeared to stem from targeting the VR hand mesh. For some unknown reason, Unity was able to read inputs from the right-hand controller, but not from the left-hand controller. While I believe this could have been resolved with more time and troubleshooting, I ultimately decided not to pursue it further.
The reason was that complex hand animations were not central to the narrative theme of “Rashomon.” Since the story focuses on subjective perspectives and conflicting memories, I concluded that implementing fully articulated VR hands would not significantly enhance the core experience, and thus chose to prioritize narrative development over visual complexity..
The script where the problem occurred
using System.Collections;
using System.Collections.Generic;
using UnityEngine;
using UnityEngine.XR;

public class HandPresence : MonoBehaviour
{
    public bool showController = false;
    public InputDeviceCharacteristics controllerCharacteristics;
    public List<GameObject> controllerPrefabs;
    public GameObject handModelPrefab;


    private InputDevice targetDevice;
    private GameObject spawnedController;
    private GameObject spawnedHandModel;
    // Start is called before the first frame update
    void Start()
    {
        List<InputDevice> devices = new List<InputDevice>();

        InputDevices.GetDevicesWithCharacteristics(controllerCharacteristics, devices);

        foreach (var item in devices)
        {
            Debug.Log(item.name + item.characteristics);

        }
        if (devices.Count > 0)
        {
            targetDevice = devices[0];
            GameObject prefab = controllerPrefabs.Find(controller => controller.name == targetDevice.name);
            {
               spawnedController = Instantiate(prefab, transform);
            }
            spawnedHandModel = Instantiate(handModelPrefab, transform);
        }

    }

    // Update is called once per frame
    void Update()
    {

        if (showController)
        {
            spawnedHandModel.SetActive(false);
            spawnedController.SetActive(true);
        }
        else
        {

            spawnedHandModel.SetActive(true);
            spawnedController.SetActive(false);
        }
    }
}
Haptic Events
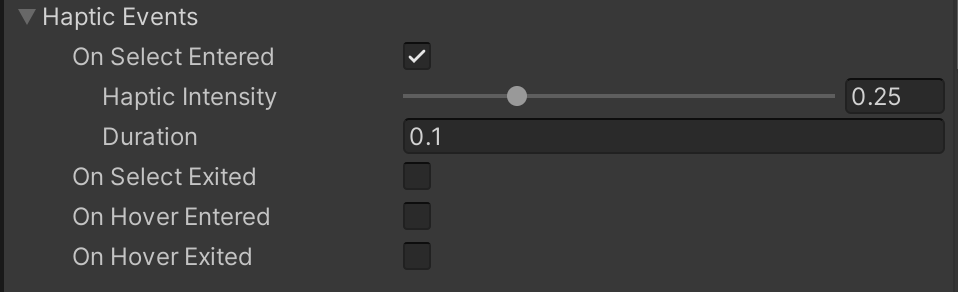
In my project, I configured the player’s right hand to generate a short, subtle vibration each time the player moves using the right-hand teleport ray. As shown in the image above, I was able to customize both the intensity and duration of the haptic feedback.
The more a person’s senses are tricked, the more likely they are to accept the virtual world as real. That’s why virtual reality continues to explore ways to deceive sight, sound, touch, and even smell—the more immersive the illusion, the stronger the player’s belief in the virtual environment.
While playing Half-Life: Alyx, I realized that even simple vibration-based haptics can significantly enhance immersion. Despite the limited tactile range, the feedback felt convincing and emotionally impactful, proving that subtle sensory cues can be incredibly effective in virtual storytelling.
Blender – texture missing Problem, Solution
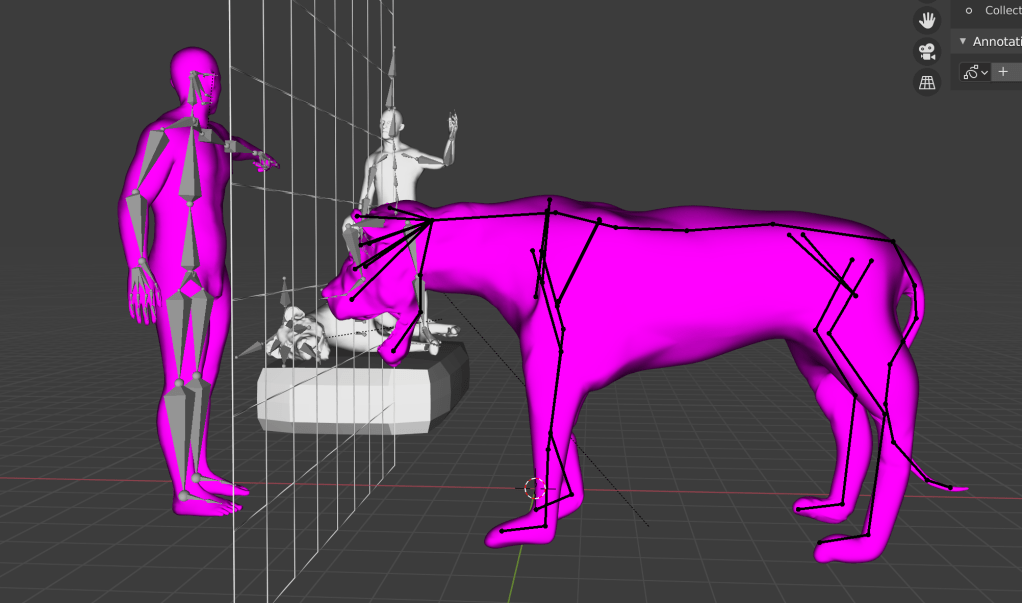
However, this transition introduced a new challenge. I had to transfer Blender project files from macOS to Windows using a removable USB drive, but during this process, the mesh textures were lost. Blender on Windows was unable to locate the texture paths originally defined on the Mac, resulting in missing textures. As a result, Blender displayed the affected meshes in pink, which indicates texture-loading errors.
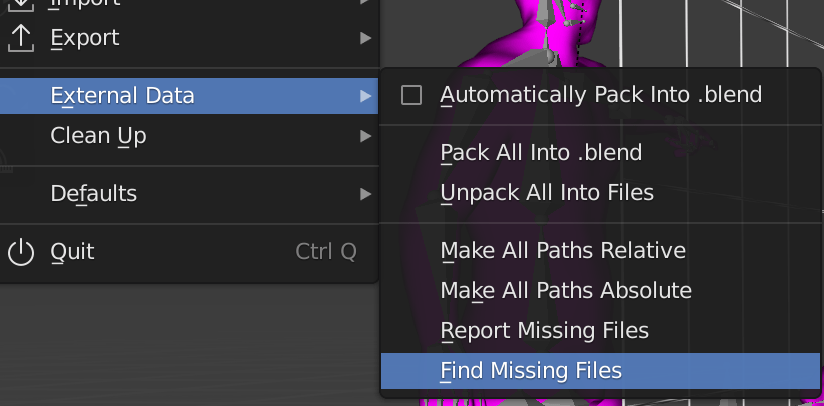
This was the same issue I encountered in Unit 12, so I was somewhat prepared. To fix it, I manually saved all the texture files used in the Mac version of Blender and then transferred them separately to the Windows machine. Once in Blender on Windows, I navigated to:
File → External Data → Find Missing Files,
and re-linked the project to the correct texture directory.
This process successfully restored the textures and allowed me to continue development on Windows without further visual errors.
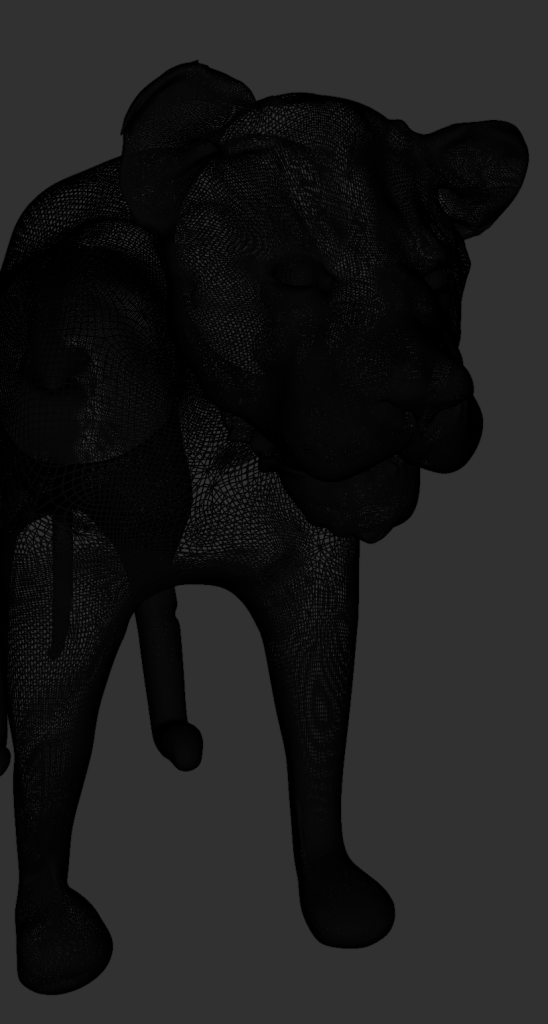
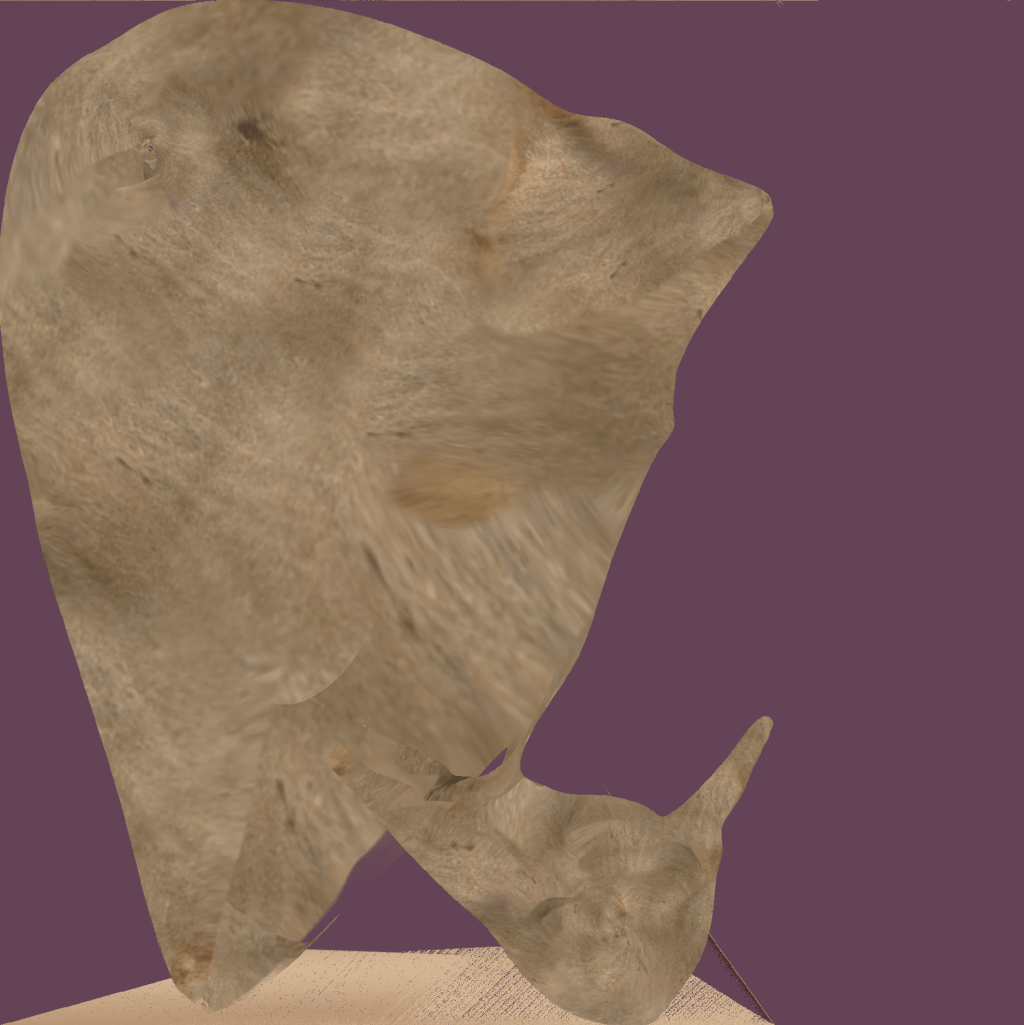
Problem – Transparency Lion
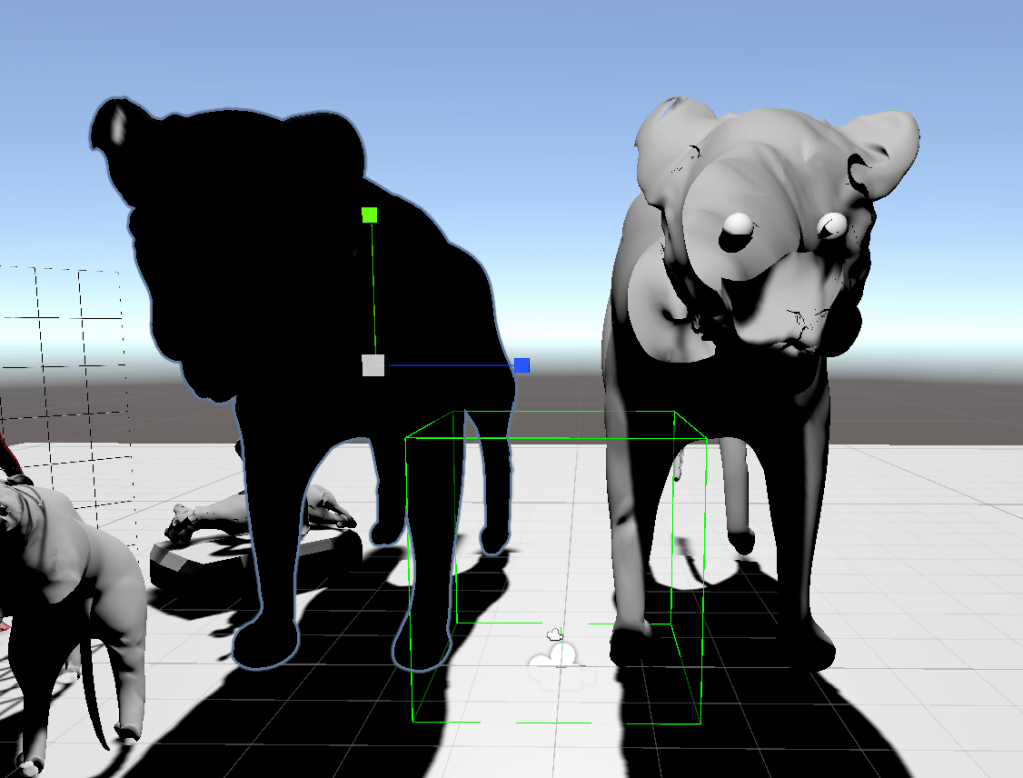
In my experience, when a mesh appears visually incorrect in Blender or Unity, the issue can often be fixed by using Edit → Recalculate Normals (Outside) in Blender. However, in this case, after recalculating the normals, the lion mesh turned completely black, as shown in the image on the left. At that point, the mesh lost all visible detail, and it was no longer recognizable as a lion.
Importantly, this problem only occurred when I exported the animated lion mesh from Blender to Unity. The static mesh—without any animation or rigging—was imported without any issues.
In Unity, I checked the model through the 3D object preview tab, and everything appeared normal there. That means the issue likely lies in the animation export settings or mesh deformations caused by rigging, rather than the mesh geometry itself.
No Solution
Game Animation
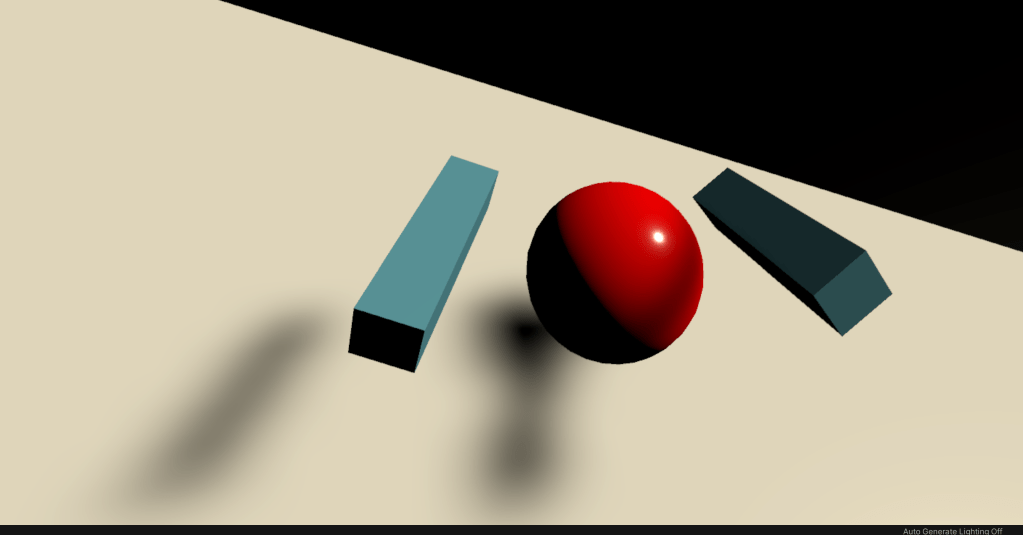
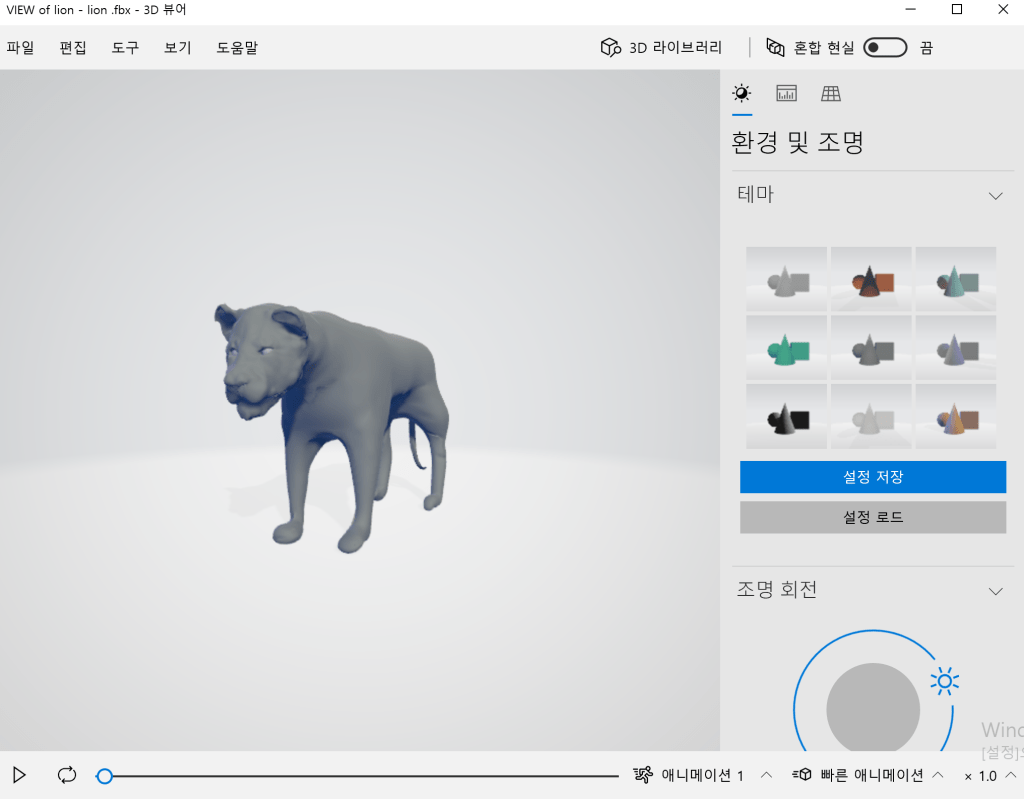
Although the textures are missing and the background is still incomplete, I was very satisfied with the result—both the main and supporting characters were rendered clearly in the VR space, somewhat reminiscent of the visual clarity found in the game Superhot.
Based on feedback from Ali, who emphasized the importance of strong lighting and a stylized background to enhance immersion, I plan to set the background to black. This will help make the characters feel more three-dimensional and visually striking, drawing more focus to their expressions and interactions.
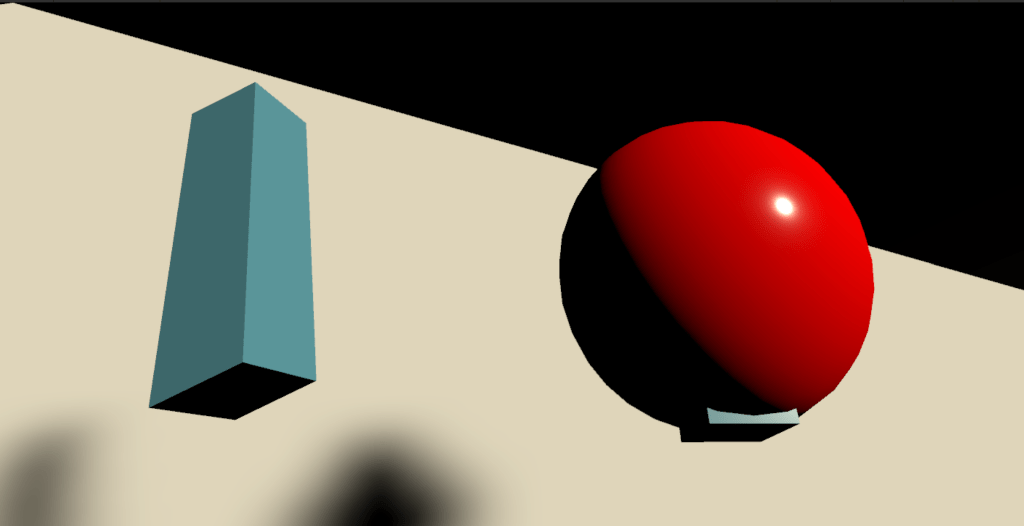
Lighting Problem

However, during this process, the black skybox background was unintentionally tinted gray, likely due to the blending effects of the smoke and lighting settings.
Additionally, I noticed that Unity’s real-time rendering capabilities were visibly lower in quality compared to Blender’s viewport or render engine. As a result, the overall mesh textures and lighting fidelity suffered a noticeable downgrade, especially in finer details.
Script for Voice Over
Initially, I envisioned a more interactive, dialogue-driven experience. However, the length of the animations created in Blender turned out to be relatively short, making them unsuitable for long or complex conversations.
As a workaround, I changed the concept so that the lion does not speak, but can understand human language. This helped simplify the structure while keeping the dual-perspective narrative intact.
Still, I felt limited in expressing the theme of memory distortion, since the man’s dialogue from his own perspective and the man’s dialogue as recalled by the lion ended up being almost identical. This lack of divergence made it difficult to fully explore the subjectivity and unreliability of memory, which was a central theme inspired by Rashomon.
Music & Voice Over
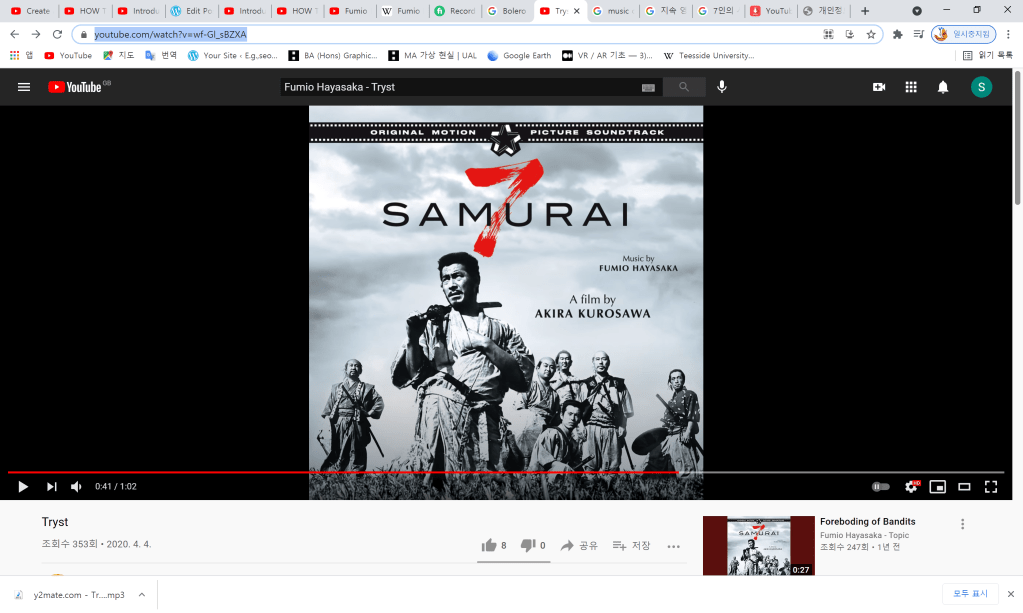
More importantly, its emotional tone and subtle tension complemented the psychological depth of the story and enhanced the overall sense of mystery and ambiguity, aligning well with the game’s Rashomon-inspired themes.
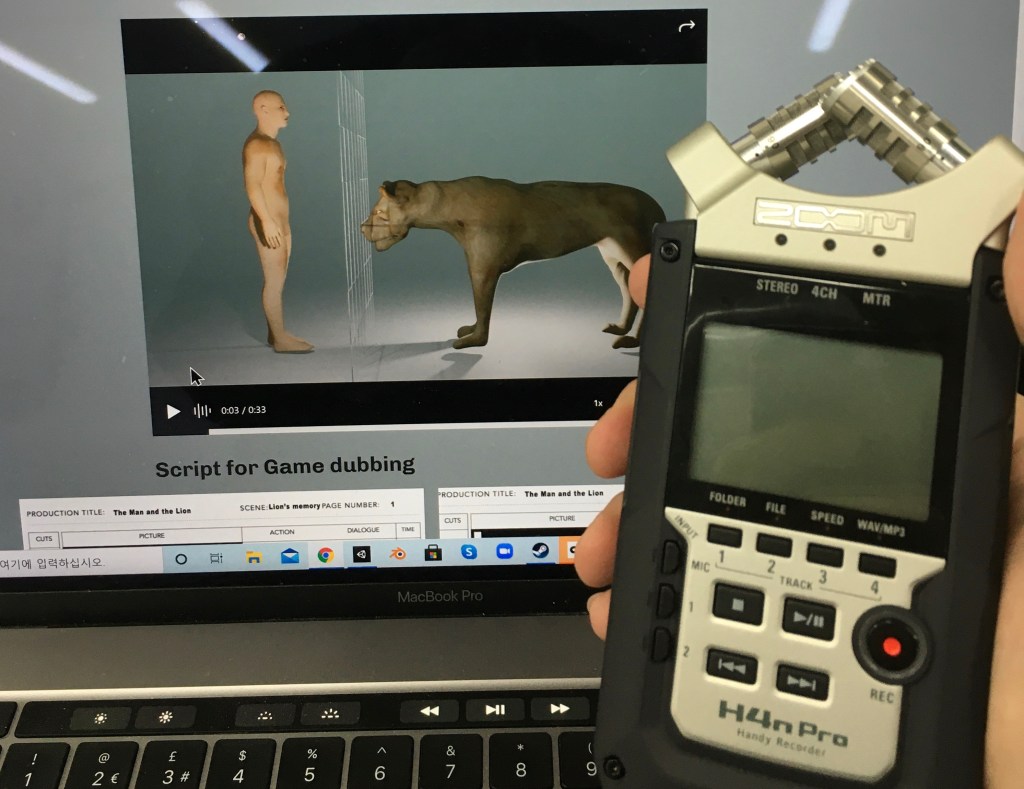
Each line in the script was recorded at least three times, using different tones and emotional deliveries to find the most fitting expression. In addition, I recorded sound effects such as the man’s scream during the lion attack and the sound of the man taking his own life, to heighten the emotional impact.
One major advantage of using the Zoom recorder was its ability to capture stereo audio, recording the left and right channels separately. This allowed for the creation of a more immersive and three-dimensional sound experience, which I believe added depth and realism to the overall gameplay.
Voice Over, Sound editing
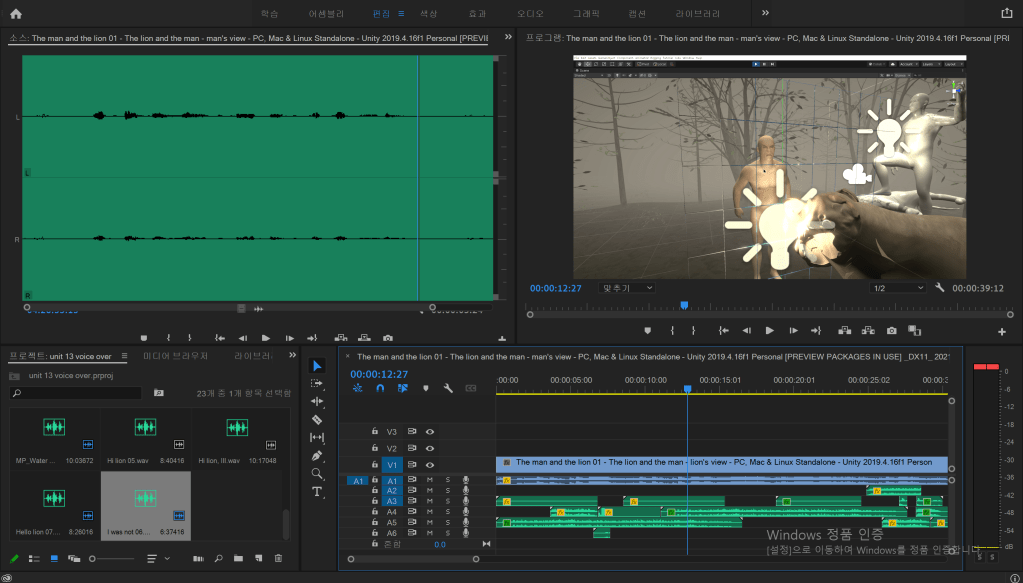
After editing, the sound effects were converted into MP3 format and imported into the Unity game engine. Syncing the audio with the characters’ actions—especially lip movement—proved to be challenging and unpredictable.
Ms. Ali’s narration was implemented using a 2D sound effect, allowing the voice to be heard at a consistent volume regardless of the player’s position in the game space. In contrast, a 3D spatial sound was applied to the dialogue between the man and the lion, so that the volume dynamically decreased as the player moved further away from the characters—creating a more immersive environment.
Reflection: Although this was my first experience integrating sound into a game engine, I’m quite satisfied with the results, despite the lack of proper lip-sync implementation. For future projects, I’ve realized the importance of allocating more time for voice-over recording and sound editing to improve both quality and immersion.
Scene change Programming
using System.Collections;
using System.Collections.Generic;
using UnityEngine;
using UnityEngine.SceneManagement;


public class SceneSwitch : MonoBehaviour
{
    // Start is called before the first frame update


    void OnTriggerEnter(Collider other)
    {
        SceneManager.LoadScene(1);


    }
}

Regrettable point: The transition is currently one-way only—the player cannot return to the man’s perspective after switching to the lion’s. Although I attempted to implement a main menu using the same scripting method, an error occurred, preventing the first scene from loading properly.
Additionally, the interaction method may feel unintuitive. Rather than using the VR controller’s input (e.g. button press or raycast selection), the player must physically navigate to the location where the interaction cube is placed. As a result, this has caused confusion among players, as observed when my classmates tested the game—many found it difficult to locate and trigger the scene switch.
Animation inside Unity
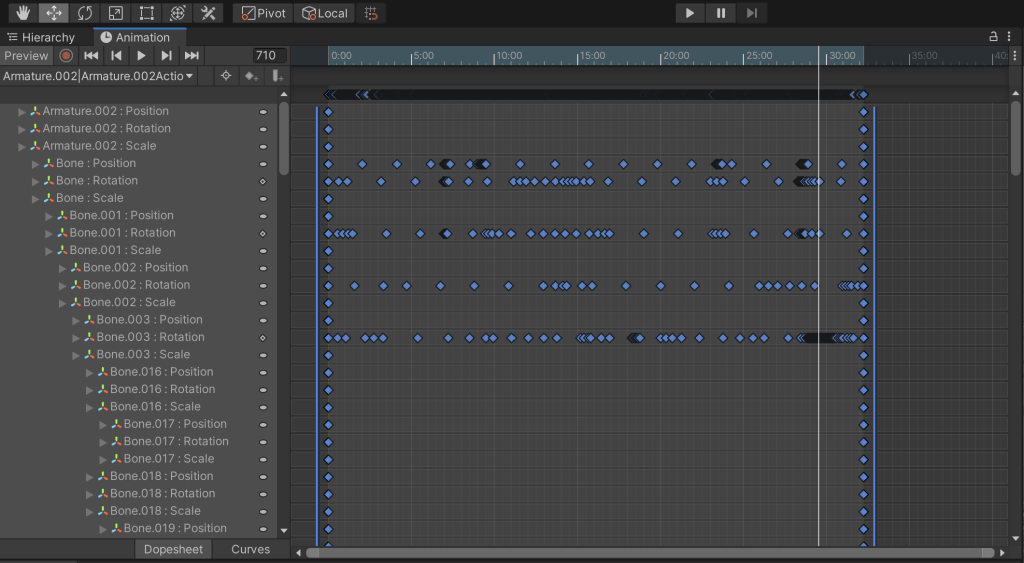
Thanks to this feature, I was able to edit and fine-tune the animations of the lion and the man independently, allowing them to perform actions separately and more precisely within the game environment.
Blood Particle system
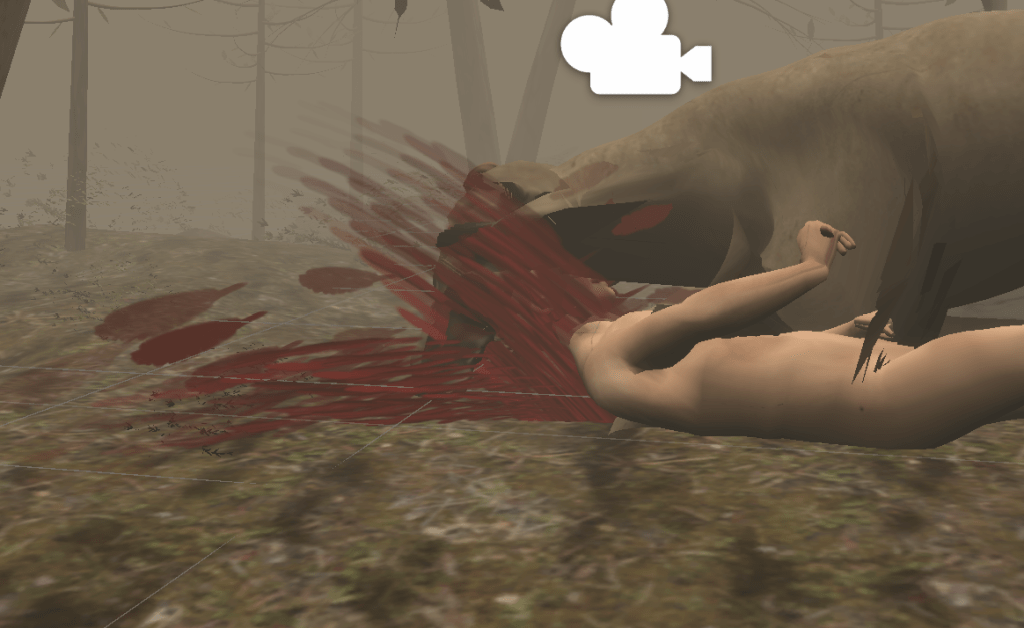
Reflection: I’m very satisfied with how the blood effect turned out—it added a much more grotesque and dynamic atmosphere to the scene, enhancing the overall intensity and visual impact of the moment.
Final Scene
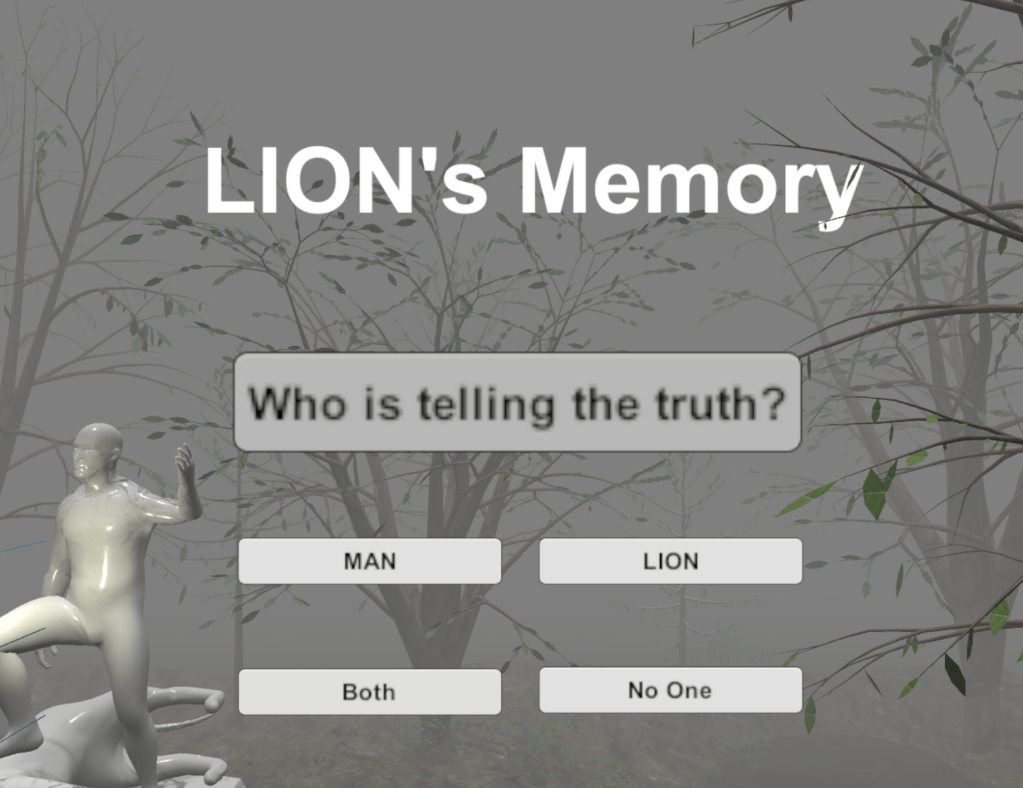
I designed a final UI scene asking the player “Who speaks the truth?”, which serves as the ultimate goal of the game. As the player chooses to believe either the lion’s or the man’s version of the story, one of their claims becomes the “truth.”
This decision is meaningful because the player has experienced both perspectives—not just as a passive observer, but as someone who has seen the same event from multiple, conflicting viewpoints. Ultimately, the player can choose to trust one character, lie for personal satisfaction, or even reject the idea that any truth exists at all.In this game, anyone can lie—the lion, the man, or even the player. The concept of truth becomes subjective, and no outcome is inherently right or wrong. Whatever the result, the responsibility lies with the player. That ambiguity is exactly what the game is meant to explore.One disappointment: Even if the player points to the one who finally told the truth, nothing happens because I haven’t produce a corresponding result. Perhaps the essence of this game is that nothing happens.Final game playing
Final Evaluation
I applied to a university department with a focus on VR and Game Design. As I considered which of the two fields to pursue as a career, I decided to create my own VR game as the final project—a way to explore both my aptitude and gain insight into the current state of the industry.
Through Unit 13, I ultimately chose to follow the path of Game Design. This unit was especially important to me, as it allowed me to experience the entire development pipeline: from character design and narrative development, to programming, 3D modeling, and animation. The process helped solidify my direction and gave me the confidence to move forward with my decision.
This project was also meaningful in that it allowed me to deepen my understanding of C# programming in a more professional context. It was my third attempt at developing a Unity game using C#, and compared to my previous projects, I was able to learn more advanced techniques and useful tips.
Through this experience, I also developed an interest in other computer languages, such as Blueprint, Java, and C++, particularly within Unreal Engine 4. What began in Unit 1 as an interest in fine art has gradually evolved into a genuine fascination with the engineering side of creative technology, such as game programming.
The greatest benefit of this transition is that it has broadened my artistic perspective—I now see creativity not only in traditional mediums, but also in systems, code, and interactivity.
However, even while engaging in technical research, I have never neglected my artistic and humanities-based inquiry. After reading Ryūnosuke Akutagawa’s collection of short stories, I discovered that In a Grove and Rashomon were the key literary works that deeply influenced Akira Kurosawa’s film Rashomon.
For a long time, I have reflected on how to visually reinterpret the Rashomon effect, particularly by connecting it to memory distortion and psychological transience. My reinterpretation is this: each character recalls or testifies to events in a way that benefits themselves, and in doing so, the visual elements of their memory become distorted—emphasizing what they wish to highlight, whether consciously or unconsciously.
This conceptual approach is why I investigated fashion and visual distortion in 20th-century European art and culture, seeking to understand how exaggeration, deformation, and stylization can serve as tools for conveying subjective truth.
From this point onward, I would like to describe my weekly timetable, blogging process, and the preparation for my final presentation.
In the first week, while I was still in Korea, I focused on developing initial ideas for the project. During this time, I became particularly interested in the theme of “laughter,” which I realized could carry many different meanings—ranging from joy to irony, satire, or even despair.
While visiting an exhibition of Chinese artist Yue Minjun in Seoul, I was struck by his signature laughing faces—exaggerated, distorted, and visually intense, often carrying sharp humorous and political satire toward the Chinese government. His work deeply intrigued me and led me to explore the broader concept of humor as a critical lens.
This interest soon led me to revisit Aesop’s Fables, which also deliver moral critique through humor, and I explored Marc Chagall’s illustrations of the fables for additional visual inspiration.
At the same time, I watched Akira Kurosawa’s film Rashomon and became fascinated by how subjective truth and perspective shape storytelling. That’s when I had the idea to merge the Rashomon effect with the concept of humor and satire—to explore how memory, distortion, and laughter intersect in both art and narrative.
In the second and third weeks, I continued exploring related texts and became deeply engaged with the works of Akutagawa Ryunosuke. His narratives, particularly In a Grove, resonated strongly with the theme of subjective truth, which is central to Rashomon. During this time, I also discovered the fable “The Man and the Lion”—a story that, like Rashomon, raises questions about perspective and conflicting testimonies. I saw a strong conceptual link between Akutagawa’s themes and Aesop’s Fables, and this connection laid the foundation for my narrative.
In the fourth week, I began sketching the 2D character concepts and studied lion anatomy in detail, which later helped me with accurate sculpting in Blender. I also started sculpting the characters in 3D, focusing on realistic muscle structures and proportions.
In the fifth and sixth weeks, I focused on texturing and animating the characters. I applied UV mapping and texture painting, and implemented basic rigging and animation to prepare the assets for game integration.
Starting from the seventh week, I began working in Unity in earnest. I actively studied game development through online resources, tutorials, and YouTube channels, particularly those related to VR game creation. This was also the point when my interest in game design grew significantly.
During weeks eight and nine, I successfully imported Blender animations into Unity, working on refining the scenes and syncing animations with the gameplay experience.
In the tenth week, I implemented Fumio Hayasaka’s piece “Tryst” into the game engine, which enhanced the overall mood of the game. I also programmed a portal system that allowed players to switch perspectives—from the man’s point of view to the lion’s.
Finally, in the eleventh week, I added voice-over recordings and implemented haptic feedback, allowing players to experience simulated touch through VR controllers. I also completed the game’s background design, adjusted lighting, and finalized the atmosphere to reflect the emotional tone of the story.
It was somewhat regrettable that I couldn’t update my blog with more detailed documentation, as I prioritized the development of the game itself. In particular, there were numerous technical trials and errors when exporting Blender files to the Unity engine. However, I often focused on solving the problems rather than recording them. Once resolved, the issues would often be forgotten before I had a chance to reflect or write about them. Despite this, I still did my best to document the process on my blog to preserve as much of the experience as possible.
Producing a VR game turned out to be much more engineering-focused than traditional artistic disciplines. Consequently, I realized that explaining every technical detail was not always necessary or effective for communication. To address this, I tried to embed personal reflection within technical descriptions. For example, I documented each problem I faced, shared my thought process, and described how I approached finding a solution. This gave the blog a more subjective and narrative-driven perspective.
For my final presentation, I demonstrated the project by wearing a VR headset and playing the game live. It was an experimental and ambitious format, but unfortunately, unexpected technical issues arose—such as device malfunctions and screen-sharing errors—that compromised the presentation’s effectiveness.
From this experience, I learned that when presenting real-time media, such as games, it is often more effective to prepare a pre-recorded gameplay video. This ensures stability and allows the audience to fully understand the content without being distracted by technical interruptions. I also realized that using overly technical terminology during a presentation can make it difficult for the audience to follow. Clear and accessible language is crucial when communicating with a diverse audience.
Presentation

For the final presentation, I chose to demonstrate the game by playing it live while wearing a VR headset. It was an experimental and unconventional format, intended to immerse the audience in the experience. However, unforeseen technical issues—such as device malfunctions and screen-sharing errors—arose during the presentation. As a result, the delivery was hindered, and I wouldn’t consider it a fully effective presentation.
One key takeaway from this experience is that when presenting real-time media like games, it is often more reliable and professional to prepare a pre-recorded gameplay video. This approach ensures stability and avoids potential technical disruptions.Another challenge I encountered was the use of overly technical language. At times, it made it difficult for the audience—especially those unfamiliar with game development—to follow my explanations. Moving forward, I’ve learned the importance of adjusting technical communication to the knowledge level of the audience to ensure clarity and engagement.Previous peer assessment for Pat
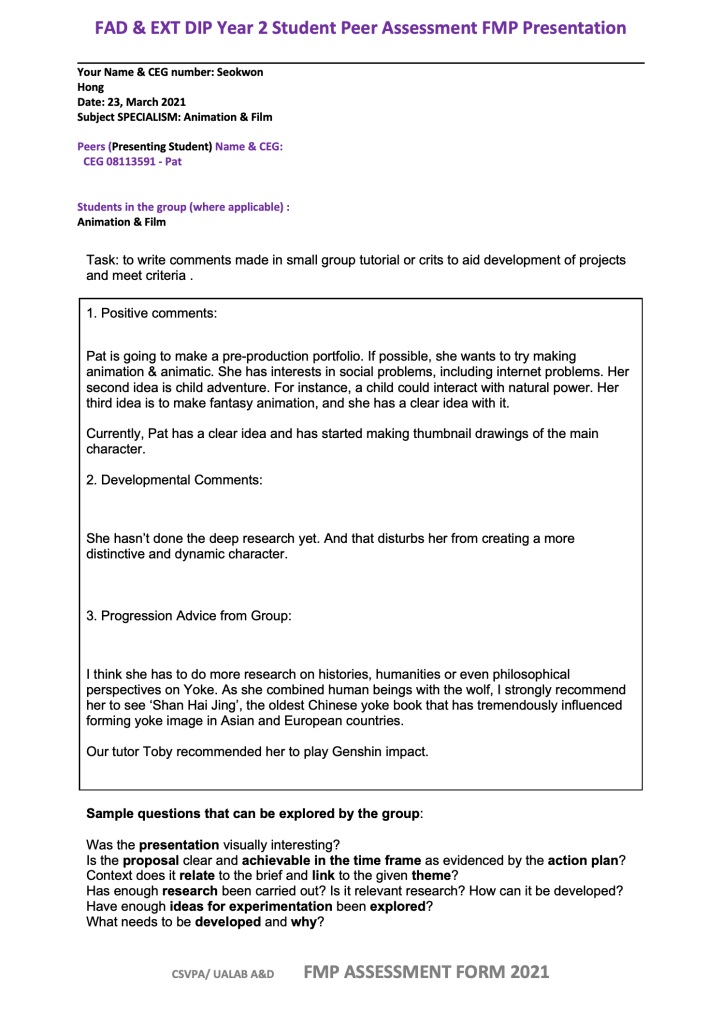
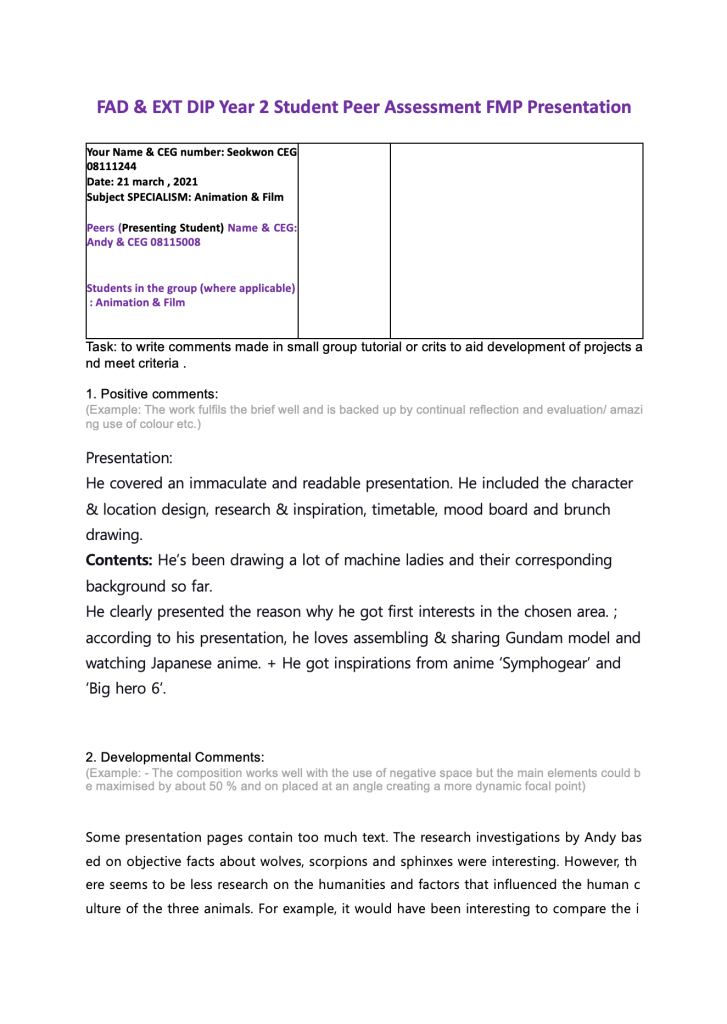
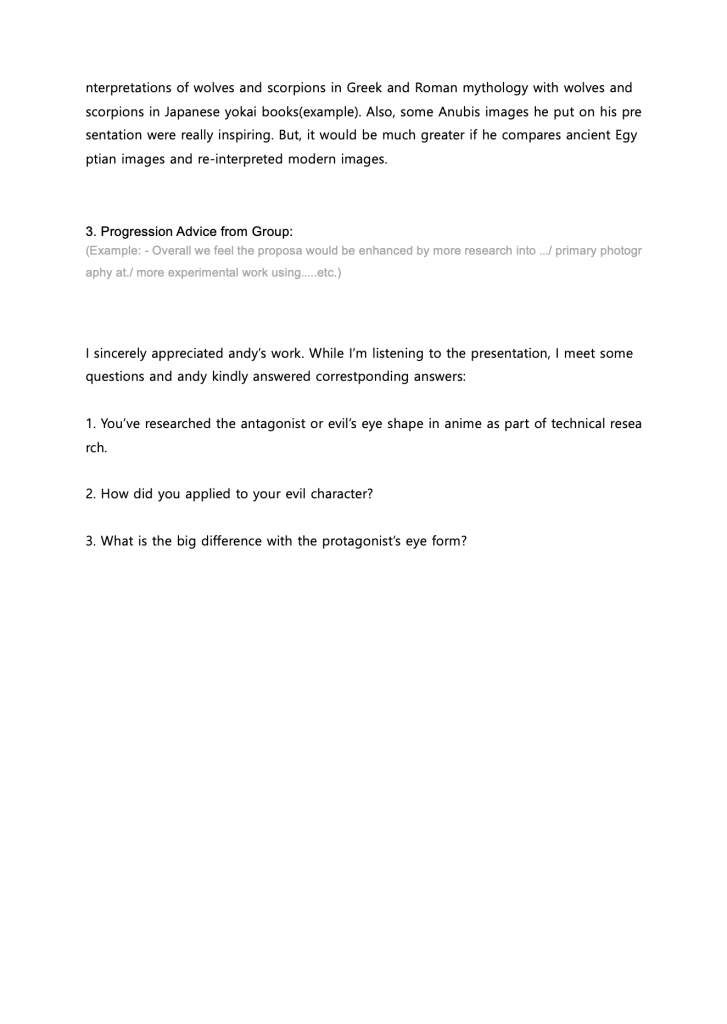
Peer assessment for Andy
Peer assessment for Evan